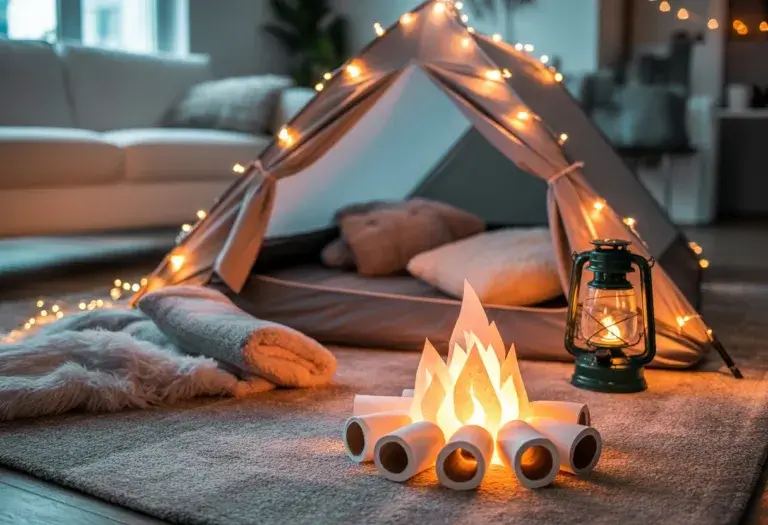
How to Insulate a Tent for Winter Camping: Stay Cozy in the Cold
Winter camping sounds incredible – until that first icy night hits and your tent feels more like a walk-in freezer. I’ve been there, shivering in my sleeping bag, questioning my life choices.
The good news? Insulating your tent for winter camping isn’t rocket science. It just takes a handful of strategies: pick the right tent, add insulation layers to the floor and walls, use tarps above and below, and manage ventilation to dodge condensation.
I used to think you just had to tough out the cold if you wanted to camp in winter. Turns out, a few simple insulation tricks can actually keep you warm and comfortable, even when it’s way below freezing.
The difference between a miserable night and a cozy one? It’s usually just a matter of prepping smart and not skimping on the basics.
So, here’s what I’ve learned about keeping a tent warm out in the cold. From scoping out the best campsite to figuring out how to manage moisture in your tent, these tips have made my winter trips genuinely enjoyable instead of just survivable.
Key Takeaways
- Proper tent insulation keeps heat from escaping through the ground, walls, and roof, but you still need airflow to control moisture.
- Choosing a sheltered campsite and picking the right tent size makes insulation work way better.
- Layering ground tarps, thermal blankets, and solid sleeping gear gives you the warmest setup.
Why Insulating Your Tent Matters
When you insulate a tent for winter camping, you’re basically building a little shield against the cold that tries to steal your body heat. Knowing how you lose warmth – and what happens when you can’t stay warm – makes all the difference when you’re out there in freezing temps.
How Heat Escapes a Tent
I learned the hard way that heat slips out of a tent in three main ways. Once I figured these out, my winter camping experience totally changed.
Conduction is when your body touches something cold. The ground is the biggest offender. If I lie straight on the tent floor with no insulation, the cold earth just sucks the warmth right out of me. It’s basically like sleeping on a giant ice pack.
Convection happens when cold air moves in and pushes warm air out. Wind hitting the tent walls pulls away that thin layer of warmth. Inside, drafts from zippers or vents do the same thing.
Radiation is how my body naturally gives off heat into the space around me. If my tent isn’t insulated, that heat just radiates right through the walls and disappears into the night.
Winter campers deal with all three at once. Ground insulation and solid barriers are crucial for keeping heat in because they block those escape routes.
Health Risks of Cold Weather Camping
The risks of bad insulation go way beyond just feeling miserable. I take this stuff seriously every time I head out.
Hypothermia kicks in when your core temperature drops below 95°F. Early signs? Uncontrollable shivering, confusion, and clumsy hands. If you can’t warm up, things get dangerous fast – shivering stops, and your brain just doesn’t work right.
Frostbite goes after any exposed skin and extremities when it’s freezing. Fingers, toes, nose, ears – they’re all targets. I’ve seen people deal with frostbitten toes just because they skimped on sleeping pad insulation.
Sleep deprivation is real if you’re too cold to rest. Bad sleep messes with your judgment and coordination, and it’s the last thing you want if something goes wrong. Good tent insulation lets your body actually recover overnight.
On top of that, cold stress can weaken your immune system and make it harder to breathe if you’re sucking in freezing air all night.
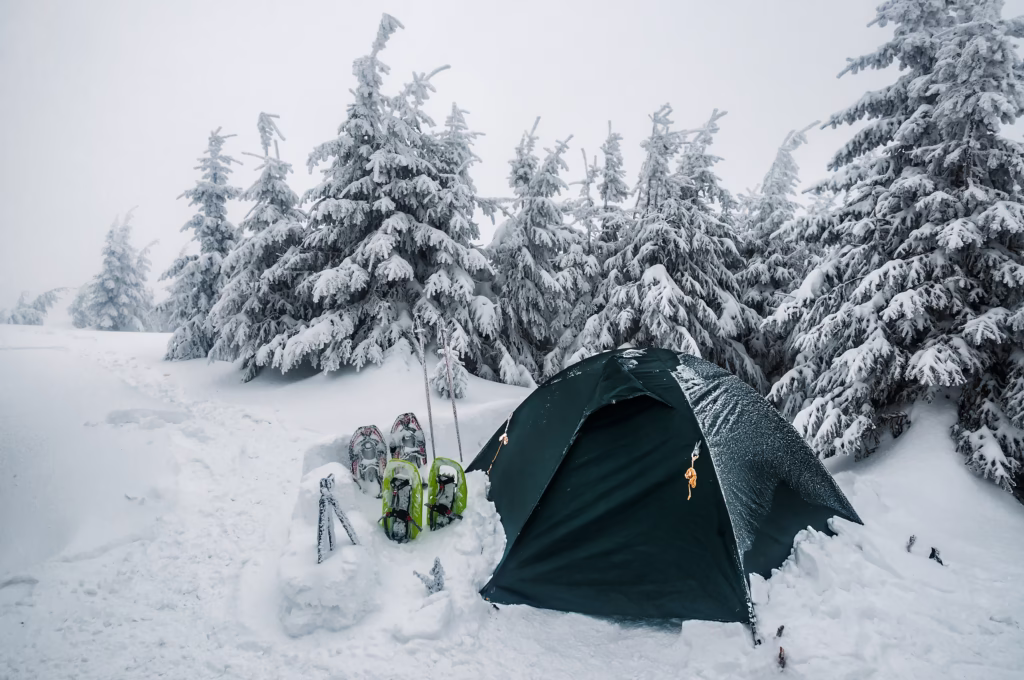
Choosing the Right Winter Tent
Before I even think about insulation or heat, I start with the right tent. The tent you pick sets the stage for everything else, and getting it right from the start makes staying warm so much easier.
Four-Season vs. Three-Season Tents
When I shop for a winter tent, I pay close attention to the difference between three-season and four-season tents. Three-season tents are made for spring, summer, and fall. They’ve got lots of mesh for airflow and lighter fabrics, but they just can’t handle heavy snow or brutal winter winds.
Four-season tents are built for winter. They use stronger poles that won’t collapse under snow, fewer mesh panels, and heavier fabrics to block wind. The rainfly usually goes almost to the ground, which helps keep snow and wind out.
Another thing: four-season tents have steeper walls, so snow slides off instead of piling up. Sure, they cost more, but if you’re camping in real cold, they’re totally worth it.
Tent Size and Shape
Here’s something that caught me off guard – smaller tents actually keep you warmer. Compact spaces heat up faster and hold onto warmth better than big, roomy tents. I pick a tent that fits me and my gear without much extra space.
Shape matters, too. Dome tents handle wind and snow way better than cabin-style ones. Geodesic domes, with all those crisscrossing poles, are the most stable when things get rough. I look for low-profile tents that don’t catch as much wind.
When I’m choosing, I always ask myself: Do I really need that extra space? Usually, it just means more cold air to heat up.
Double-Wall Tent Benefits
A double-wall tent has two layers: the inner tent and a separate rainfly. That gap between layers acts like insulation. I’ve noticed my tent stays noticeably warmer with this setup.
The biggest perk for winter camping is how well double-wall tents handle condensation. When I breathe at night, moisture hits the cold wall and condenses. With a double-wall, most of the moisture ends up on the rainfly, not dripping on my stuff. The air gap lets some ventilation happen without letting the cold in.
Single-wall tents are lighter and quick to set up, but in cold weather, condensation gets out of control. I’ve woken up to frost on the inside, which just melts and soaks everything.
Insulating the Tent Floor
The ground steals more heat from you than anything else when you’re winter camping. A solid tent floor setup with the right insulation keeps the cold from creeping up through the bottom.
Using a Tent Footprint or Ground Tarp
I always throw down a ground tarp before pitching my tent. This simple layer goes right on the snow or frozen ground and does two big jobs.
First, it protects my tent floor from sharp rocks or sticks. Second – and way more important – it blocks ground moisture. A damp tent floor will chill you no matter how much insulation you stack on top.
Sometimes I use a tent footprint made for my tent, sometimes just a plastic tarp cut a little smaller than the tent base. The key is making sure it doesn’t stick out past the tent edges, or else rain and melting snow will pool up and sneak under your tent.
Adding Ground Insulation Layers
Once my tent’s up, I build my floor insulation from the ground up. I start with a closed-cell foam pad as my base. These pads trap air and stop heat from leaking into the ground.
Closed-cell foam pads usually have an R-value between 1.5 and 3.5. I cover the whole tent floor with them, no gaps.
Next, I lay down my regular sleeping pad. Want even more warmth? Slip a Mylar emergency blanket between your sleeping pad and sleeping bag. The shiny side reflects heat back up at you. I’ve found it works better if there’s a small air gap above the pad, not underneath.
Sometimes I’ll toss an old fleece blanket or some foam tiles on top for extra comfort. It feels way better than bare tent floor, trust me.
DIY Tent Floor Insulation Ideas
You don’t need fancy gear for good tent floor insulation. I’ve used cheap yoga mats from discount stores – they work surprisingly well. Just tape a few together to cover your space.
If you’re car camping and don’t care about bulk, even cardboard works. I flatten moving boxes and layer them under my tent. They squish down after a night or two, but they do the trick.
Foam pipe insulation tubes (the kind for plumbing) can be cut open and laid flat for a quick, insulated floor. I’ve even used exercise mats or stacks of newspaper in a pinch. The main thing is to create as many layers of trapped air as you can between you and the frozen ground.
Protecting Tent Walls and Roof
Your tent’s walls and roof are where heat just loves to escape. If you beef up those spots with the right materials, you’ll notice a serious difference in how cozy it feels inside.
Adding insulation and using your rain fly wisely can turn a drafty tent into a much warmer shelter. It doesn’t take a ton of gear – just a few smart tweaks.
Attaching Thermal Blankets or Reflective Insulation
I’ve found that clipping thermal blankets to the tent walls is one of the quickest ways to trap warmth. Reflective blankets bounce your body heat back at you, instead of letting it leak out through thin fabric.
Space blankets and emergency blankets are perfect for this. They’re light, cheap, and surprisingly good at reflecting heat.
I usually fasten them to the inside walls with clips, tape, or even safety pins. The shiny side should face in – otherwise, you lose the benefit. You don’t have to cover every inch, but focus on the walls behind where you sleep for the biggest payoff.
One thing I learned (the hard way): leave a small gap at the top for ventilation. If you seal it up too tight, moisture builds up, and everything gets damp, which is the last thing you want.
Lining Tent Walls with Insulation Materials
Besides reflective stuff, I sometimes use foam padding or insulated fabric liners for extra warmth. These add a physical barrier, blocking cold air from sneaking in.
Closed-cell foam sheets work great. I cut them to fit my tent’s walls and stick them up with velcro or clips. That little bit of thickness really helps.
Some people repurpose old sleeping bag liners or even chopped-up yoga mats. Just pick something that won’t soak up water – wet insulation is basically useless in winter.
If you’ve got a single-wall tent, insulating the walls matters even more. Double-wall tents already give you a head start, but adding layers still helps.
Maximizing Insulation with Rain Fly and Rainfly
Your rain fly isn’t just for rain. It’s actually a key insulation layer in winter. The air gap between the rainfly and the tent wall traps warmth and blocks wind.
I always pull my rain fly tight and make sure it’s secure. If it’s loose, cold wind will sneak right in and undo all your hard work.
Sometimes I’ll throw a tarp over the tent above the rainfly for another layer. It keeps snow off and adds a bit more insulation. Just make sure there’s space for air to circulate, or you’ll get condensation.
If your rainfly has vents, close them partway but not all the way. You still need some airflow to keep things dry inside.
Managing Ventilation and Condensation
I know it sounds counterintuitive, but keeping your tent ventilated is just as important as keeping it warm. When you breathe and sweat in a sealed tent, moisture builds up fast and turns into condensation on cold surfaces.
Balancing Airflow and Heat Retention
Sealing every opening in my tent has left me with a soggy mess more than once. Your body releases about a pint of moisture overnight, and it’s got to go somewhere.
The trick is to keep vents cracked even when it’s freezing. I usually open the top vents or roof first, since warm air rises. Adjustable vents? Open them halfway to start and see how it goes.
You can keep vents open to let moisture escape without losing too much heat. I try to sleep with my bag away from the tent walls so my breath doesn’t hit the cold fabric. If you’re worried about losing heat, focus on insulating the floor and lower walls, and leave upper vents open.
Quick airflow tips:
- Open top vents before bottom ones
- Keep at least one vent cracked all night
- Point vents away from the wind if you can
Preventing Moisture Inside Your Tent
I never bring wet or snowy gear inside my tent if I can help it. Snow on boots and clothes melts fast in the warmer air and just adds more moisture to deal with.
Before I go in, I brush off snow from my gear, boots, and clothes. I keep a little towel or brush near the door for this. If I absolutely have to bring damp stuff in, I stash it in a waterproof bag.
Cooking outside cuts down on moisture, though I know sometimes you just can’t. If I cook inside, I leave the door partly unzipped and try to finish up quickly. I also avoid open water bottles or anything that could add humidity.
Wiping down condensation in the morning keeps it from freezing into ice patches. I use a small towel or bandana to soak up the droplets before I pack up.
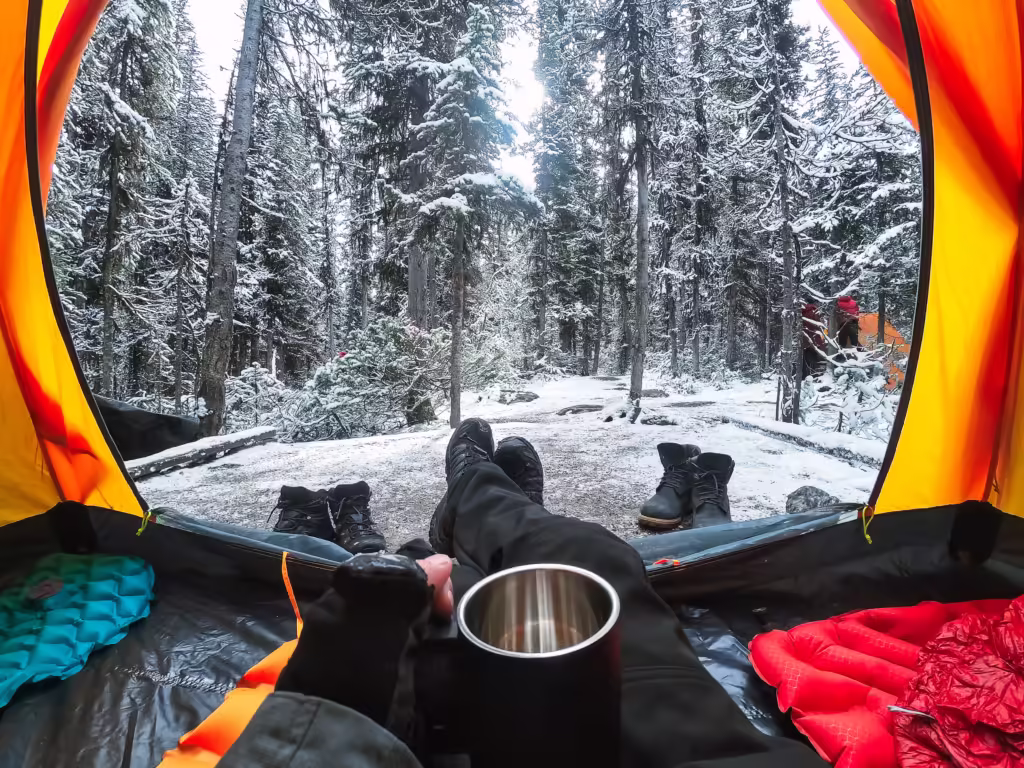
Heat Sources and Staying Warm
Insulation alone isn’t always enough when the temps really plummet. I’ve found that mixing solid insulation with smart heat sources is what keeps me comfortable – and actually lets me enjoy winter camping.
Safe Tent Heater Options
With tent heaters, safety is non-negotiable. I only use electric heaters if I’m near a power source – they’re the safest and easiest. Small electric space heaters work great in insulated tents and don’t put out dangerous fumes.
If you go with a fuel-based heater, propane models made for camping are your best bet. Look for ones with auto shut-off and oxygen sensors. I always keep two vents cracked for airflow, even if it’s brutal outside.
Never use these inside your tent:
- Charcoal grills or hibachis
- Propane heaters not meant for indoor use
- Gas-powered generators
- Open flames without proper ventilation
Carbon monoxide is invisible and deadly. I picked up a small battery-powered detector and hang it near my sleeping spot whenever I use any kind of heater.
Hand and Body Warmers
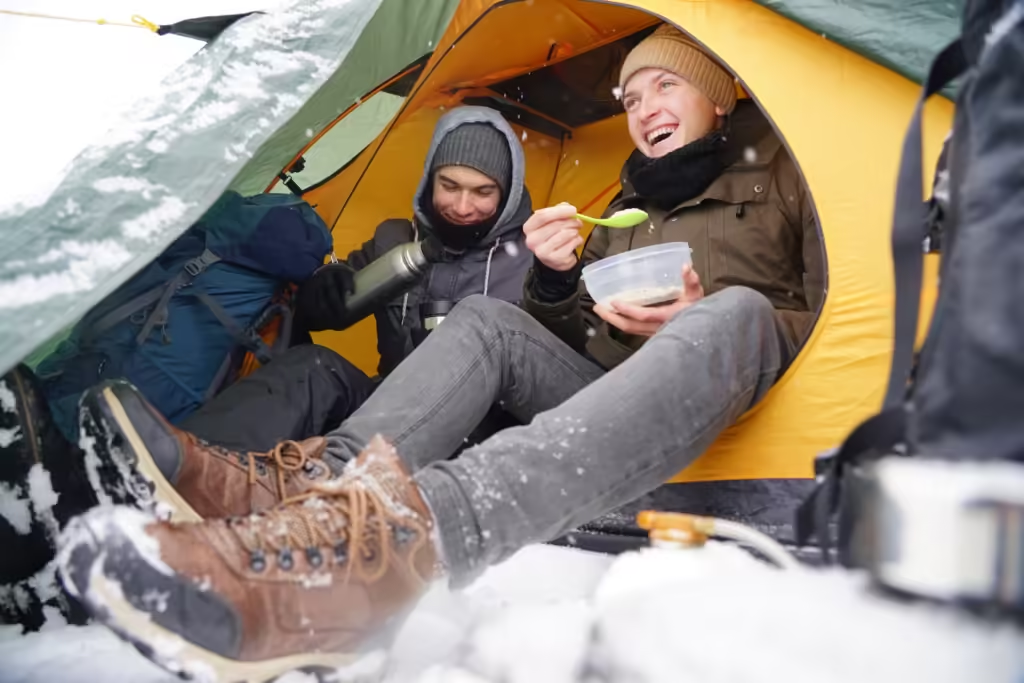
Heat packs are my go-to for staying comfy all night. I buy the disposable chemical hand warmers in bulk – they’re cheap, last 6-10 hours, and I toss a couple in my sleeping bag before bed.
Body warmers are bigger and stick to your clothes. I put them on my lower back or chest if I’m really cold. They give steady warmth with zero fire risk.
Reusable hand warmers are worth a look if you camp a lot. You snap a metal disc to activate them, then boil to reset. They don’t last as long per use, but you save money over time.
My warmth strategy:
- Put warmers near your core (chest, back)
- Keep a pair in your boots overnight
- Stick them in gloves before you head out in the morning
Hot Water Bottles: Old School Warmth
Hot water bottles might seem old-fashioned, but I swear by them. I fill one with hot water from my camp stove right before bed. A decent bottle stays warm for 4-6 hours.
I wrap mine in a t-shirt or a stuff sack to avoid burns, then stick it at the foot of my sleeping bag. My feet always get coldest first. By morning, it’s usually just lukewarm, but that’s still better than nothing.
The best thing about hot water bottles? Totally safe – no battery, no fumes, no fire hazard. And in the morning, you’ve got water ready for washing up.
Sleeping Bag Liners and Layered Clothing
A sleeping bag liner can add 10-25 degrees of warmth. I use a fleece liner in winter since it’s warmer than silk, but silk’s great for milder nights. Plus, liners keep your sleeping bag cleaner.
Wearing layers inside your sleeping bag makes a huge difference. I go with a base layer (thermal underwear), a mid layer (fleece), and sometimes even a lightweight down jacket if it’s really cold. Just skip cotton – it holds moisture.
My layering system:
- Base layer: Merino wool or synthetic thermals
- Mid layer: Fleece pants and top
- Insulation: Down or synthetic jacket if needed
- Extremities: Wool socks, beanie, gloves
I always change into dry sleeping clothes before bed. Whatever I wore during the day is probably a little damp, and that’ll make you cold overnight. Dry layers really are essential for staying warm.
Finding the Perfect Campsite

I always look for spots that naturally cut down on wind and cold air, then add extra protection with tarps or packed snow to make a warmer space around my tent.
Using Natural Windbreaks and Snow Walls
Picking a campsite with natural windbreaks makes a big difference in how warm you’ll stay. I look for dense trees, big boulders, or hillsides that block the wind. These features stop cold gusts from hitting my tent straight on.
I always set my tent entrance away from the wind so drafts don’t blow right in. Trees work great as natural windbreaks and also keep snow from piling up too much on one side.
If nature doesn’t provide enough, I build a snow wall on the windward side. I pack snow into blocks or just pile it up about 3-4 feet high. The wall should run a few feet past each side of the tent for better protection.
Key tips for snow walls:
- Pack the snow firmly so it won’t collapse
- Build it at least 6 feet from your tent for airflow
- Make it higher than your tent’s peak if you can
- Smooth the side facing the tent to reflect heat back
Building a Shelter with Tarps and Snow
I like to combine tarps and snow to build an extra layer of insulation around my campsite. First, I set up a tarp as a lean-to on the windward side of my tent and anchor it down with packed snow or buried stakes.
This setup creates a small air gap that helps block wind and trap warmth. For even more insulation, I pile snow along the bottom edges of the tarp where it meets the ground.
That extra snow seals up gaps where cold air tries to sneak in. Sometimes, I’ll drape a tarp right over my tent and hold it down with snow, always leaving some openings at the top and bottom for air to flow.
One more hack: I build a snow wall with tarps sandwiched between packed snow layers. The tarp keeps moisture from seeping through, while the snow does the insulating job.
Just be careful – never let tarps touch any heat sources inside your tent. That’s a risk you don’t want to take.
Tips for a Toasty Night and Happy Morning
Managing moisture and warming up before bed can totally change your winter camping experience. These habits help me wake up actually feeling rested, not frozen.
Storing Wet Gear Outside
I always leave wet or damp gear outside my tent at night. If I bring wet clothes, boots, or snow-covered stuff inside, the moisture just turns into condensation on the tent walls.
That condensation drips down or even freezes, making everything colder and wetter. Trust me, I learned that lesson fast on my first real winter trip.
Here’s what I keep outside my tent:
- Wet boots and socks
- Snow-covered jackets and pants
- Damp gloves and hats
- Any gear with ice or snow on it
I hang these things on a line between trees or stash them under a tarp away from the tent door. If I’m worried about my boots freezing solid, I’ll stuff them in a sack and hang them from a branch.
The only stuff I keep inside are things I can’t let freeze, like water bottles or electronics. Those go right into my sleeping bag with me.
Pre-Bedtime Warm Up Rituals
Getting warm before crawling into my sleeping bag is one of my favorite winter camping tricks. If I get in cold, it takes way too long to heat up.
I’ll do some jumping jacks, jog in place, or just walk around camp for a few minutes before bed. That gets my blood moving and warms me up from the inside.
I also make a hot water bottle before I sleep. I boil water, pour it into a heat-safe bottle, wrap it up, and tuck it near my core or at my feet inside my bag.
Eating a high-calorie snack right before bed helps too. I usually go for nuts, cheese, or chocolate to give my body fuel for warmth overnight.
Frequently Asked Questions
Winter camping always brings up questions – sometimes faster than frost forms on your tent. From DIY insulation hacks to gear picks, here’s what I get asked most about staying warm when the temps drop.
What creative DIY tricks crank up the warmth in my winter wonder-tent?
I’ve found that emergency blankets work wonders when you hang them along the tent walls with the shiny side facing in. They bounce your body heat right back at you instead of letting it slip out.
Bubble wrap is my secret weapon for cheap insulation. I cut it to fit and stick it to the tent walls with clips or removable tape. The little air bubbles trap warmth surprisingly well.
Layering extra blankets or thermal liners inside also does the trick. It makes the tent feel less like a shelter and more like an actual cozy room.
Natural stuff like pine boughs or dry leaves works great under your sleeping area. I’ll spread them out beneath my pad for extra insulation from the cold ground.
Can I become a temporary tailor and whip up my own tent insulation liner?
Making your own tent liner is totally possible if you’ve got basic sewing skills. I use thermal blankets or quilted fabric cut to match the inside of my tent.
The easiest way: measure each wall, cut fabric a little bigger, and attach it with safety pins or fabric clips so you don’t damage the tent.
If I want something more permanent, I sew loops or ties into the corners so I can hook the liner to the tent’s guy-out points. That way, nothing shifts around.
If sewing’s not your thing, heavy-duty clips or even binder clips work fine. Just make sure you don’t block any vents – ventilation is still important.
Guess what? Summer’s gone chilly! How do I retrofit my tent for Jack Frost’s party?
Turning my summer tent into a winter shelter isn’t as hard as it sounds. First thing I do is add a good groundsheet or footprint under the tent to block the cold from coming up.
I always seal seams and zippers with weatherproof tape to stop drafts. Even the tiniest gaps can let in a ton of cold air.
I throw down foam mats or old carpet pieces on the tent floor. I layer them under my sleeping pad to create a few barriers between me and the frozen ground.
For windows, I cover them with plastic panels, foam board, or even cardboard taped on with removable strips. Most of the heat escapes right through those spots.
If I snug a tarp overhead, will my tent turn into a cozy igloo?
A tarp overhead really does help. I set mine up six to twelve inches above the tent roof to create a little air gap that keeps warmth in.
It blocks wind and sheds snow or rain before it can land on the tent. That keeps moisture away and helps with heat loss.
I angle the tarp so water runs off, then secure it with guy lines and stakes. Tension is key or the tarp will sag or flap all night.
Don’t seal up the sides completely, though. You need airflow to avoid condensation inside. I always leave small gaps at the ends for ventilation.
Looking for the secret sauce in materials to turn my tent into a toasty burrito?
Reflective materials are my go-to because they bounce heat back at you. Emergency blankets and reflective film work best with the shiny side facing in.
For the floor, closed-cell foam is hard to beat. It blocks cold and doesn’t soak up water if things get damp.
Thermal blankets made from wool or synthetic fibers add a serious warmth boost. I like synthetics because they still insulate even if they get wet, unlike cotton which just gets cold.
For windows, I use clear plastic sheeting or foam board. Bubble wrap works in a pinch and actually does a decent job with those little air pockets.
When terra firma feels like an ice rink, what’s the best ground pad to cut the cold?
Closed-cell foam pads top my list for winter camping. They insulate well against the cold ground and keep working even if they get wet.
I always check for an R-value of 4 or higher when it’s cold out. The higher the R-value, the better the insulation—simple as that.
Layering pads helps a lot. I’ll put a closed-cell foam pad on the bottom and toss an inflatable pad on top for extra comfort and warmth.
Insulating the tent floor actually starts before you even crawl inside. I usually lay down a groundsheet or tarp under the tent, then throw in foam mats or even some cardboard to block out the cold from below.