Camper Renovation On A Budget: Transform Your RV Into A Dream Home Without Breaking The Bank
Renovating a camper doesn’t have to wipe out your savings or demand expert skills. A lot of folks assume transforming their RV means spending thousands, but honestly, there are tons of ways to breathe new life into a camper without going broke.
With some planning, creativity, and a bit of elbow grease, you can totally change your camper for way less than you’d expect.
Fresh paint, new flooring, clever storage, and better lighting – small changes really do transform the whole vibe. We’ll dig into practical DIY tricks that make a big impact for less cash.
From kitchen backsplashes to cabinet makeovers, these ideas work for vintage trailers and newer models alike. Turns out, you don’t need a fortune to create a home on wheels that feels just right.
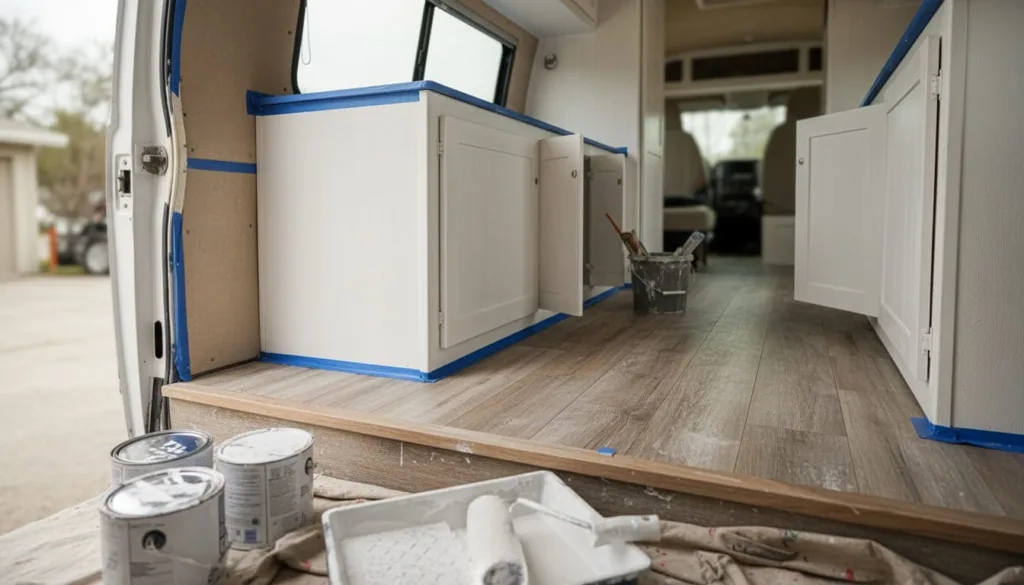
1) Start with a fresh coat of paint – it’s the cheapest way to totally transform your camper’s vibe.

Paint changes everything. Seriously, one weekend with brushes and rollers and your tired old camper suddenly looks brand new.
Painting RV walls is probably the best DIY skill you can pick up. It transforms your camper for cheap.
Start inside. Light colors – think soft whites, pale blues, warm grays – make cramped spaces feel bigger and brighter.
Don’t skip the cabinets. Painting camper cabinets gives you the most bang for your buck. That dark wood from the ‘90s? Gone. Now it’s modern and fresh.
The outside deserves some attention, too. Painting the exterior brings old trailers back to life. Pick colors that make you happy when you roll into camp.
Prep is everything. Clean really well and use a primer made for RVs. Good prep means your paint job will actually last.
Grab a few samples first. Paint can look totally different inside your camper than it does under store lights.
2) Replace old flooring with luxury vinyl planks; they’re waterproof, durable, and super easy to install yourself.

Your camper’s old floors don’t stand a chance against luxury vinyl planks. These are our go-to for budget-friendly renovations.
They handle spills, mud, and whatever you drag in from outside. The waterproof part is key since moisture sneaks in everywhere in camper life.
You can install vinyl planks over most old floors, so you don’t have to rip anything out. Saves time and cash.
The click-lock system is pretty forgiving. Measure twice, cut once, and snap them together – no special tools or pro help needed.
They look like real wood, too. Friends always think we splurged on hardwood, but nope – we just picked the right vinyl.
Messed up a section? No big deal. Just pop it apart and fix it. Nothing’s permanent until you’re happy with it.
3) Reupholster cushions with vibrant, budget-friendly fabrics instead of buying new seating.

This trick saves serious money. Reupholstering camper cushions gives your whole space a facelift without shelling out for new furniture.
You don’t need fancy sewing skills, either. A no-sew method with fabric, hardboard, and staples does the trick in a day.
When picking fabric, we go for budget-friendly options that can handle camper life – canvas, denim, even outdoor fabrics.
Bold patterns or bright colors? Yes, please. They make the space feel personal and fun. Pick something that matches your adventure style, whether that’s geometric prints or nature themes.
DIY cushion covers are a cheap way to revive tired seating. Even basic slipcovers can totally change the look.
This project stretches the life of what you already have and adds a dose of comfort. Plus, there’s something satisfying about doing it yourself.
4) Add peel-and-stick backsplash tiles in the kitchen for a quick style upgrade with minimal effort.
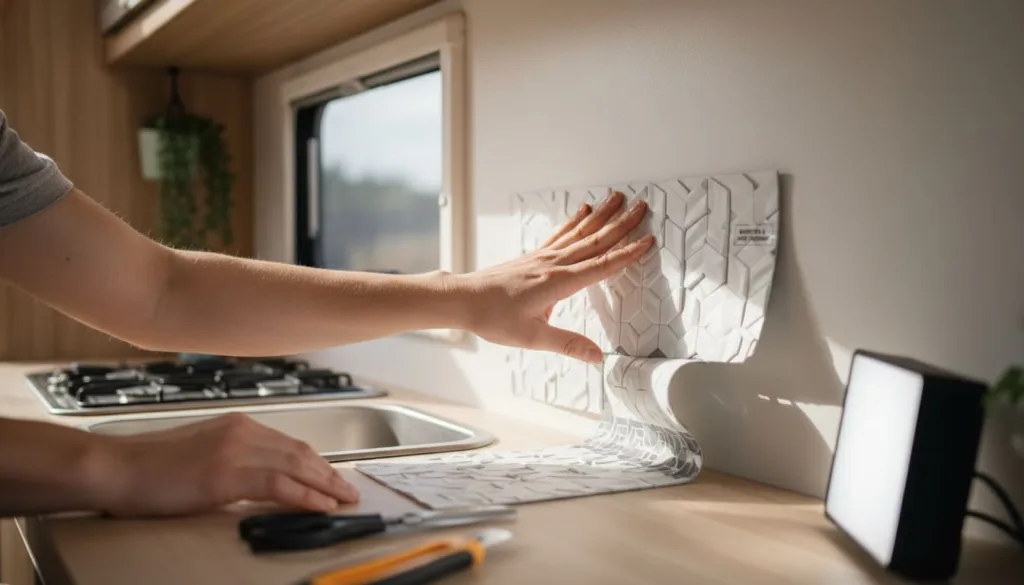
Peel-and-stick tiles can give your camper kitchen a whole new look in just a few hours. These budget-friendly options cost anywhere from $100–$500, depending on what you pick.
No mortar, no grout, no mess. The adhesive holds up well against heat and moisture, so they work great behind the stove or sink.
Clean the wall first. Plan your layout before peeling off the backing. Trust me, it saves headaches and keeps lines straight.
Cut tiles with scissors or a utility knife. Press from the center out to get rid of bubbles. Working in small sections helps.
The 3D textured styles add some depth, even in a tiny space. Subway, arabesque, or mosaic – pick what fits your vibe.
If you change your mind down the road, most peel-and-stick tiles peel off clean. Perfect for a home that’s always evolving.
5) Install LED strip lights under cabinets to brighten your space without driving up the electric bill.

LED strips are a camper game-changer. They use way less power than old-school bulbs and set the mood with cozy lighting that makes your space feel bigger.
You can install LED strips under cabinets with just basic tools. Most have sticky backing, so it’s basically peel, stick, done.
Stick them near the front edge of cabinets for the best light on your counters. Always test the spot before sticking them down – you want even light, not weird shadows.
These strips draw just 2–5 watts per foot, compared to 20–60 watts from traditional bulbs. So you can light the whole kitchen and not worry about draining your battery.
They last ages – 25,000 hours or more. You won’t be swapping them out anytime soon, which is nice when you’re on the road.
That warm glow at night? Makes the camper feel like home after a long day outside.
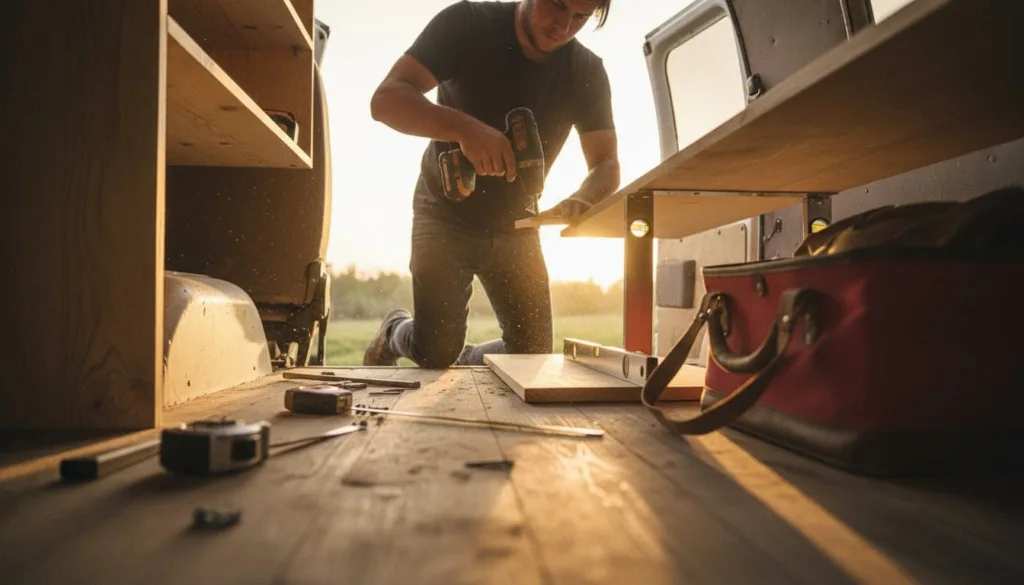
6) DIY open shelving using reclaimed wood to boost storage and showcase your cool travel finds
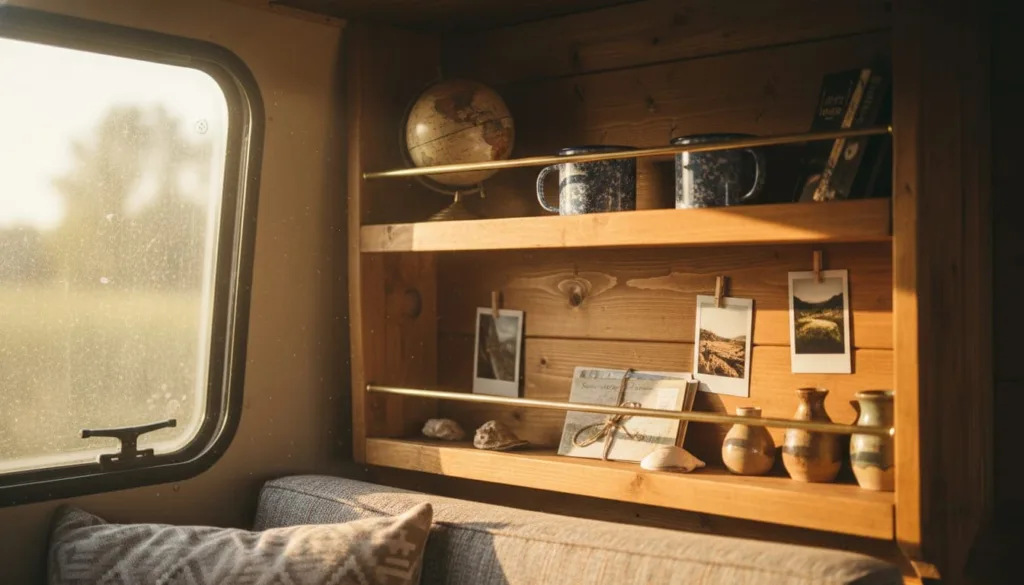
Reclaimed wood shelves can turn cramped camper corners into organized showcases. Old barn wood or weathered planks bring instant character and keep costs low.
Finding materials is half the fun. We love digging through salvage yards or grabbing old crates and pallets for stacked storage.
The beauty of DIY shelves is how simple they are. Just measure, cut, and fit planks between walls or above benches.
Thin floating shelves work great for lightweight treasures – think beach rocks or Route 66 postcards. They deserve a spot, right?
Simple brackets keep everything secure, even while driving. We pick low-profile hardware so nothing gets snagged during those 3 am bathroom trips.
These shelves aren’t just storage – they’re conversation starters. Guests always ask about our quirky collection of finds from the road.
7) Swap out dated cabinet handles and knobs for modern ones – small change, big impact!
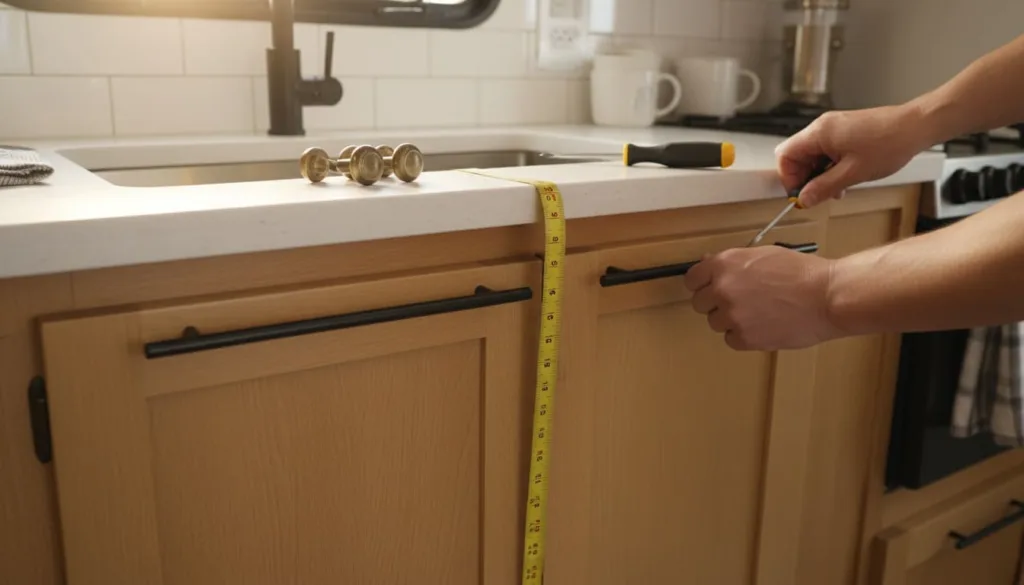
We never expected new cabinet hardware to make such a difference in our camper. Those old brass knobs from the ’90s just made everything feel tired.
Swapping cabinet hardware is about as easy as upgrades get. No fancy tools or skills needed here.
Modern black pulls or sleek stainless knobs instantly update the vibe. Small hardware changes really do make a big impact – and our budget barely notices.
We always measure the existing holes before shopping, just to skip extra drilling. Most hardware fits standard spacing, but it’s worth double-checking.
Discount stores and online shops have plenty of choices for just a few bucks each. Mixing different styles can look intentional and fresh, if you ask us.
This project usually takes about an hour.
8) Use removable wallpaper on one accent wall to inject personality without committing long-term.
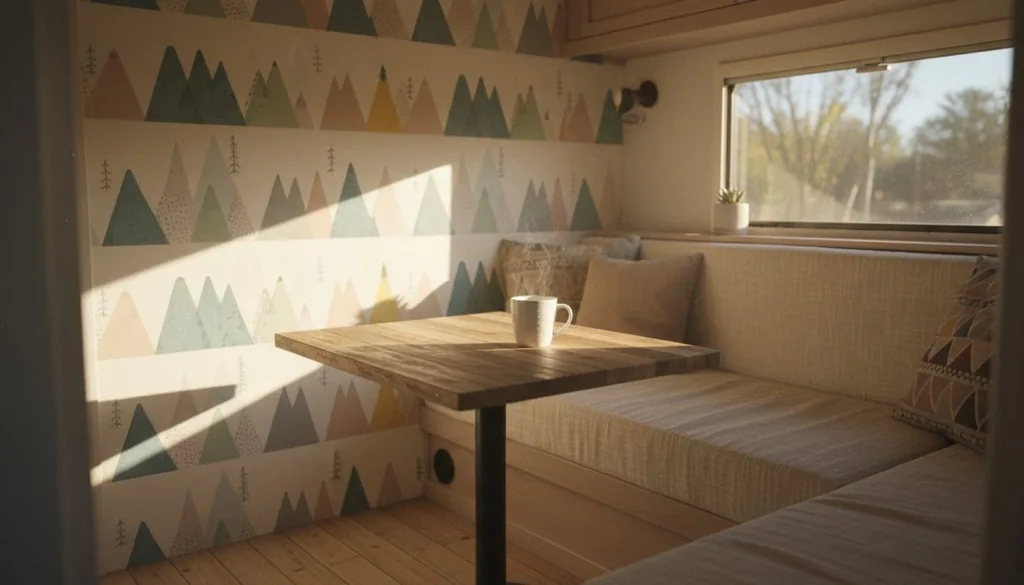
Removable wallpaper lets us transform accent walls – no permanent changes needed. It’s a lifesaver for renters or anyone who likes to change things up.
Peel-and-stick wallpaper gives maximum impact with minimal effort. We can totally change the mood of our sleeping area or dinette without touching the rest of the camper.
The best part? One accent wall costs just a bit more than paint, and you use way less material.
We usually pick the wall behind the bed or next to the dinette. These spots instantly become focal points and make the camper feel more designed.
Painter’s tape around the edges helps us get crisp lines, even in cramped spaces. It makes the finish look professional.
When we want a new look, the wallpaper peels right off. No scraping, no damage – no regrets.
9) Maximize storage with hanging organizers and collapsible bins to keep your space neat on the go.

Storage is everything when you live in a camper. Every inch matters, so we look for smart solutions that actually work on the road.
Hanging closet organizers are total game-changers. We hang them from rods or hooks for instant shelves – clothes, toiletries, gear, you name it.
Collapsible bins fold flat when we don’t need them. That way, we can stash them under beds or in cabinets without wasting space.
We always think vertical when organizing. Hanging organizers on doors or walls maximizes every bit of height.
Stackable bins let us build up, not out. We secure them with bungees or straps so nothing slides around while traveling.
The best part is flexibility. We move things around for each trip, so our setup always fits what we’re carrying.
10) Replace old curtains with light, airy fabrics to let the sunshine in and lift your mood.

Those heavy, dark curtains from the last owner? They have to go. Swapping them for something lighter brings instant sunshine and a whole new mood.
Sheer linen or cotton curtains work wonders in a small space. Suddenly, our camper feels bigger and brighter – without spending much.
We love hunting thrift stores for lightweight panels. Cotton voile or thin polyester sheers are cheap secondhand but make a huge difference.
For sunny campsites, we pick UV-resistant fabrics that don’t fade fast. That way, we don’t have to replace them every season.
Breathable fabrics like cotton or linen help keep things cool. Air flows through, but we still get privacy.
Discount stores often have fabric remnants that work perfectly. A simple rod pocket – sewn by hand or machine – gives us custom curtains for next to nothing.
Light, flowing curtains turn the camper into a cozy retreat instead of a dark box.
Smart Planning For Your Budget Camper Renovation

Good renovations start with smart planning and a dose of reality. We have to focus on the changes that matter most and avoid expensive mistakes that wipe out our savings.
Setting Realistic Goals And Priorities
It’s tempting to want everything at once, but let’s get real about our budget and timeline. A priority list keeps us focused on the upgrades that actually make a difference.
We jot down everything we want to change. Then we sort them: must-have, nice-to-have, and maybe later.
Must-haves usually mean safety repairs, fixing water damage, and basic function. Nice-to-haves? Paint, new curtains, hardware – stuff that makes it feel like home.
We write down our total budget, then split it: 60% for must-haves, 30% for nice-to-haves, and 10% for surprises. This way, we don’t blow the budget on throw pillows and forget about leaks.
We pick two or three big projects for the first phase. It’s better to finish a few things well than start ten and finish none.
How To Stretch Your Renovation Dollars
Getting creative and shopping smart really helps our budget stretch. We time our purchases around sales and pick materials that give us the most bang for our buck.
Clearance sections at home improvement stores are goldmines for paint, hardware, and fixtures. We also check Facebook Marketplace and Craigslist for gently used RV parts.
Some of our favorite money-savers:
- Paint instead of replacing – Fresh paint works wonders on cabinets and walls for under $50.
- DIY what you can – Swapping out faucets or light fixtures isn’t rocket science.
- Buy generic – Store brands often work just as well as the fancy stuff.
- Repurpose – Old wood can become shelves or accent walls with a little effort.
We stick to affordable DIY tips that deliver the most visual punch. Sometimes, the smallest tweaks make the biggest difference.
Avoiding Common Beginner Pitfalls
We see a lot of new renovators trip up by skipping the basics. Learning from other people’s mistakes saves us time, money, and headaches.
Never skip the inspection. We check for water damage, structural issues, and electrical problems before buying supplies. Hidden problems like leaks or rot can blow up our budget if we find them too late.
We don’t buy everything at once. It’s better to get materials as we need them, so we don’t waste money on stuff that doesn’t fit.
Measure twice, buy once. Camper spaces are weird – curved walls, odd corners – so we always double-check before ordering anything.
We try to avoid trendy upgrades that might look dated fast. Classic colors and simple designs age well and make selling easier if we ever decide to move on.
We start with small projects to build confidence before tackling big stuff like flooring or plumbing.
Creative Solutions For DIY Camper Upgrades
Finding smart materials and clever storage ideas can totally transform a camper – without draining your wallet. These little hacks make your space work and look good.
Sourcing Materials On The Cheap
We’ve learned that the best renovation materials sometimes hide in weird places. Thrift stores are packed with vintage hardware, fabric, and quirky decor that bring character.
Hardware stores often have remnant bins full of discounted tile, paint, and wood. We always check those first before paying full price.
Facebook Marketplace and Craigslist are gold for RV-specific stuff. Folks sell leftover supplies for a fraction of what you’d pay new.
Discount retailers like Big Lots and Overstock stores are worth a look. We’ve scored stick-on subway tile and more for cheap.
Estate sales can surprise you – vintage camper parts, retro fabrics, even tools for next to nothing.
Online retailers sometimes offer bulk deals that cut down per-item cost. Ordering a few things together saves on shipping and sometimes unlocks discounts.
Maximizing Storage Without Skimping On Style
Storage doesn’t have to be dull or look cheap. We like using decorative baskets and old crates – they organize our stuff and look good doing it.
Under-bed storage is a lifesaver. Rolling drawers made from old dresser drawers on casters slide out easily and keep things handy.
Wall-mounted organizers help us keep surfaces clear. Pegboards in bold colors hold tools, utensils, and supplies without hogging floor space.
Multi-purpose furniture really makes a difference. Ottoman storage boxes double as seating and stash supplies inside.
Fold-down tables give us workspace when we need it, then get out of the way.
We try not to waste vertical space, either. Hooks, shelves, and hanging organizers go up on walls and inside cabinet doors wherever we can fit them.
Clear containers make it easy to see what’s inside. Mason jars and plastic bins stack neatly and look intentional, not cluttered.
Frequently Asked Questions

Lots of camper owners ask about renovation tricks, where to find cheap supplies, and how to maximize space without blowing their budget. These questions cover everything from DIY hacks to choosing between paint or wraps for a fresh look.
What are some creative and budget-friendly ways to give my old camper a new lease on life?
We almost always start with paint. It’s the cheapest way to totally change the vibe – cabinets, walls, even the outside can get a whole new personality for under $100.
Fabric works wonders, too. Discount stores are great for affordable fabric to reupholster cushions, sew new curtains, or make a table runner. It costs way less than buying new stuff.
Peel-and-stick materials are a favorite. Backsplash tiles, wallpaper, and contact paper let us update surfaces without making anything permanent. They’re perfect for renters or anyone who likes to switch things up.
Lighting makes a huge difference. We’ve added LED strips under cabinets or battery-powered pendant lights for under $20, and it instantly feels more inviting.
Can you give me nifty tips for updating my camper’s interior without breaking the bank?
Luxury vinyl plank flooring is at the top of our list for affordable updates. It’s waterproof, tough, and we can usually lay it right over the old floor for about $200-300.
Swapping out hardware gives a fresh look fast. New cabinet knobs, drawer pulls, and faucets can modernize a space. We always check the clearance bins for deals.
Storage can be stylish, too. Woven baskets, decorative jars, and cute containers organize clutter and show some personality. Thrift and dollar stores are packed with options.
Mirrors work magic. Placing them across from windows bounces light around and makes the space feel bigger. Big mirrors from discount stores often cost less than $30 but add a lot of impact.
Where can I find affordable renovation supplies for sprucing up my small RV?
We’ve found great stuff at thrift stores and estate sales. Vintage dishes, linens, and unique decor pieces give campers real character.
Estate sales sometimes have tools and hardware, too. Home improvement store clearance sections are another go-to for discounted materials – discontinued paint, sample tiles, and returned items are perfect for small projects.
Online marketplaces can be goldmines. Construction companies and contractors sometimes sell leftover supplies for cheap. We’ve picked up quality flooring, fixtures, and even lumber that way.
RV salvage yards are worth checking out. We’ve scored original light fixtures, cabinet doors, and hardware that keep our camper’s vintage look without breaking the bank.
Are there any DIY renovation hacks for first-time camper owners on a tight budget?
We always do a deep clean first. Sometimes, what looks like damage is just years of grime – a $10 bottle of degreaser can make a world of difference.
Trying out new techniques on a small area first is smart. We learned the hard way that certain paints don’t stick to all RV surfaces, so now we test before committing.
Multi-purpose products help us save. Primers that also seal stains, paint-and-primer combos, and all-purpose adhesives mean we buy less overall.
We tackle remodel projects in phases. Finishing one area before moving on keeps us motivated and helps avoid overwhelm.
What should I consider before deciding whether to paint or wrap my aging RV?
We look at the surface first. Paint works if the surface is smooth and intact, but wraps can cover up small dents and scratches. We always inspect closely before choosing.
Budget matters a lot here. Paint usually costs $200-500 for materials, while professional wraps can run $3000-5000, though DIY wraps are cheaper if you’re up for it.
Climate plays a role, too. Paint holds up better in wild temperature swings. Wraps might bubble or peel if they get too hot, so we factor in where we’ll camp most.
Time is another thing to think about. We can paint in sections over a few weekends, but wrapping takes a few dedicated days and the right weather. Paint is easier to touch up down the line, too.
How can I maximize space and style in my small camper with low-cost remodeling ideas?
Vertical storage can turn cramped quarters into something way more organized. We put up hooks, magnetic strips, and slim shelves on the walls and inside cabinet doors.
Every bit of vertical space matters, so we make it all work for storage. Honestly, it’s surprising how much you can tuck away when you use the walls.
Light colors and reflective surfaces really open things up. We usually go with white or cream paint for the walls, then add some metallic hardware or shiny accessories here and there.
That little bit of shine makes the whole place feel bigger – almost like a magic trick for your eyes.
Multi-functional furniture is a game-changer in tight spaces. We’ll build window seats with storage underneath, set up fold-down desks, and pick ottomans that hide blankets or supplies inside.
Strategic decluttering helps the whole camper breathe. We stick to a one-in, one-out rule and only keep things that do more than one job.
If you’re curious, here’s a handy small camper renovation checklist that’s great for staying on budget and getting ruthless about what’s worth keeping.