Creating a Cozy Campsite: Your Guide to Ultimate Camping Comfort
Camping doesn’t have to mean roughing it or giving up comfort for the sake of adventure. After spending many, many nights under the stars, I’ve found that the real magic of camping comes from how cozy you make your little outdoor home.
The secret to creating a cozy campsite is blending smart gear choices with thoughtful touches that make your outdoor spot feel warm and inviting. From string lights for a magical vibe to comfy seating, small details can turn any patch of wilderness into your personal hideaway.
Whether you’re squeezing into a tiny tent or have room to spread out, I’ll show you how to turn your campsite into a place you actually want to hang out. These tips work for both weekend campers and seasoned pros, because comfort and nature really can go together.
Key Takeaways
- Pick a flat, sheltered spot with natural windbreaks to set the stage for a comfy campsite.
- Get good sleeping gear and toss in personal touches like soft blankets to make your space feel homey.
- Use warm lighting and keep your cooking area organized for a welcoming vibe when you’re eating or relaxing outdoors.
Choosing the Perfect Campsite Location

The foundation of any cozy campsite starts with picking the right spot. I usually focus on three things: finding level ground, getting some natural protection from wind and sun, and staying close enough to water without being right next to noisy facilities.
Evaluating Ground Surface and Terrain
I always check the ground before unpacking. Sleeping on a rock or waking up in a puddle is a surefire way to ruin a trip.
Level ground is key. I look for flat spots with a slight slope, just a couple of degrees, for drainage. That way, rain won’t pool under my tent.
I lie down on the ground for a few seconds to test it out. If it feels rough without my sleeping pad, it’s not going to get better after a whole night.
Watch out for these ground surface red flags:
- Big rocks or roots poking through the tent floor
- Marshy, soft spots (bad drainage)
- Really hard dirt that won’t hold tent stakes
- Pine cones or thorny stuff everywhere
Firm soil that takes tent stakes easily is ideal. I keep a small trowel handy to test the ground before I commit to a spot.
I also look up for dead branches or “widow makers.” Those things can fall during wind storms and wreck your gear, or worse.
Finding Natural Shade and Wind Protection
Nature has its own climate control, and I try to use it. I set up camp where natural barriers block the wind but steer clear of hazards.
Morning sun placement is sneakily important. I like my tent door facing east so the sunrise wakes me up gently instead of my alarm blasting me out of bed.
For wind protection, I look for hills, rocks, or thick bushes. Still, I stay at least 30 feet away from big trees to avoid falling branches.
Here’s my wind protection game plan:
- Point the narrow end of my tent toward the wind
- Use boulders or bushes as shields
- Skip valley bottoms where cold air settles at night
- Find some tree cover but don’t camp directly under branches
On hot days, I care more about afternoon shade than morning sun. Trees are like nature’s AC and keep my gear from baking.
But I don’t want a spot that’s totally closed in. Airflow matters for keeping condensation and bugs away.
Proximity to Water and Facilities
Getting the distance right between my campsite and essentials takes a little planning. Too close means noise; too far means long walks with heavy water jugs.
Water access should be easy, but not too easy. I stick to the 200-400 foot rule from water sources to protect both the water and the environment.
I set up camp uphill from water to avoid flooding, but not so far that carrying water becomes a workout. Lugging water gets old really fast.
Here’s the distance cheat sheet I use:
| Facility | Ideal Distance | Reason |
|---|---|---|
| Water source | 200-400 feet | Environmental protection |
| Bathrooms | 100-200 feet | Convenience vs. odors |
| Trash area | 150+ feet | Wildlife prevention |
| Other campers | 50+ feet | Privacy and noise |
If I’m at a campground, I always find the bathrooms before it gets dark. Wandering around at 2 AM with a headlamp, half-asleep, is not my idea of fun.
I check if there are potable water spigots nearby. Most established campgrounds have them, and they save me from having to treat stream water.
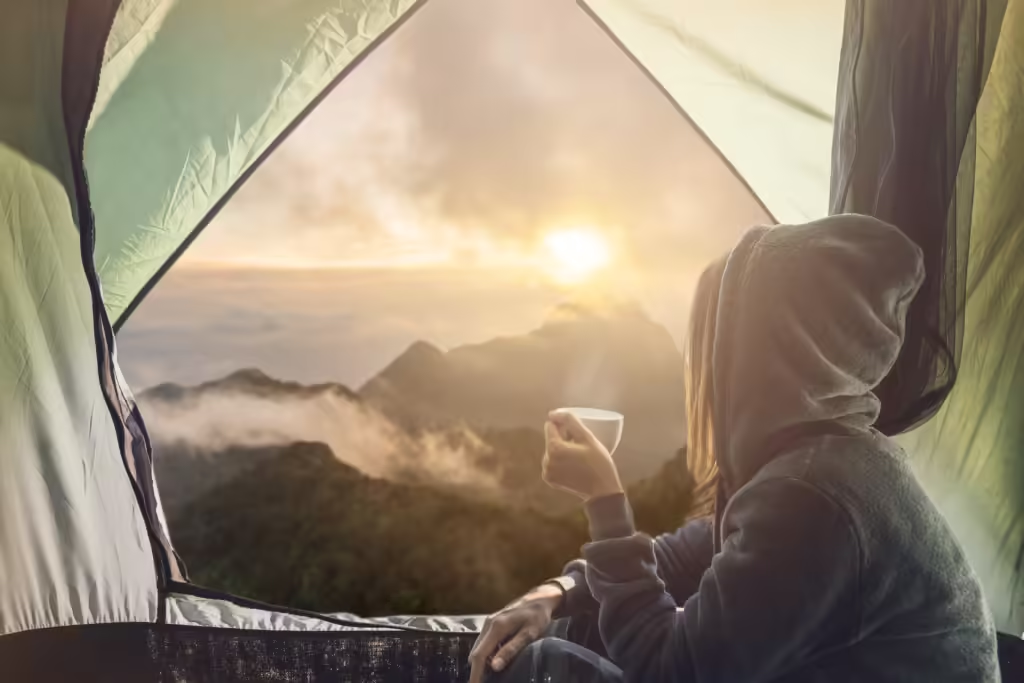
Sleeping Soundly: Setting Up a Cozy Sleep Space
Getting good sleep while camping can be the difference between waking up refreshed or feeling like you, well, slept on the hard ground all night. (If you sleep at all…) The right tent placement, solid sleeping gear, and a few comfort tricks can turn any campsite into a dreamy outdoor bedroom.
Selecting the Right Tent and Site
I always scout my sleeping area before setting up anything else. The ground needs to be as flat as possible – otherwise, I’ll end up sliding into the tent wall by morning or have blood rushing to my head.
I clear away rocks, sticks, and pinecones that could poke through my tent floor. Even a tiny pebble feels huge at 3 AM.
Wind direction is more important than most people think. I set my tent door away from the wind to avoid that annoying flapping sound all night. If there are natural windbreaks like trees or rocks, even better.
For chilly mornings, I try to position my tent for some early sunlight. It helps warm things up and makes getting out of my sleeping bag a little less brutal.
I also keep a safe distance from water. The sound of a creek might seem peaceful, but it can keep you up when nature calls at midnight.
Sleeping Bags and Sleeping Pads for Maximum Comfort
My sleeping bag should be rated for the coldest temperature I expect, plus about 10 degrees for safety. Learned that lesson the hard way on a chilly spring trip.
The sleeping pad matters just as much as the bag. I look for pads with high R-values for insulation. A thicker pad saves my hips and shoulders, too.
I always bring a real pillow from home. Inflatable camping pillows just don’t cut it for me, and the extra bulk is worth it for a good night’s sleep.
For my cozy campsite setup, I add a lightweight blanket on top of my sleeping bag. Extra layers let me adjust as the night gets colder or warmer.
Hot water bottles are amazing. I fill one with hot water from my stove and toss it in my bag ten minutes before bed, so nice on chilly nights.
Air Mattresses and Extra Blankets for Warmth
Air mattresses give me that real bed feeling, which makes camping way more enjoyable. I go for at least 3 inches thick for proper cushioning.
Self-inflating mattresses are my go-to for balancing comfort and convenience. They mostly inflate themselves, but I can add a little extra air for firmness.
I never forget extra blankets. A soft fleece throw from home makes the tent feel less like a tent and more like my own space.
When it’s cold, I put a blanket under my sleeping bag for insulation from the ground, and one on top for warmth. Layering is key.
And if it’s hot? I bring a small battery fan for air circulation. Stuffy tents are the worst for sleeping. A fan can make all the difference, and it’s also great for white noise.
Hammocks for Daytime Relaxation
Hammocks aren’t great for sleeping overnight in most places, but they’re perfect for afternoon naps or lazy coffee mornings.
I set up my hammock between two solid trees in a shady spot near camp. The trick is the right sag – about 30 degrees feels best to me.
For extra comfort, I toss a lightweight blanket and a small pillow in the hammock. It’s the perfect spot to read or just zone out for a bit.
Hammocks can also be backup seating around the fire if there aren’t enough chairs. Just don’t overload them, I’ve learned that one the hard way.
I bring hammock straps instead of rope. They’re easier to use, protect the tree bark, and spread out the weight better.
Camp Kitchen and Dining Made Comfortable
A well-organized camp kitchen and a comfy dining setup can turn outdoor meals from just basic fuel into something you actually look forward to. With the right storage, solid cooking gear, and a cozy place to sit, your campsite starts to feel like a real home away from home.
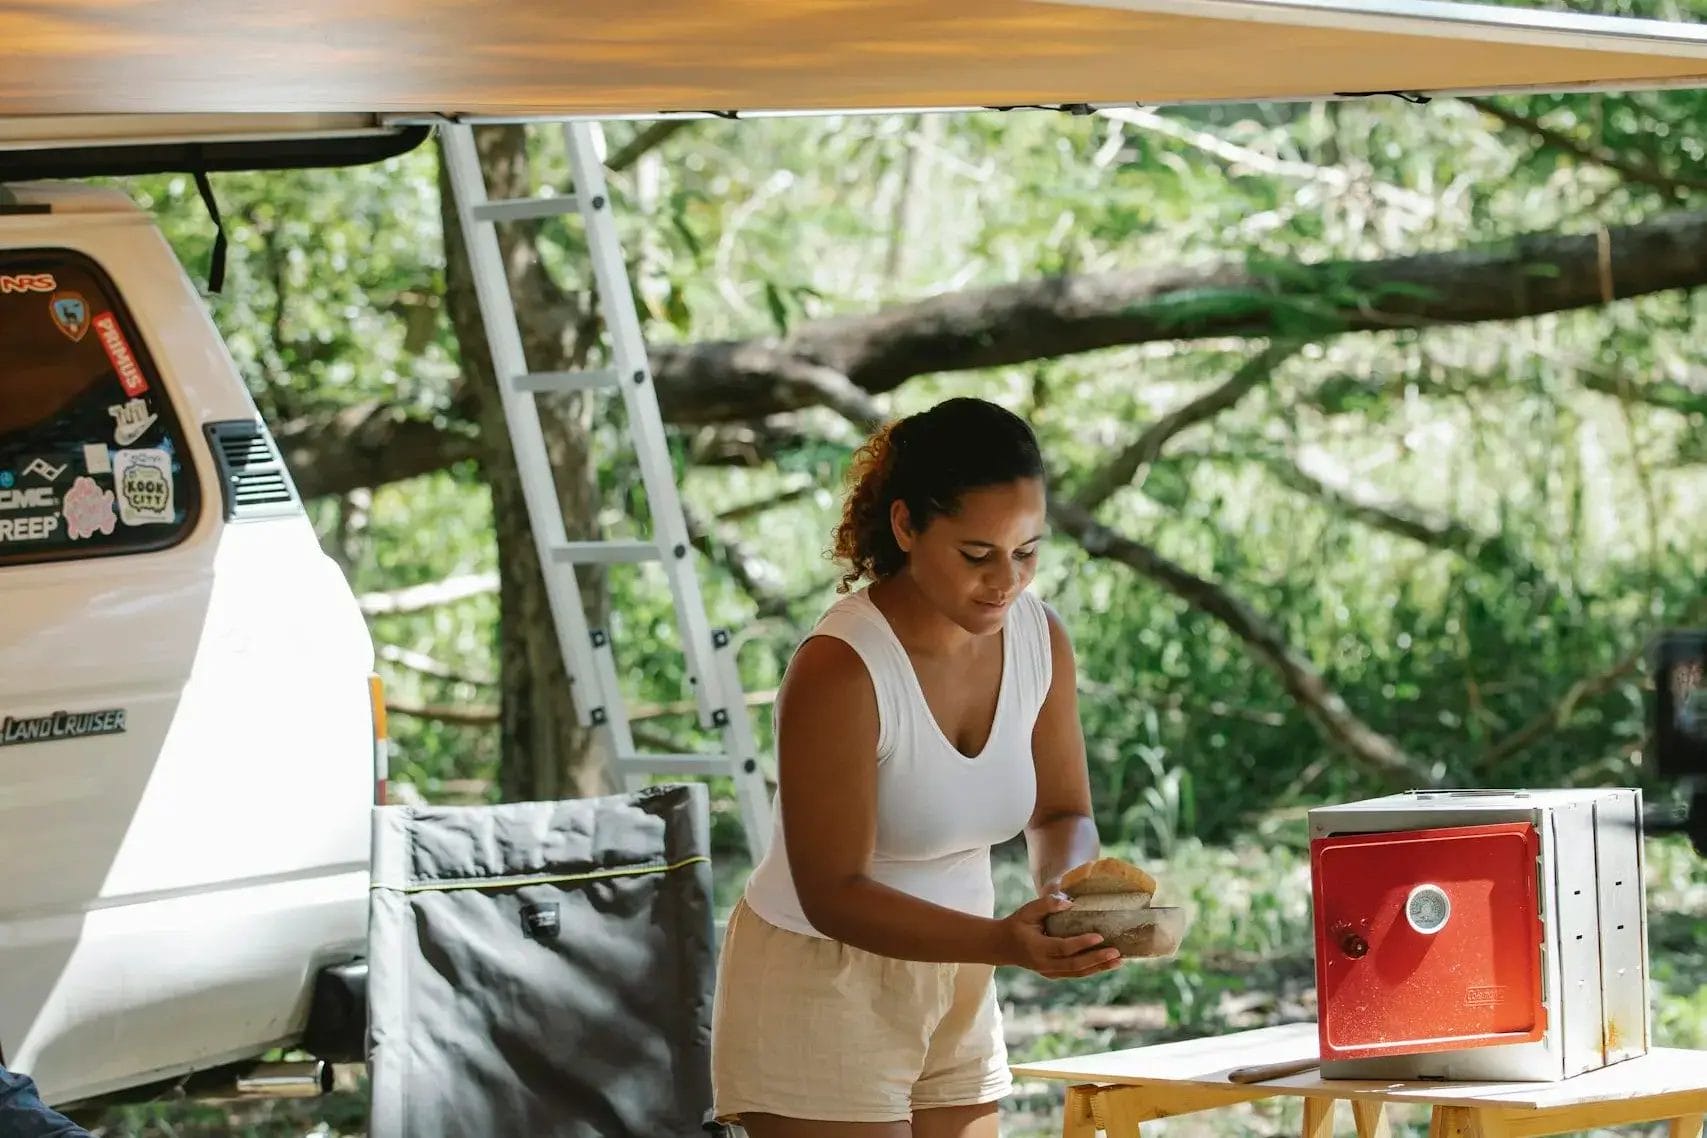
Setting Up an Efficient Camp Kitchen
I always start by picking a flat, stable spot for my camp kitchen setup. A car’s tailgate? Perfect for prepping -instant counter space, no extra gear needed.
Essential Storage Solutions:
- Stackable bins for spices and dry goods
- Collapsible dish tubs for easy cleanup
- Magnetic knife strips to keep blades secure
I stick with organized storage bins and crates to keep everything neat and easy to grab. There’s something satisfying about finding what you need without digging through a mountain of unorganized stuff.
A foldable table is my main workspace. Chopping veggies on a real surface is way better than balancing everything on your lap.
Water access is huge. I bring a big container with a spout, which basically becomes my portable sink for cooking and cleaning.
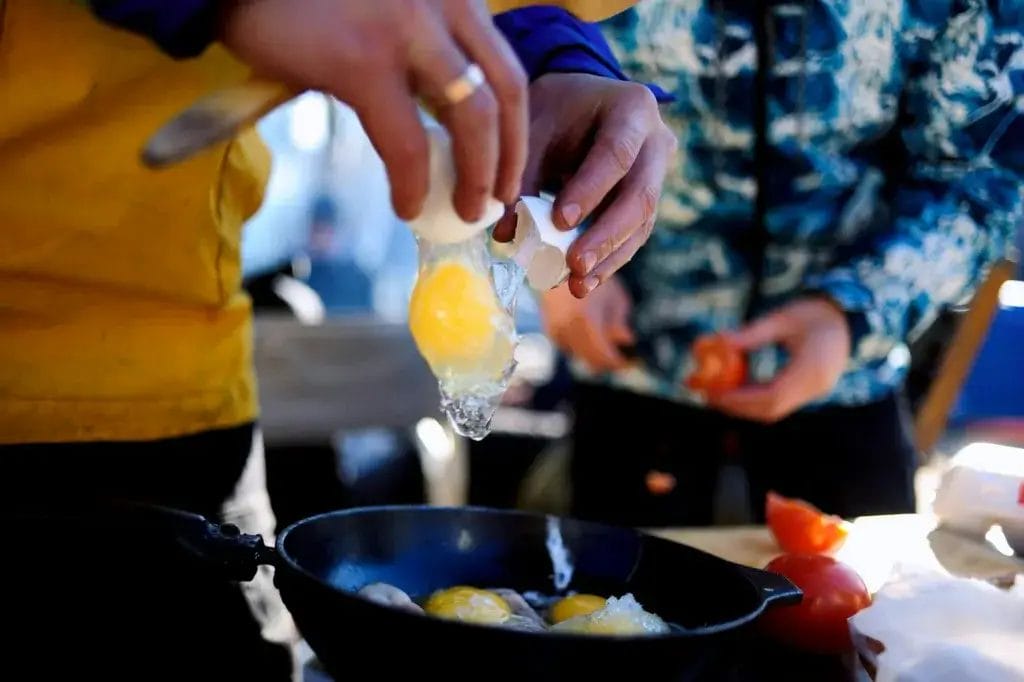
Cooking Gear Essentials and Portable Stoves
Your portable stove is the heart of the camp kitchen. I lean toward dual-burner models since I can cook more than one thing at once, kind of like being at home.
Must-Have Cooking Equipment:
- Lightweight camping grill for variety
- Compact cutting boards that stack easily
- Hanging hooks for utensils
- Portable cookware kit
Having a reliable stove gives you options beyond just the campfire. Sure, roasting marshmallows is fun, but steady heat makes dinner prep way less stressful.
I hang utensils on hooks right on my setup. It keeps them handy and adds a touch of that homey vibe I always chase after.
Don’t leave the coffee maker at home. Fresh coffee in the morning? It’s a must for me, so much better than the instant stuff.
Dining Area Comfort and Seating
Comfortable camp chairs totally change mealtime. I set mine up close to the kitchen so I can kick back while food cooks.
Creating cozy dining ambiance starts with picking the right spot. I look for flat ground with a nice view, close to the kitchen but not in the smoke zone.
Comfort Elements That Matter:
- Battery-powered string lights for evening meals
- Padded folding chairs for extended sitting
- Sturdy table for stable eating surface
- Portable lanterns for task lighting
Once the sun dips, I string up some battery-powered lights. The soft glow makes the campsite feel extra cozy, even if dinner’s just sandwiches.
A lightweight folding picnic table means no more eating off your knees or losing food in the dirt. It’s a small upgrade that makes a big difference.
Creating a Cozy Outdoor Living Area

Turn your campsite into a comfortable retreat with soft flooring and thoughtful seating. Little details like these make any spot feel more like home.
Using Outdoor Rugs for Homey Comfort
Adding an outdoor rug totally changes the vibe. Suddenly, you’ve got a defined living space that feels warm and inviting.
Size and Placement Tips:
- 6×8 feet works perfectly for most small campsites
- 5×7 feet fits tight spaces while still providing comfort
- Place it under your main seating area
Stepping onto a soft rug instead of dirt or pine needles? Way better. My feet stay cleaner, and my gear doesn’t end up gritty or dusty.
I go for rugs made from polypropylene or recycled plastic. They handle rain, dry fast, and shaking them clean is easy.
What to Look For:
- Waterproof backing keeps ground moisture away
- Lightweight materials for easy packing
- Neutral colors hide dirt better
When I set up my comfortable campsite, I always lay the rug down first. Everything else just falls into place around it.
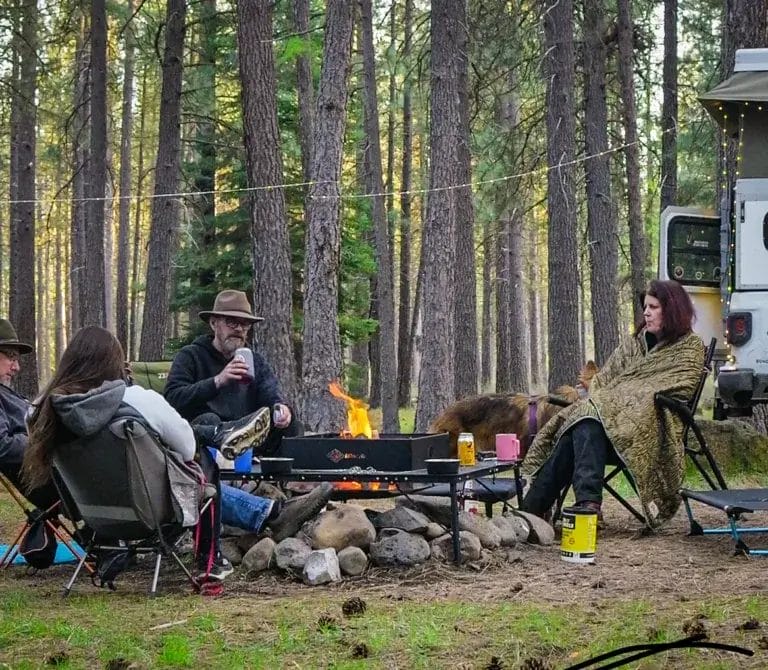
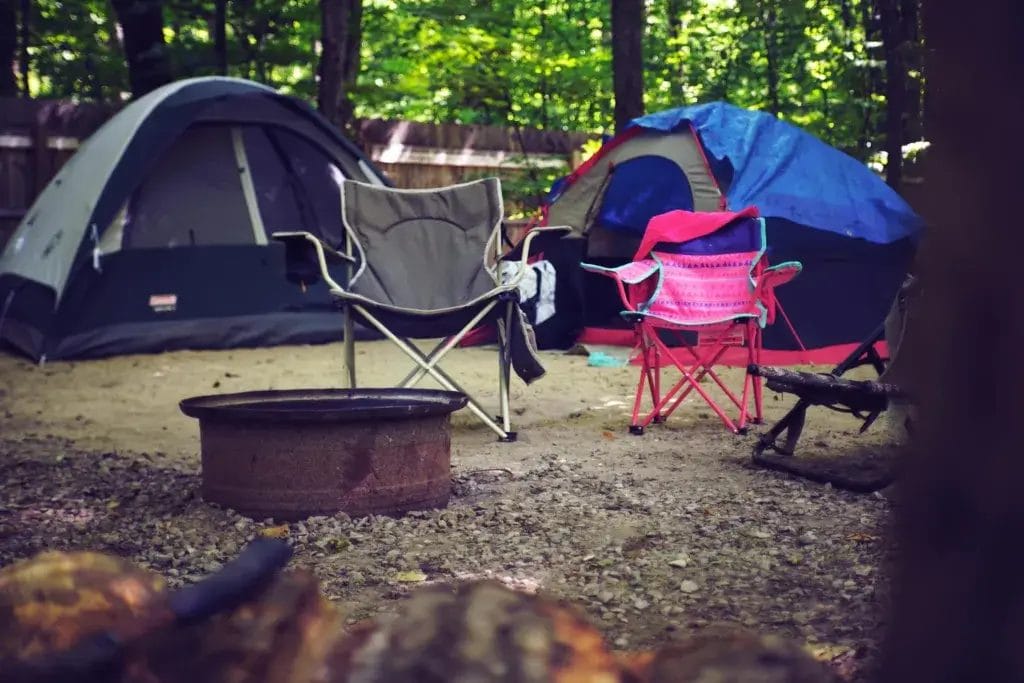
Arranging Camp Chairs and Social Spaces
Chair setup totally shapes the social feel at camp. A little thought goes a long way in making conversation flow naturally.
Circle Formation Benefits:
- Everyone can see each other easily
- Creates intimate conversation space
- Works well around fire rings
I space chairs about 4-5 feet apart. Too close feels cramped, but if they’re too far, talking gets awkward.
For campsite comfort, I mix up chair heights. A couple of regular camp chairs with a low beach chair or two keeps things interesting and comfy for everyone.
My Go-To Chair Setup:
- Two standard camp chairs facing each other
- One low beach chair for relaxed lounging
- Cooler or storage box as extra seating
I angle the chairs in just a bit. That way, people naturally face each other instead of staring off into the woods.
Storage matters, too. I pick camp chairs with cup holders and side pockets so drinks and snacks are always close, but the place doesn’t get cluttered.
Light Up the Night: Ambiance and Practical Lighting
Good lighting totally transforms a campsite. I’ve found that mixing decorative string lights with lanterns and headlamps strikes a nice balance between cozy and practical.
String Lights for a Magical Glow
String lights are my favorite way to add some magic. I drape solar-powered string lights between trees or around the tent for that fairy-tale feel.
Battery-powered LED string lights are flexible and waterproof, so I wrap them around poles or hang them from my canopy.
My favorite string light setups:
- Outline your tent entrance for easy navigation
- Create a border around your seating area
- Hang them overhead for dining ambiance
Solar lights charge during the day and flip on at dusk. No batteries to swap, no fuss. Just a little magic when the sun goes down.
I always toss in extra clips or zip ties. The wind can get sneaky, and chasing runaway lights at midnight is not my idea of fun.
Lanterns and Headlamps for Function and Style
Battery-powered lanterns are my go-to for practical, good-looking light. I set them on tables, hang them from hooks, or put them on the ground to light up paths.
Modern LED lanterns let you adjust the brightness. I use dim settings for a chill vibe and crank up the light for cooking or card games.
Essential lantern features I look for:
- Multiple brightness levels
- Long battery life (8+ hours)
- Weather-resistant design
- Easy carrying handle
Headlamps aren’t the coziest, but they’re super practical. I use mine for setting up camp, late-night bathroom runs, or reading in the tent.
The newer ones have red light modes. They don’t wreck your night vision and keep things mellow. Way better than blinding everyone with a bright white beam.
I keep lanterns on tables and clip headlamps to tent walls. That way, I’ve got ambient light and hands-free options when I need them.
Battery-Powered Lighting Solutions
Rechargeable batteries are a camping game-changer. I grabbed a solid battery pack and switched to USB-rechargeable lights, no more hunting for AAAs in the dark.
Power banks keep everything running for days. I can run string lights, lanterns, and headlamps without stressing about battery life.
My battery strategy:
- One main power bank (20,000+ mAh)
- USB-rechargeable lights only
- Solar panel for extended trips
- Backup battery pack just in case
Battery-powered tea lights give off a subtle glow with zero fire risk. I scatter them around the seating area, and they’ll flicker for up to 200 hours.
Crank-powered emergency lights are my last resort. When everything else fails, a few cranks give me enough light to get by. You never know when you’ll need it.
Keeping Warm, Snug, and Entertained

Staying comfortable on chilly nights is all about mastering warmth – safe fires, smart layers, and making the most of the darkness. The best camping memories happen when you’re actually cozy enough to enjoy the outdoors, not just shivering through it.
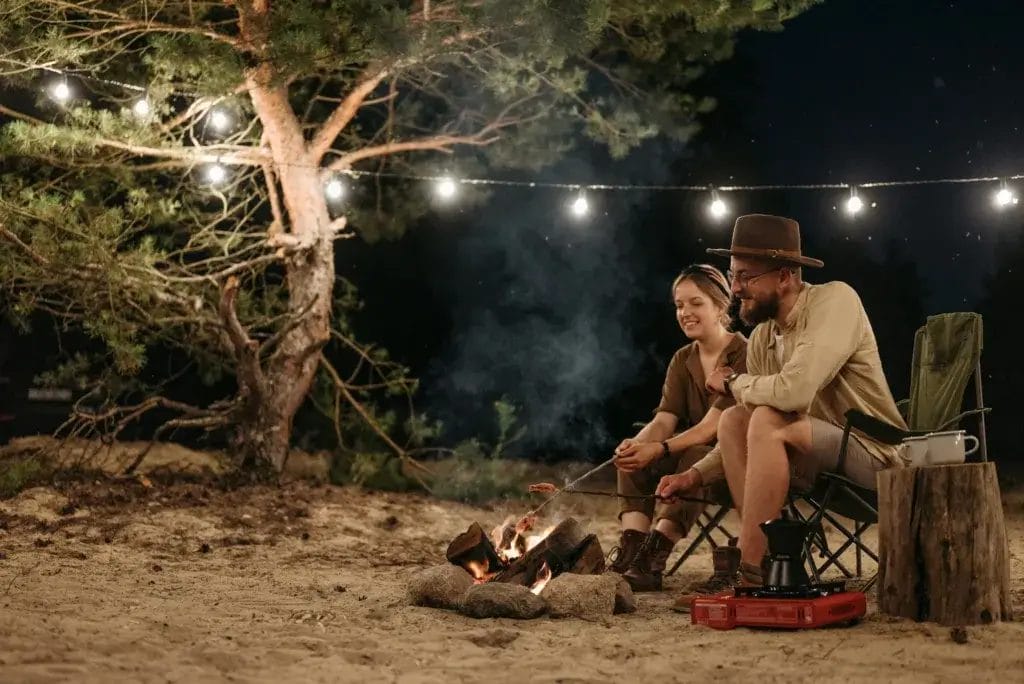
Campfire Comfort and Safety Tips
Gathering around a crackling campfire is tough to beat. I always clear a 10-foot circle around the pit, getting rid of dry leaves or branches before lighting up.
Essential Fire Safety Items:
- Water bucket or sand
- Shovel for stirring ashes
- Fire-resistant gloves
- First aid kit nearby
I stack my firewood upwind and at least 10 feet from the flames. Hardwoods like oak and maple burn longer and hotter, so I get more warmth out of less effort.
For the coziest setup, I arrange chairs in a semicircle. It feels more intimate and helps block the wind from one direction.
I never leave the fire unattended, not even for a quick bathroom run. At bedtime, I douse the ashes with water and stir until they’re cool to the touch. A portable fire pit makes cleanup safer and a lot easier.
Blankets, Hot Water Bottles, and Layering
Smart layering starts before I even crawl into my sleeping bag. I always pack extra blankets made from wool or fleece, since they keep warmth in even if they’re a bit damp.
Here’s my go-to warmth system:
- Base layer (moisture-wicking material)
- Insulating layer (fleece or down)
- Outer shell (wind and water resistant)
- Warm hat and wool socks
Hot water bottles are my secret sauce. I fill up a sturdy bottle with hot water from the camp stove, then slip it into my sleeping bag half an hour before bed.
For a touch of comfort, I bring a small throw blanket from home. It’s a little thing, but it makes the campsite feel more familiar and inviting.
I always toss in one more blanket than I think I’ll need. Sharing warm blankets around the campfire turns chilly nights into cozy, memorable moments.
Stargazing and Fun Nighttime Activities
Clear nights are some of the best parts of camping. I always download a stargazing app before my trip so I can spot constellations and planets.
Some of my favorite nighttime activities are:
- Ghost stories around the fire
- Card games by lantern light
- Hot cocoa making contests
- Night photography of the stars
I bring a red flashlight or headlamp to keep my night vision sharp while stargazing. Regular white lights mess with your eyes for a while, so the red light is a must.
Campfire storybooks add nostalgia and fun to the evening. Short stories keep everyone paying attention.
For the ultimate cozy vibe, I set up my hammock somewhere with a clear view of the sky. Lying back with a warm blanket and watching shooting stars is just unbeatable.
If the weather’s not great, I always have backup activities like travel-sized board games or a deck of cards. You never know when you’ll need them.
Frequently Asked Questions
I get tons of questions about making campsites cozy without blowing the budget. Folks ask about DIY tricks, tent decorating ideas, and easy ways to add a little luxury to their setup.
What are some budget-friendly tips for jazzing up my campsite?
I always start with stuff I already own. Old blankets and throw pillows work wonders for making a campsite feel comfy right away.
String lights are my favorite cheap hack. You can grab solar-powered ones for under $15, and they totally transform the vibe after dark.
Mason jars make great lanterns if you pop in a battery tea light. I also use them to show off wildflowers I find on hikes.
Thrift stores are little treasure chests for camping decor. I’ve scored vintage camp chairs, colorful tablecloths, and cozy throws for a few bucks.
Any genius DIY hacks for increasing campsite coziness?
One of my favorite tricks is making a wind screen with rope and a big tarp or shower curtain. It instantly creates a room-like feel around your hangout spot.
I always pack a small outdoor rug or a piece of astroturf. It really helps define your space and feels awesome under bare feet.
Pool noodles are way more useful than you’d think. I slice them open and slip them over tent guy-lines so nobody trips in the dark.
Creating comfortable seating areas is easy with foam cushions in waterproof covers. Perfect for those long campfire chats.
How can I decorate my tent to be both stylish and comfy?
I stick a small mirror on the tent wall with command strips. It makes the tent feel bigger and comes in handy for getting ready in the morning.
Mesh organizers help keep things tidy and add a splash of color. I pick ones that match my mood or the season.
Battery-powered fairy lights along the ceiling make the tent feel magical at night. Just double-check they’re made for indoor use so you don’t run into condensation issues.
Small battery fans with colorful blades are a game changer. They keep the air moving and add some fun to plain tent walls.
Got any tricks for making a permanent campsite feel like home?
Weather-resistant outdoor furniture is a must for long-term setups. I look for pieces that can handle rain and sun without too much fuss.
Personalizing your space with thoughtful touches is key. I hang up outdoor-safe photos in weatherproof frames for a little piece of home.
Container gardens let me have fresh herbs and flowers, even in the middle of nowhere. I like using big planters on wheels so I can move them around.
I set up different areas for each activity. There’s a reading nook, a cooking corner, and a fire pit zone for winding down at night.
Ideas to elevate my RV’s campsite vibe without breaking the bank?
Outdoor rugs are an instant upgrade for any RV site. I like to layer different sizes and patterns to break up the space visually.
Portable pergolas or pop-up canopies are great for expanding your living area. Add curtains or string lights and it feels super cozy.
I use outdoor curtains for privacy and to define spaces. Shower curtains are a cheap alternative and come in fun prints.
Bistro sets and café umbrellas make the whole site feel like a European getaway. Folding versions are perfect since they don’t take up much storage.
What are the top ways to add a splash of luxury to a camping experience?
Comfortable bedding makes a huge difference when it comes to luxury camping. I always bring real pillows and soft sheets, even if I’m just sleeping in a tent.
After a long day of hiking, a portable camp shower with a privacy tent feels amazing. It’s such a simple upgrade, but it can really help you feel refreshed.
I never skip packing a camp coffee setup that actually rivals my machine back home. Having good coffee out in the wild? That’s pure luxury, if you ask me.
Adding warm lighting with rechargeable lanterns and candles totally changes the vibe. Battery-operated candles are my go-to for cozy ambiance, and there’s zero stress about fire.
Portable speakers bring gentle background music and turn your campsite into a little outdoor living room. Just remember to keep the volume low so you don’t bother anyone nearby.