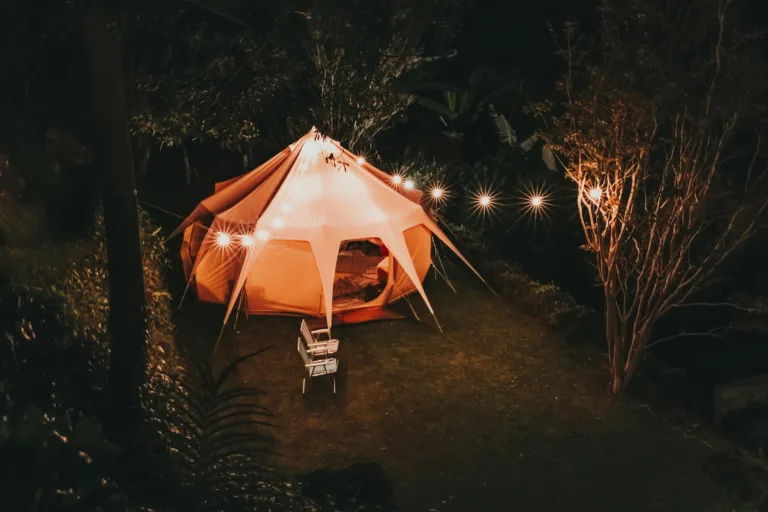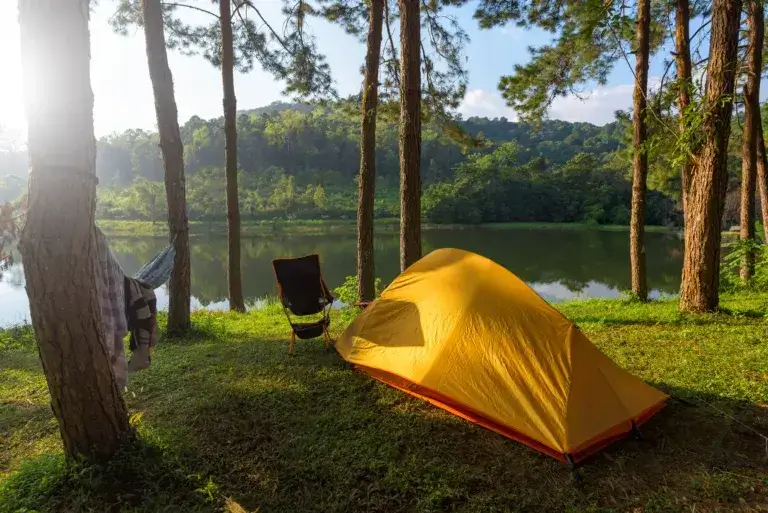

22 DIY Tent Glamping Ideas on a Budget for a Cozy Camping Setup
Making a tent feel cozy comes down to five cheap things: better bedding, soft lighting, a few containers to keep gear off the floor, one comfortable place to sit, and a rug or mat underfoot. Nearly all of it can come from a linen closet, a garage shelf, or a thrift store shelf. I have spent years sleeping in tents and living out of a vehicle full-time, and the setups I remember most fondly were never the expensive ones. They were the ones where I could find my flashlight in the dark and roll over without hitting cold nylon.
The fastest way to turn a plain tent into a glamping setup is to bring real bedding from home, add warm battery lighting, and give every item a place to live. That’s the whole formula. Everything else on this list is a variation on those three moves.
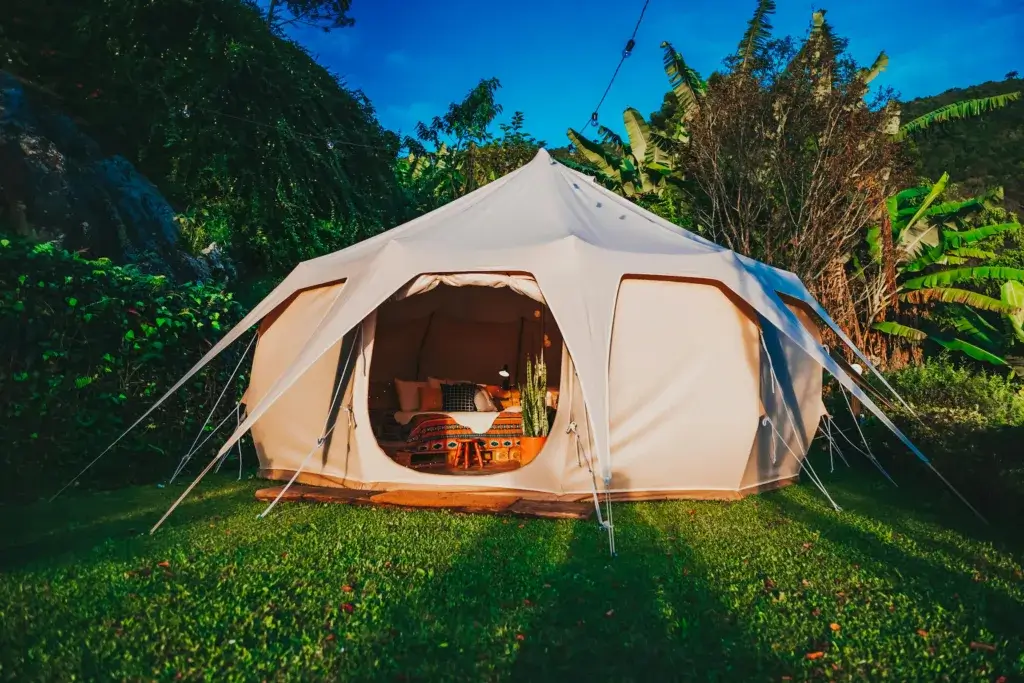
Below you’ll find 22 ideas sorted by what problem they solve, so you can skip straight to the ones that fit your tent, your budget, and the weather you’re heading into. Beginners can start with the free ideas at the bottom and work up.
Disclosure: This post contains affiliate links and might earn us a small commission if you make a purchase at absolutely no extra cost to you.
At a Glance
- Best low-cost comfort upgrade: Your own sheets, pillows, and a quilt from home. Costs nothing, changes everything.
- Best small-tent idea: Storage bins or wood crates that stack, so the floor stays clear and the tent feels bigger.
- Best car-camping idea: A thick self-inflating mattress. Heavy for backpacking, perfect when the car is 20 feet away.
- Best cold-evening idea: Layered blankets over a foam pad, plus a heavy towel or curtain hung across the tent door.
- Best organization idea: A folding side table by the head of the bed for water, headlamp, and phone.
- Best no-purchase idea: A tarp strung over the tent for shade and rain protection using rope you already own.
Planning Table
| Upgrade | Best for | Use what you own first | Optional purchase |
|---|---|---|---|
| Real bedding | Every trip | Sheets, quilts, pillows from your bed | Fitted camp sheet set |
| Sleep pad or mattress | Car camping | Foam yoga mat, couch cushions | Self-inflating 4″ pad |
| Warm lighting | Evenings | Phone flashlight in a water jug | Battery string lights, LED lantern |
| Floor covering | Cold or damp ground | Bath mat, old rug, yoga mat | Indoor/outdoor rug |
| Storage | Small tents | Laundry baskets, tote bags | Stackable bins, wood crates |
| Shade | Hot or rainy days | Old tarp and paracord | Lightweight camp canopy |
| Seating | Long evenings | Cushions from patio furniture | Padded folding camp chair |
| Bug control | Summer | Screened tent doors, long sleeves | Citronella candles, coils |
Make Your Tent More Comfortable
1) Choose a roomy, stand-up-height tent for maximum comfort and space.

Headroom does more for tent comfort than any decoration you can buy. Once you can stand upright, changing clothes stops being a wrestling match and the tent starts feeling like a small room.
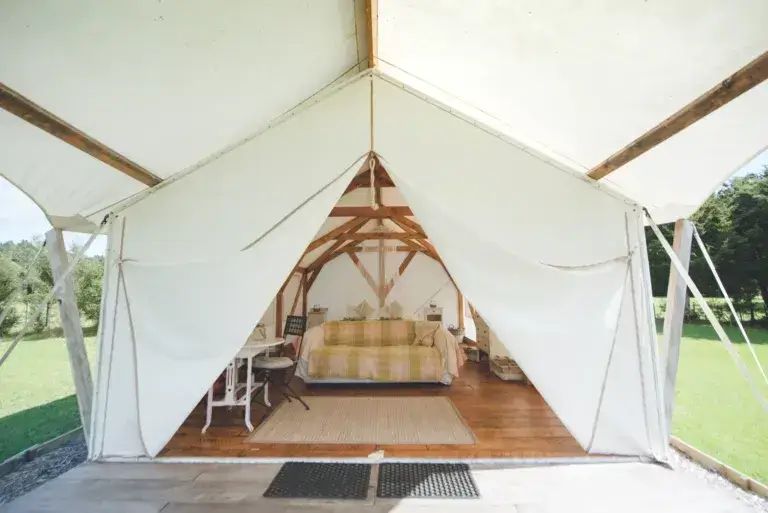
Cabin-style tents with near-vertical walls are the ones to look for. A peak height around 72 to 78 inches across most of the floor is the threshold where standing feels natural. Dome tents often list a tall center height, but the walls slope away fast, so usable space shrinks quickly. Canvas bell tents and safari tents give the most dramatic glamping look, though they weigh a lot and cost more than most beginners want to spend on a first setup.
Inflatable tents are worth a look if setup speed matters. Air-beam tents pitch in about five minutes with a hand pump and skip the pole-threading step entirely. I’ve watched a first-time camper get one up alone while a family of four was still sorting poles.
Packing note: A tall family tent takes up a whole trunk corner. If you’re driving a small car, measure the packed length before you commit. For more options, our roundups of inflatable tents for camping and the best tents for summer campingcover sizes that fit different vehicles.

This inflatable tent is a breeze to set up in just 5 minutes with the included pump and sturdy air columns, making it much easier than traditional pole tents. Crafted from high-density, waterproof, and UV-resistant 300D Oxford cloth with durable TPU air columns, it offers reliable protection against the elements. With excellent ventilation from dual doors and four mesh windows, plus a spacious interior that comfortably fits four people, this tent is perfect for family camping year-round. Enjoy peace of mind with a 12-month warranty and dedicated after-sales support.
.
Use your own cozy sheets and blankets from home to add that personal touch.

Bringing bedding from your own bed is the single cheapest glamping upgrade there is, and it costs exactly nothing. Sleeping bags trap you in a nylon tube; sheets and a quilt let you move the way you do at home.
Pack a fitted sheet sized to your pad or mattress, a flat sheet, and whatever quilt or comforter you already sleep under. Add two pillows per person, real ones from the couch or closet. The smell of your own laundry detergent in a tent does something odd and lovely for how quickly you fall asleep.
The trade-off is bulk. A comforter eats more space than a sleeping bag, so this idea works best for car camping and backyard nights. Roll everything into a large duffel or a laundry bag instead of stuffing it loose in the trunk. That keeps it dry and gives you something to sit on at camp.
Setup note: Make the bed the moment the tent is up, before anything else goes inside. Making a bed around scattered gear at 9 p.m. with a headlamp is miserable. Our guide to camping bed ideas walks through a few layouts that work in tight tents.
3) Invest in a quality self-inflating mattress for a comfy night’s sleep.

A self-inflating pad is the upgrade most people notice on the very first night. Open the valve, walk away, and foam inside pulls in air until the pad is thick and firm. Two or three breaths at the end tops it off.
Look for something around 3 to 4 inches thick if you’re car camping. That depth keeps hips and shoulders off the ground, which matters a lot for side sleepers. Quiet, brushed fabric is worth paying for. Crinkly pads wake up everyone in the tent every time somebody turns over.
Self-inflating pads also beat a plain air mattress in cold weather. Air alone conducts cold straight up from the ground, while the foam core slows that down. If you already own an air mattress, put a foam pad or a folded blanket underneath it and you’ll feel the difference. A mattress topper from a spare bed works too, though it soaks up moisture fast, so keep it off bare ground.
Packing note: Store it unrolled with the valve open at home. Compressed foam loses loft over the years.

Experience ultimate comfort on your next camping trip with this extra thick 4” foam camping mattress, designed to keep you off the ground and ensure a quiet, restful night. The self-inflating pad features a unique blend of high-resilience foam and air for fully adjustable support, while the noise-free, skin-friendly fabric guarantees undisturbed sleep. With a durable, easy-to-inflate design, all-season insulation, and a multifunctional backpack bag for easy transport and inflation, this mattress is perfect for family camping, road trips, or hosting guests at home. Enjoy peace of mind with a customer satisfaction guarantee and built-in instructions for hassle-free setup.
4) Add string twinkle lights inside your tent to create a magical glow.

NWarm string lights change a tent’s whole mood faster than anything else you can hang. Overhead lanterns throw hard shadows; a strand of small warm-white bulbs along the ceiling seam gives soft, even light you can read by.
Battery-powered strands are the right choice for tents. No cord running out the door, no fire risk, and most run 20 to 40 hours on three AAs. Solar string lights work if you can leave the panel in direct sun all afternoon, though cloudy days will leave you short. Copper wire fairy lights are the lightest and cheapest option, and they weigh almost nothing in a pack.
Clip them to the ceiling loops most tents already have, or use small binder clips on the seams. I’ve also draped a strand inside a clear water jug to make a lantern that lights a whole four-person tent.
Setup note: Pack lights in a small dry bag with spare batteries. Loose strands tangle into a knot that takes ten minutes to fix in the dark. Our camping tent lighting ideas guide has more layouts worth copying.
5) Bring along a folding side table to keep snacks and gear handy.

A small folding table beside your bed solves the most annoying part of tent life: everything ends up on the floor. Water bottle, headlamp, phone, book, glasses. Give them a surface and you stop crawling around at midnight.
Aluminum roll-top tables fold to the size of a laptop bag and weigh three to five pounds. Some have cup holders molded into the frame, which is a small thing that saves a lot of spilled coffee. A plastic milk crate turned upside down does the same job for free if you’d rather not buy anything yet.
For cooking, a full-size folding table outside the tent gives you room to prep. Adjustable feet help on the uneven ground you get at most campsites.
Packing note: Slide the folded table flat against one side of the trunk. It becomes a divider that keeps everything else from sliding around on the drive.

Upgrade your outdoor setup with the spacious and lightweight KingCamp folding camping table, featuring a seamless aluminum surface for stability and easy cleaning. Its durable, corrosion-resistant frame folds compactly into a convenient carrying bag, making transport and storage effortless. With reinforced support, adjustable feet for uneven ground, and versatile use for camping, picnics, or backyard gatherings, this table is built for comfort, durability, and all your outdoor adventures.
6) Swap sleeping bags for thick, warm blankets for extra coziness.

Layered blankets sleep warmer than most people expect, and they let you adjust temperature through the night. Peel one off at 2 a.m. when the tent warms up, pull it back on before dawn.
Wool holds warmth even when damp, which makes it the best single blanket to bring. Fleece is lighter and dries fast. A military surplus wool blanket costs around 25 dollars used and lasts decades. Stack two or three cozy blankets over a foam pad and the setup rivals a sleeping bag rated well below the temperatures you’ll see on a summer weekend.
The catch is bulk and weight. Three blankets fill a large tote. This is a car-camping and backyard idea, plain and simple.
Setup note: Put one blanket under you and the rest on top. Compressed insulation under your body does almost nothing, so the bottom layer’s job is padding, not warmth. For colder trips, our cozy fall camping essentials list covers what to add.
7) Consider foam sleeping pads for lightweight, cushioned support.
Closed-cell foam pads are the most reliable sleeping surface you can own because there is nothing to puncture or leak. They cost 20 to 45 dollars, weigh about a pound, and last for years of hard use.
The comfort is modest on its own. Half an inch of foam takes the edge off roots and gravel without feeling plush. Where foam earns its keep is insulation and backup. Slide one under an air mattress or self-inflating pad and you gain real warmth from the ground plus insurance if the air pad springs a leak.
They strap to the outside of a pack, shrug off mud, and dry in minutes. I keep one in my vehicle year round. It has been a sit pad at picnic tables, a kneeling mat for tire changes, and a bed for unplanned guests.
Packing note: Accordion-fold pads store flatter than rolled ones and slide behind a seat easily. For winter trips, check our picks for the best sleeping pads for winter camping.
8) Set up a tarp or canopy above your tent to create a shaded outdoor lounge.

A tarp strung above your tent adds a shaded outdoor room for the cost of nothing if you already own one. On hot afternoons a tent becomes an oven by 10 a.m., and shade is what keeps you outside enjoying the day.
Use a tarp with grommets in the corners, four lengths of paracord, and either trees or two adjustable poles. Pitch it with a slight slope so rain runs off one side instead of pooling in the middle. A pool of water on a flat tarp gets heavy fast and will pull your stakes loose.
Under it, set up chairs, the folding table, and a hammock if there are two solid trees at the right distance. That covered outdoor lounge becomes where you eat, play cards, and wait out afternoon rain.
Setup note: Pitch the tarp before the tent when weather looks unsettled. You’ll have a dry spot to work under while you sort out poles.
Add Cozy Lighting and Atmosphere
9) Decorate with a colorful rug inside and outside the tent to add warmth.

A rug on the tent floor gives you warm footing and keeps dirt from tracking through the whole space. Bare tent floors are cold and slick in the morning, and grit works its way into everything you own.
Indoor/outdoor polypropylene rugs are the practical choice because they shake clean, dry fast, and don’t mildew. A 4×6 foot rug covers the living area of most family tents. Inside, layer a smaller rug or a bath mat next to the bed so your feet land on something soft.
Put a second mat right at the door as a boot-removal zone. That one habit cuts the sand and pine needles in a tent by more than half.
Packing note: Roll rugs and slide them in the trunk last so they come out first. You want the floor down before anything else goes in. More layout ideas live in our guide to how to decorate a camping tent.
10) Hang lightweight, sheer curtains to give your tent a dreamy vibe.

Sheer fabric panels soften the light coming through the tent walls and add a bit of privacy at the door. Two thrift-store curtains and some clips will do it.
Bungee cords make the easiest hanging system. Run one across the inside of the tent between two ceiling loops and hang curtains from it with shower rings or clothespins. Safety pins and zip ties work too, though pins can leave small holes in fine mesh, so clip to structural loops instead of the fabric itself.
Sheer panels filter harsh midday sun without blocking airflow. In the evening, a curtain across the door lets you change clothes with the flaps open for breeze.
Setup note: Light fabric catches wind. Pin the bottom corners to something or the curtain will flap all night. For a fuller look, our boho camping tent guide covers fabrics and colors that hold up outdoors.
11) Use battery-operated lanterns for soft, safe lighting around your site.

Battery and rechargeable lanterns are the safest main light source for a campsite because nothing burns. Flip a switch and you have steady light, with no fuel to carry and no flame near nylon.
Pick LED camping lanterns with a dimmer. Full brightness is for cooking and finding lost gear; the lowest setting is what you want for sitting around after dark. Warm-toned bulbs attract fewer bugs than cool white ones, which is a detail worth checking on the box. USB rechargeable models pair well with a power bank you’re already carrying for phones.
Hang one from the tent ceiling loop, set one on the table, and clip a small one near the door. Homemade tin can lanterns with punched patterns throw nice shadows around a picnic table if you want a craft project the kids can help with.
Packing note: Bring one spare set of batteries per lantern and store them separately so nothing drains in the bag. Our glamping lighting ideas post covers layering light across a whole site.
12) Pack a portable camping stove to make easy, tasty hot meals outdoors.

A small camp stove is what separates a weekend of sandwiches from real meals. Hot coffee at 6 a.m. and soup after a cold hike are worth the 40 to 70 dollars a basic two-burner or canister stove costs.
Single-burner canister stoves screw onto a fuel can, boil water in three or four minutes, and pack into a stuff sack. Two-burner propane stoves handle a pan and a pot at once, which matters when you’re feeding a family. Either one runs fine on a folding table.
Simple meals work best: eggs and potatoes, oatmeal, one-pot pasta, quesadillas. Pre-chop vegetables at home and store them in zip bags so camp cooking is assembly instead of prep.
Setup note: Cook outside the tent, always, and set the stove on a level surface away from the door. For meal ideas, see our list of the best camping food to bring.
Create a More Organized Tent Setup
13) Create a mini outdoor kitchen area with foldable tables and storage bins.

Grouping all cooking gear in one spot cuts meal prep time roughly in half. A camp kitchen is just a table, two bins, and a rule that everything goes back where it came from.
Use one bin for hardware: stove, fuel, pots, utensils, sponge, trash bags. Use a second for food: dry goods, spices, coffee. Clear bins let you see what’s inside without unpacking. Stackable ones with latching lids keep raccoons out overnight, which is not a theoretical concern at most campgrounds.
A collapsible wash basin and a five-gallon water jug with a spigot cover dishes. Some folding camp kitchen tables include a sink and side shelves if you want the full setup, though bins on a plain table do the same work for less.
Packing note: Load the food bin last so it’s on top when you arrive. Hungry people at camp will not wait patiently while you dig..
14) Bring foldable camping chairs with cushions to relax in style.

A padded camp chair is the piece of gear people underestimate most. You’ll spend more waking hours in it than you spend in the tent, so comfort here pays off every evening.
Look for chairs with a higher back for neck support, a cup holder, and a weight rating that comfortably exceeds who’s using it. Standard folding chairs run 20 to 40 dollars; padded ones with a detachable cushion sit around 50 to 70. The cushion matters most on cold nights, when a mesh seat pulls heat right out of you.
Two chairs plus a small table under a tarp makes a real outdoor living room. Add floor cushions if you’d rather sit low around a fire ring.
Setup note: Camp chairs are the bulkiest soft item you’ll carry. Two fit fine in most trunks; four means someone rides with a chair on their lap. Our guide on how to choose a camping chair breaks down the frame types.

2 Pack - Portable Heavy Duty Folding Chairs for Outside Camping Hiking Fishing
15) String up bunting or flags for a festive, personal festival feel.

Bunting is the cheapest way to make a campsite look intentional instead of thrown together. A strand of triangle flags between two tent poles reads as a party from across the field.
Store-bought fabric bunting runs 10 to 20 dollars. Homemade is better and nearly free: cut triangles from old shirts or fabric scraps, fold the top edge over a length of bias tape or ribbon, and sew or hot-glue it down. No hemming needed on the edges if you use pinking shears. Kids can draw names or doodles on the flags with fabric markers.
Floral garlands, either fake or made from wildflowers, work the same way and pack flatter. For a glamping party, string them along the tent ridgeline and over the doorway.
Packing note: Wind bunting around a piece of cardboard so it doesn’t tangle. It takes ten seconds and saves a lot of swearing at setup.
16) Include a portable Bluetooth speaker for your favorite chill tunes.

A small waterproof speaker adds a lot to camp evenings and costs less than you’d think. Solid options start around 30 dollars, with IPX7-rated models handling rain and spilled drinks without complaint.
Battery life is the spec to check. Aim for 12 hours or more so a weekend doesn’t need a recharge. If you’re camping without power, a power bank covers the speaker and your phone both. Speakers that clip to a tent loop or a chair keep sound off the ground, where it gets muffled.
Keep the volume low. Sound carries much farther across a campground than it feels like it does, and most parks have quiet hours starting at 10 p.m.
Setup note: Download playlists before you leave. Cell service at campgrounds is unreliable, and streaming burns battery fast. Our things to do while camping at night post has more evening ideas.
17) Add lots of throw pillows for lounging and freshening up your tent space.

Throw pillows turn a sleeping space into a lounging space. Three or four soft furnishings piled against the tent wall give you a backrest for reading, which a bare tent floor can’t offer.
Mix sizes: two standard bed pillows for sleeping, a couple of decorative throw pillows for propping, and one long body pillow if you sleep on your side. Floor cushions and beanbags work well in tall tents with room to spare. An inflatable sofa packs down small and gives kids a spot that isn’t the bed. Stuffed animals earn their space if a child sleeps better with one.
Pillows are bulky and weigh little, so they’re free padding for the trunk. Stuff them into gaps around hard gear on the drive.
Setup note: Bring one pillowcase extra. It doubles as a laundry bag or a stuff sack for clothes, which then becomes a camp pillow.
18) Use natural materials like wood crates for storage that feel rustic and cute.

Wooden crates give you storage that looks good enough to leave out. Unfinished pine crates run 12 to 18 dollars each at craft stores and stack into shelves without any hardware.
Stack two on their sides and you have a nightstand with a shelf underneath. Line them with a scrap of burlap or an old dish towel and they hold folded clothes without snags. Stain or paint them once at home and they’ll last years of trips.
They hold firewood, boots, books, and lanterns. Unlike plastic bins, they breathe, so damp towels dry instead of souring. The downside is weight and no lid, so anything that must stay dry needs a bin instead.
Packing note: Crates nest poorly and eat trunk space. Two is the sweet spot for a weekend. When the trip ends, they go straight to a closet or entryway at home, which is why I don’t mind hauling them.
Improve a Tent for Car Camping
19) Keep a small plant or flowers in a sturdy pot to brighten your space.

A jar of flowers on the camp table is the smallest touch on this list and the one guests comment on most. It signals that somebody cared about the space.
Use a mason jar or a squat pot with a wide base so it survives being bumped. Wildflowers picked on a walk work where picking is allowed; check park rules first, since many protected areas prohibit it. Grocery-store daisies or sunflowers travel fine wrapped in a damp paper towel inside a zip bag. Lavender is my favorite for camp because the scent lingers on your hands and near the tent door.
A small succulent in a heavy pot rides along without water for a weekend and goes back on the windowsill at home.
Packing note: Fill the jar with water at camp, never before. A jar of water in a moving car is a wet sleeping bag waiting to happen. Set it in a cup holder or wedge it in a bin during the drive.
20) Plan simple but delicious finger foods that don’t need much cleanup.

Finger foods cut dish washing to almost nothing, which is the real cost of camp meals. Water for washing is limited, and nobody wants to scrub pans by headlamp.
Build a spread from things that need no cooking: hard cheeses, crackers, cured meats, hard-boiled eggs made at home, carrots, snap peas, cherry tomatoes, grapes, hummus, and guacamole. A charcuterie board arranged on a cutting board takes five minutes and feels like a treat. Granola bars and jerky cover snacks between meals. A s’mores kit in one bag, with graham crackers, chocolate, and marshmallows, keeps dessert from becoming a search party.
Pack it all in a picnic basket or a single cooler bin so one trip to the car covers the meal.
Setup note: Bring a small cutting board and one sharp knife. Everything else can be served straight from the container. Our list of camping snacks has more no-cook options.
Keep a Glamping Tent Comfortable in Cooler Weather
21) Set up a cozy reading nook with a blanket, books, and cushions.

A reading corner takes about two minutes to build and gives the tent a second purpose beyond sleeping. Pile cushions against one wall, drape a soft blanket over them, and set two or three books within reach.
Add a clip-on book light or a small battery lamp at head height so you’re not holding a flashlight. A crate on its side beside the nook holds a mug, glasses, and whatever you’re reading. On rainy afternoons this corner is the difference between waiting out weather and enjoying it.
Set the nook away from the door so foot traffic doesn’t run through it. In smaller tents, build it on top of the bed and unbuild it at night.
Setup note: Paperbacks over hardcovers, and an e-reader over both if you’re tight on space. Books soak up humidity in a tent, so keep them in a zip bag when you’re not reading.
22) Use mosquito-repellent candles or coils to keep bugs away comfortably.

Citronella candles and mosquito coils buy you comfortable evenings outside the tent, which is where you’ll want to be. They work best in still air within a few feet of where you’re sitting.
Light coils about 30 minutes before dusk, when mosquitoes start moving. Place two on opposite sides of the seating area rather than one in the middle. Citronella candles in wide jars resist wind better than tapers and add warm light to the table.
Neither replaces repellent on skin. Pair them with a DEET or picaridin bug spray for anything more than mild bug pressure. Keep all flames outside the tent and well away from fabric.
Packing note: Store coils in a rigid container. They snap in half in a soft bag every single time, and a broken coil burns unevenly.
DIY Tent Glamping Ideas That Cost Little or Nothing
Setting The Right Atmosphere
Atmosphere at a campsite comes from two decisions: where you pitch and how you light it after dark. Both are free, and both do more for the feel of a site than any purchase.
Choosing Your Glamping Location
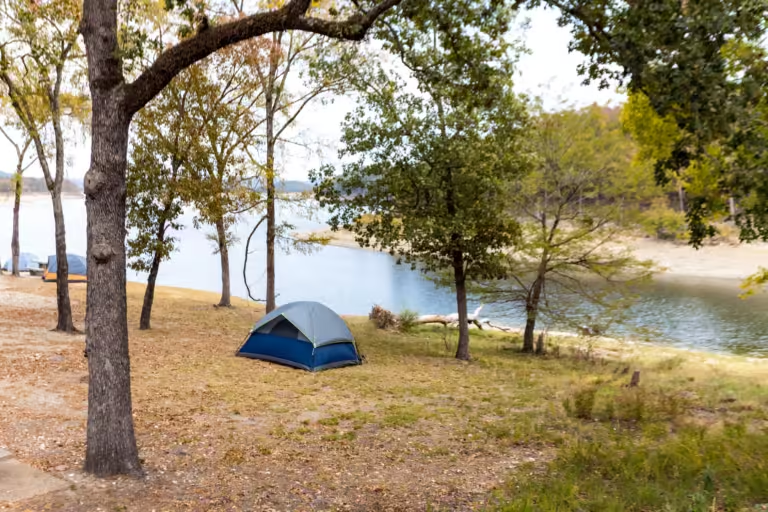
Flat ground is the first thing to look for, and it’s worth walking a site twice to find it. Lie down where the tent will go before you unpack. You’ll find the slope, the rock, and the root you would otherwise discover at midnight.
Partial shade from big trees keeps a tent 10 to 15 degrees cooler through the afternoon. Morning sun on the east side of the tent wakes you gently and dries condensation off the fly. A breeze from any direction keeps bugs moving and the tent fresh.
Pitch at least 200 feet from water where regulations require it, and keep a buffer between your tent and dense brush so wildlife has a path around you instead of through camp. Being near a stream gives you background noise that covers campground sounds, though low spots collect cold air and dew overnight.
For a glamping site at home, backyard glamping skips all of this. Pick the flattest patch of lawn, avoid the sprinkler zone, and you’re done. Our tips for backyard glamping cover the rest.
Lighting Tips For A Cozy Vibe
Layered ambient lighting beats one bright lamp every time. Aim for three levels: a dim overall glow, a task light where you cook or read, and small accents along paths.
Warm-white LED fairy lights handle the glow. A dimmable lantern on the table covers task light. Solar pathway lights pushed into the ground mark tent guy lines and the route to the bathroom so nobody trips at 2 a.m. Flameless candles on stumps or a firepit ledge add flicker without fire risk, and battery salt lamps or mini neon signs give a backyard setup personality.
The campfire is still the centerpiece where fires are allowed. Check restrictions before you plan around one, since burn bans are common in late summer. When fires are banned, an outdoor movie screen made from a white sheet and a small projector fills the same role, and it runs off a power bank.
Keep bright lights off after dark if you want real stargazing. Give your eyes 20 minutes without white light and the sky opens up. That’s also the right window for outdoor games that don’t need much light, like flashlight tag.
Comfort And Style On Any Budget
Glamping on a budget works because the expensive-looking parts are textiles and light, and both come cheap. A tent with a rug, layered bedding, warm bulbs, and one comfortable chair reads as luxury whether the gear cost 80 dollars or 800.
Upcycling Decor For A Personal Touch
Shop your own house first. Spare throw pillows, a folded quilt, a runner rug from the hallway, and a stack of mismatched blankets cover most glamping decor without spending a cent. Layering textures is what makes it look deliberate: a knit throw over a smooth sheet, a woven rug under a canvas chair.
Mason jars are the workhorse. Drop in a tealight or a coil of fairy lights and you have a lantern; use them for utensils, flowers, or drinks. An old step stool becomes a side table. A wooden ladder leaned against a tree holds towels and hanging lanterns.
Thrift stores are where budget glamping gets fun. Rugs, curtains, blankets, and picnic baskets show up for a few dollars each, and you won’t care if they come home muddy. Save the sewing project for bunting from fabric scraps, which takes an evening and personalizes the whole site.
More ideas in our creating a cozy campsite guide and our diy glamping ideas roundup.
Weatherproofing Your DIY Tent
Start under the tent. A tarp or footprint cut slightly smaller than the tent floor blocks ground moisture and protects the floor fabric. Tuck the edges under so rain doesn’t run onto the tarp and pool beneath you.
Inside, a rug and a foam pad add insulation between you and cold ground. Hang a heavy towel or thick curtain across the door at night to cut drafts. Large plastic totes with lids keep shoes, packs, and electronics dry when weather turns, and they double as seats.
Heat is the other half of the problem. Battery-powered portable fans clipped to a ceiling loop move air through a stuffy tent and cost 15 to 30 dollars. A portable fan aimed at the door pushes hot air out faster than opening windows alone. Roll the rainfly partway back on clear nights for ventilation and stargazing, and keep it staked so you can drop it fast if clouds move in.
For cold trips, our winter glamping essentials guide covers what changes when temperatures drop below freezing.
Wrapping Up
A comfortable tent comes from a short list: real bedding, a thick pad under it, warm battery lighting, bins that keep the floor clear, a rug underfoot, and one chair you’re happy to sit in for three hours. Start with the bedding and lighting, since both cost close to nothing and change the most.
Skip the extras that look good in photos and take up trunk space you need. Decorative pieces earn their spot when they also do a job, like crates that store gear or a rug that keeps grit out. Build the setup over a few trips, keep what you reach for, and leave the rest at home.
Frequently Asked Questions
How can I make my tent feel like a luxury suite?
Bring real bedding, then add light. A fitted sheet, a quilt from your own bed, and two proper pillows over a 3 to 4 inch self-inflating pad handles comfort. Warm-white string lights along the ceiling and a dimmable lantern on a small table handle the rest. A rug on the floor finishes it.
What essentials should I pack for a glamorous camping setup?
Your camping checklist should cover a thick sleeping pad, home bedding, two pillows per person, a battery lantern, string lights, an indoor/outdoor rug, one padded camp chair per person, a folding side table, and two lidded bins for gear and food. Add a tarp for shade and a stove for hot meals. That’s the full list of glamping essentials for a first setup. Our tent camping must haves post covers the basic camping gear underneath it.
How do I decorate a tent without overpacking?
Give every decorative item a second job. A rug insulates the floor, crates store gear, pillows pad the trunk on the drive, mason jars hold both flowers and utensils. Anything purely ornamental gets one small allowance, like a strand of bunting that packs into a fist. Textiles beat objects because they compress.
What are easy tent glamping ideas for adults?
Set up a reading corner with cushions and a clip light, string lights across the ceiling, put a real mattress pad under proper bedding, and build a shaded lounge under a tarp with two chairs and a table. Add citronella candles for the evening. All five take under an hour total.
How do I make a small tent feel bigger?
Get everything off the floor. Stackable bins along one wall, a hanging gear loft or mesh pocket organizer overhead, and shoes in a bin outside the door free up more space than you’d expect. Keep the bed at one end and leave a clear walking lane. Light-colored bedding and a bright rug make the space read larger than dark fabrics do.
What can I use instead of an air mattress?
A self-inflating foam pad is the best swap because it insulates better and won’t deflate overnight. A closed-cell foam pad under a memory foam mattress topper works too, though the topper absorbs moisture. Two closed-cell pads stacked give decent padding for under 60 dollars. A folding camp cot keeps you off the ground entirely and stores gear underneath.