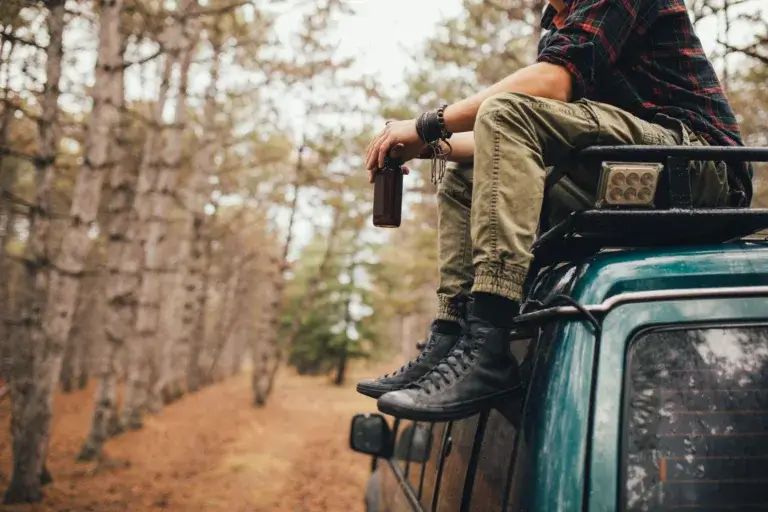
Premade Camping Meal Ideas That Will Make Your Outdoor Adventure Deliciously Simple
Planning a camping trip is always exciting, but meals? Honestly, they can be a headache. There’s nothing worse than being hungry after a long day outside and realizing you have to cook everything from scratch at camp.
We’ve all been there—completely wiped out from hiking or swimming, wishing we’d thought ahead about food.
Make-ahead camping meals are total game-changers. They give you more time to enjoy nature and less time stuck at the camp kitchen.
We love how prepping meals before your trip simplifies everything and cuts down on cleanup. Whether it’s a quick weekend or a longer adventure, having tasty, ready-to-go food just makes camping better for everyone.
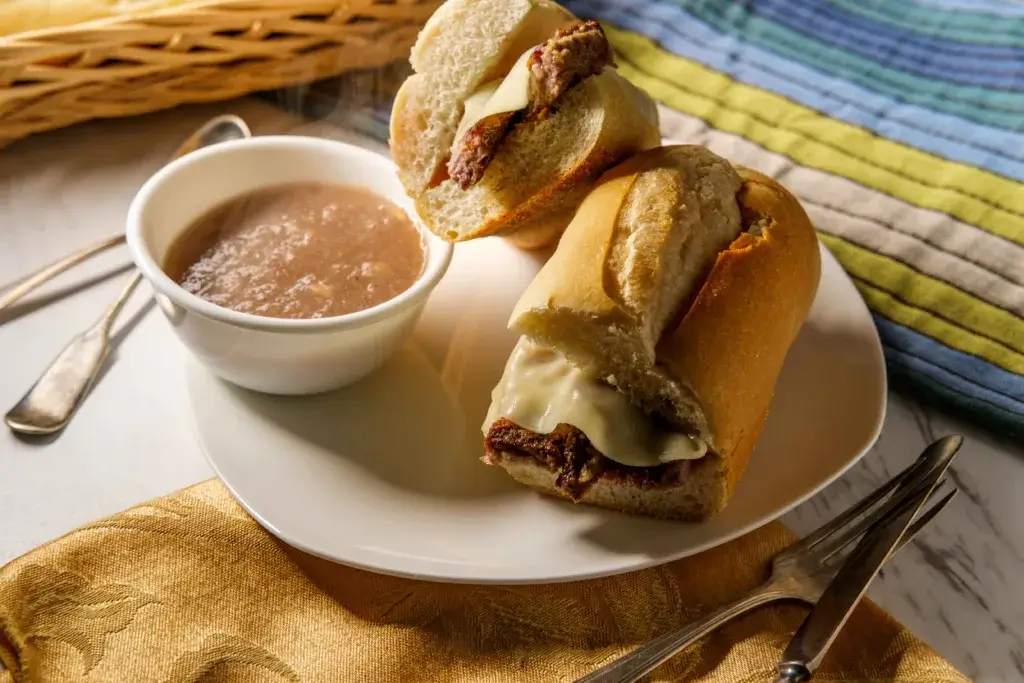
1) Chicken Tortilla Stew

Chicken Tortilla Stew is one of our go-to make-ahead camping meals. We love how easy it is to prep before leaving and how satisfying it tastes after a day outside.
This hearty stew can be assembled ahead in a gallon-sized ziplock bag and frozen until you’re ready to toss it in the cooler. It’s a perfect one-pot dinner that saves so much time at camp.
We usually mix chicken, black beans, corn, diced tomatoes, and taco seasoning. You can dial up the spice if your crew likes it hot—some of us can’t resist tossing in jalapeños.
At camp, we just dump it all into a pot and heat it up on the stove. If it’s thawed, it takes about 20-30 minutes; frozen, maybe a bit longer.
Crumble some tortilla chips on top, sprinkle shredded cheese, add a dollop of sour cream—now it’s real comfort food. This one is especially perfect for chilly camping nights when you want something warm and filling.
Leftovers? They reheat beautifully for another meal. Sometimes we even make it in our Instant Pot if the campsite has power.
Here’s our favorite recipe!
Premade Chicken Tortilla Stew Recipe
Ingredients:
- 2 cups cooked chicken, shredded (rotisserie chicken works great)
- 1 can (15 oz) black beans, drained and rinsed
- 1 can (15 oz) corn, drained
- 1 can (15 oz) diced tomatoes with green chilies
- 1 can (15 oz) tomato sauce
- 1 small onion, finely chopped
- 2 cloves garlic, minced
- 4 cups chicken broth
- 1 tsp ground cumin
- 1 tsp chili powder
- 1 tsp paprika
- 1 tsp salt (adjust to taste)
- 1/2 tsp black pepper
- 1 tbsp olive oil
- Tortilla chips, for serving
- Shredded cheese, for garnish
- Fresh cilantro, chopped, for garnish
- Lime wedges, for serving
Instructions:
- Prep Your Ingredients:
- If you’re using a rotisserie chicken, shred the meat and set it aside.
- Drain and rinse the black beans and corn.
- Finely chop the onion and mince the garlic.
- Cook the Base:
- In a large pot, heat the olive oil over medium heat.
- Add the chopped onion and garlic, and sauté until the onion becomes translucent (about 3-4 minutes).
- Combine Ingredients:
- Add the shredded chicken, black beans, corn, diced tomatoes with green chilies, tomato sauce, and chicken broth to the pot.
- Stir in the cumin, chili powder, paprika, salt, and black pepper.
- Simmer:
- Bring the mixture to a boil, then reduce the heat and let it simmer for about 20 minutes, allowing all the flavors to meld together.
- Pack for Camping:
- Let the stew cool completely.
- Transfer it to a large, airtight container or several smaller containers for easier packing.
- Store in a cooler with plenty of ice packs to keep it fresh.
- Reheat at the Campsite:
- When you’re ready to eat, simply reheat the stew over a campfire or portable stove until it’s hot and bubbly.
- Serve:
- Ladle the stew into bowls.
- Top with crushed tortilla chips, shredded cheese, and fresh cilantro.
- Serve with lime wedges on the side for an extra burst of flavor.
Tips for Camping:
- Pre-Chop and Measure: Pre-chop all your vegetables and measure out your spices before you leave for your trip to save time and effort at the campsite.
- Use a Dutch Oven: If you have a Dutch oven, it’s perfect for reheating the stew over a campfire.
- Keep it Cool: Ensure your cooler is well-stocked with ice to keep the stew fresh until you’re ready to reheat it.
Enjoy your delicious, hearty chicken tortilla stew around the campfire!
2) Make Ahead Camping Mac n Cheese
We’re huge fans of meals you can prep before leaving, and campfire mac and cheese is right at the top of our list. It’s easy to throw together and hits the spot after a long day outdoors.
We cook elbow macaroni at home, then mix it up with alfredo sauce, parmesan, mozzarella, and cheddar. A splash of half & half makes it extra creamy—so good.
Once it’s all mixed, we stash it in a bag or container in the cooler. At camp, we just heat it over the fire for that melty, cheesy goodness (and those crispy edges—yum).
This meal is always a crowd-pleaser. There’s just something about digging into creamy, cheesy macaroni under the stars that feels right.
Don’t forget to pack some salt and pepper so everyone can season to taste. The best part? It’s simple and so satisfying after a day outside.
Campfire Mac N Cheese Recipe
Ingredients:
- 1 lb elbow macaroni, cooked at home and cooled
- 1 jar (15 oz) store-bought Alfredo sauce
- 1 cup shredded Parmesan cheese
- 1 cup shredded mozzarella cheese
- 1 cup shredded cheddar cheese
- 1/2 cup half & half
- Salt and pepper, to taste
- Optional: Bread crumbs for topping
- Optional: Fresh parsley, chopped, for garnish
Instructions:
- Prep Your Macaroni:
- Cook the elbow macaroni at home according to the package instructions until al dente.
- Drain and rinse with cold water to stop the cooking process and prevent sticking. Let it cool completely.
- Transfer the cooled macaroni to a large, airtight container for easy transport.
- Mix the Cheeses:
- In a large mixing bowl, combine the Alfredo sauce, Parmesan cheese, mozzarella cheese, and cheddar cheese.
- Add the half & half and mix until well combined.
- Season with salt and pepper to taste.
- Combine with Macaroni:
- Add the cooked and cooled macaroni to the cheese mixture, stirring until the macaroni is fully coated with the cheesy sauce.
- Pack for Camping:
- Transfer the mac n cheese mixture to a large, oven-safe or campfire-safe dish (like a disposable aluminum pan).
- Cover tightly with aluminum foil.
- Store in a cooler with plenty of ice packs to keep it fresh until you’re ready to cook.
- Cook at the Campsite:
- When you’re ready to cook, place the covered pan over a campfire grill grate or a portable camping stove.
- Heat for about 20-30 minutes, stirring occasionally, until the cheese is melted and bubbly.
- Optional Topping:
- If you like a crunchy topping, sprinkle bread crumbs over the top of the mac n cheese during the last 10 minutes of cooking.
- Serve:
- Once heated through, carefully remove the pan from the heat.
- Garnish with fresh parsley if desired.
- Serve hot and enjoy!
Tips for Camping:
- Pre-Cook and Cool: Cooking the macaroni at home and letting it cool completely will save you time and effort at the campsite.
- Use Heavy-Duty Foil: Heavy-duty aluminum foil is great for covering the pan and helps retain heat while cooking over the campfire.
- Keep it Cool: Make sure your cooler is well-stocked with ice packs to keep the mac n cheese fresh until you’re ready to cook.
Enjoy your cheesy, creamy Campfire Mac N Cheese under the stars
3) Dutch Oven Potato Soup
There’s nothing quite like a hot bowl of potato soup on a cool camping night. We look forward to this one every trip.
Making Dutch oven potato soup is surprisingly easy. Potatoes, onions, and broth are the basics, and they travel well.
For extra flavor, we love tossing in bacon. That smoky taste with creamy potatoes? Chef’s kiss.
We usually chop onions and carrots at home to save time. Prepping ahead makes camp cooking so much easier.
Sometimes we sauté the onions and bacon before leaving, then just add them to the Dutch oven at camp. It really amps up the flavor.
Want to bulk it up? Toss in corn niblets or leeks. And don’t forget a bit of milk or cream for that velvety finish.
Dutch Oven Potato Soup Recipe
Ingredients:
- 6 large russet potatoes, peeled and diced
- 1 large onion, finely chopped
- 3 cloves garlic, minced
- 4 cups chicken broth
- 1 cup heavy cream
- 1 cup shredded cheddar cheese
- 1/2 cup sour cream
- 1/4 cup all-purpose flour
- 4 slices bacon, cooked and crumbled
- 2 tbsp butter
- Salt and pepper, to taste
- Optional: Chopped green onions and extra shredded cheese for garnish
Instructions:
At Home Preparation:
- Prep the Vegetables:
- Peel and dice the potatoes. Place them in a large bowl and cover with water to prevent browning. Drain and transfer to a large zip-top bag.
- Finely chop the onion and mince the garlic. Store them together in a small airtight container or zip-top bag.
- Cook the Bacon:
- Cook the bacon until crispy, then crumble it into small pieces. Store in a small airtight container or zip-top bag.
- Measure and Pack:
- Measure out the shredded cheddar cheese, heavy cream, and sour cream into separate containers.
- Measure the flour and store it in a small zip-top bag.
- Pack the butter in a small container.
- Pack Everything:
- Store all prepped ingredients in a cooler with plenty of ice packs to keep them fresh until you’re ready to cook.
At the Campsite:
- Heat the Dutch Oven:
- Place your Dutch oven over the campfire or a portable camping stove and heat it up.
- Sauté the Onions and Garlic:
- Add the butter to the Dutch oven and let it melt.
- Add the chopped onion and minced garlic. Sauté until the onion becomes translucent (about 3-4 minutes).
- Add Potatoes and Broth:
- Add the diced potatoes to the Dutch oven.
- Pour in the chicken broth and bring to a boil.
- Simmer:
- Reduce the heat and let it simmer for about 15-20 minutes, or until the potatoes are tender.
- Thicken the Soup:
- In a small bowl, mix the flour with a bit of water to create a slurry.
- Gradually stir the slurry into the soup to thicken it.
- Add Cream and Cheese:
- Stir in the heavy cream, shredded cheddar cheese, and sour cream.
- Continue to cook, stirring occasionally, until the cheese is melted and the soup is creamy.
- Season and Serve:
- Season with salt and pepper to taste.
- Ladle the soup into bowls and top with crumbled bacon, chopped green onions, and extra shredded cheese if desired.
Tips for Camping:
- Pre-Chop and Measure: Pre-chopping the vegetables and measuring out ingredients at home saves time and effort at the campsite.
- Use a Cooler: Ensure your cooler is well-stocked with ice packs to keep all the prepped ingredients fresh until you’re ready to cook.
- Dutch Oven Care: Make sure your Dutch oven is well-seasoned to prevent sticking and make cleanup easier.
Enjoy your hearty, delicious Dutch Oven Potato Soup around the campfire
4) Skillet Philly Cheesesteak
One of our all-time favorite make-ahead camping meals is the Skillet Philly Cheesesteak. After a big day outdoors, it’s exactly the kind of hearty meal we crave.
This dish works perfectly as a one-pot wonder over the campfire. Thin-sliced beef, peppers, onions, and gooey cheese—what’s not to love?
We slice all the veggies and meat at home and keep them in separate containers. Having everything prepped means we can cook fast when hunger hits at camp.
All you need is a cast iron skillet over the fire. The beef gets a nice sear, veggies go tender, and then we pile on provolone or cheese whiz—whatever mood we’re in.
We serve it on hoagie rolls or just eat it straight from the skillet if we’re feeling lazy. Honestly, we always make extra because people beg for seconds!
Skillet Philly Cheesesteak Recipe
Ingredients:
- 1 lb thinly sliced beef (ribeye or sirloin works best)
- 2 bell peppers, thinly sliced (any color)
- 1 large onion, thinly sliced
- 2 cloves garlic, minced
- 2 tbsp olive oil
- Salt and pepper, to taste
- 8 slices provolone cheese or cheese whiz
- 4 hoagie rolls or sub rolls
- Optional: Hot sauce or mayo for serving
Instructions:
At Home Preparation:
- Prep the Meat and Veggies:
- Thinly slice the beef and place it in a zip-top bag.
- Thinly slice the bell peppers and onion. Mince the garlic. Store the veggies together in a large zip-top bag or airtight container.
- Pack Everything:
- Store the sliced beef and veggies in a cooler with plenty of ice packs to keep them fresh until you’re ready to cook.
- Pack the cheese separately in a container.
- Don’t forget to bring the hoagie rolls and any optional condiments.
At the Campsite:
- Heat the Skillet:
- Place your cast iron skillet over the campfire or on a portable camping stove and heat it up.
- Cook the Veggies:
- Add 1 tbsp of olive oil to the skillet.
- Add the sliced bell peppers, onion, and minced garlic. Sauté until the vegetables are soft and slightly caramelized (about 5-7 minutes).
- Remove the veggies from the skillet and set them aside.
- Cook the Beef:
- Add the remaining 1 tbsp of olive oil to the skillet.
- Add the thinly sliced beef to the skillet in a single layer. Season with salt and pepper.
- Sear the beef until it’s browned and cooked through (about 3-4 minutes). Stir occasionally to ensure even cooking.
- Combine and Melt Cheese:
- Return the cooked veggies to the skillet with the beef. Stir to combine.
- Top the mixture with slices of provolone cheese or dollops of cheese whiz. Cover the skillet with a lid or aluminum foil to help the cheese melt (about 2-3 minutes).
- Serve:
- Once the cheese is melted and gooey, remove the skillet from the heat.
- Serve the Philly cheesesteak mixture on hoagie rolls.
- Add optional hot sauce or mayo if desired.
Tips for Camping:
- Pre-Slice and Pack: Pre-slicing the meat and veggies and packing them separately will save you a lot of time and hassle at the campsite.
- Use a Cooler: Ensure your cooler is well-stocked with ice packs to keep the prepped ingredients fresh until you’re ready to cook.
- Cast Iron Care: Make sure your cast iron skillet is well-seasoned to prevent sticking and make cleanup easier.
Enjoy your mouthwatering Skillet Philly Cheesesteak under the stars!
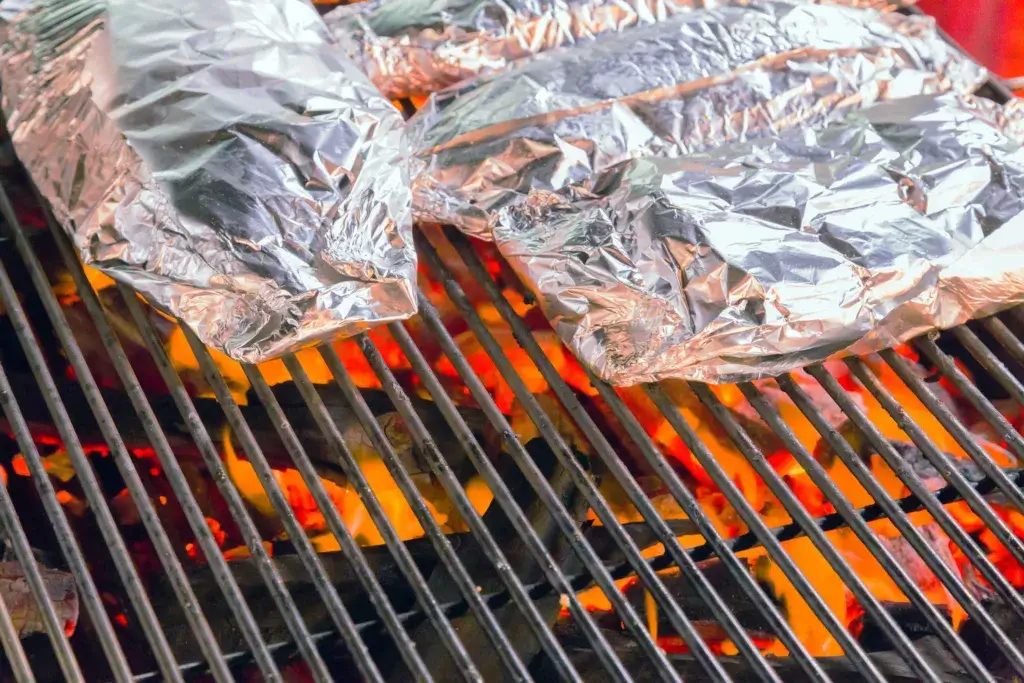
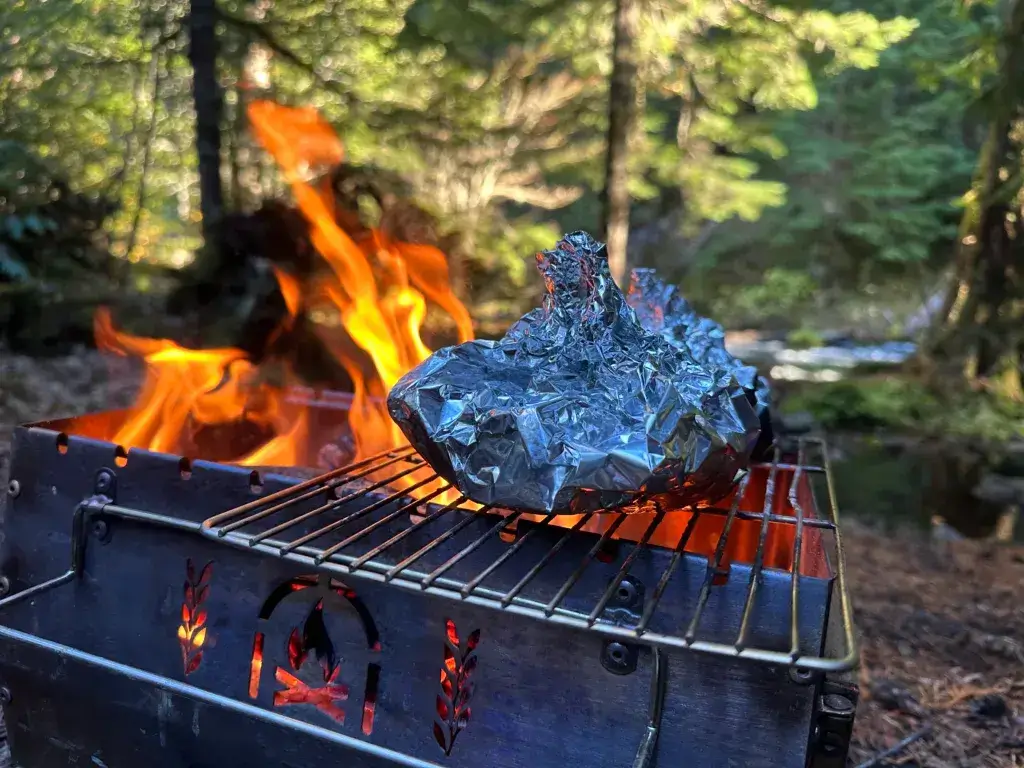
5) Mediterranean Chicken Foil Packets
These Mediterranean Chicken Foil Packets bring a little Greek magic to the campsite—and cleanup is basically nonexistent. They’re loaded with tender chicken and fresh, zesty flavors that make you forget you’re roughing it.
We use boneless chicken breasts or thighs, cut into chunks. Then we add bell peppers, red onions, cherry tomatoes, and zucchini for a colorful, healthy mix.
The best part is the seasoning. We drizzle everything with olive oil and toss in oregano, basil, garlic, and a squeeze of lemon. When we’re feeling fancy, we add olives and feta for that authentic Greek vibe.
We wrap it all up in heavy-duty foil and cook over the campfire for about 15-20 minutes. You could also bake them in the oven if you’re at a cabin.
Opening those packets is heavenly—the steam smells incredible, and the chicken comes out juicy with perfectly cooked veggies. It’s a zesty summertime meal that always gets compliments from fellow campers.
Mediterranean Chicken Foil Packets Recipe
Ingredients:
- 4 boneless chicken breasts or thighs, cut into chunks
- 2 bell peppers, sliced (any color)
- 1 red onion, sliced
- 1 cup cherry tomatoes, halved
- 1 zucchini, sliced
- 1/4 cup olive oil
- 2 tsp dried oregano
- 2 tsp dried basil
- 3 cloves garlic, minced
- Juice of 1 lemon
- Salt and pepper, to taste
- Optional: 1/2 cup pitted olives, sliced
- Optional: 1/2 cup crumbled feta cheese
Instructions:
At Home Preparation:
- Prep the Chicken and Veggies:
- Cut the chicken into chunks and place them in a large zip-top bag.
- Slice the bell peppers, red onion, and zucchini. Halve the cherry tomatoes. Store the veggies together in a large zip-top bag or airtight container.
- Mix the Seasoning:
- In a small container, combine the olive oil, dried oregano, dried basil, minced garlic, lemon juice, salt, and pepper.
- Pack Everything:
- Store the chicken, veggies, and seasoning mixture in a cooler with plenty of ice packs to keep them fresh until you’re ready to cook.
- Pack the optional olives and feta cheese separately in small containers if you’re using them.
- Don’t forget to bring heavy-duty aluminum foil.
At the Campsite:
- Assemble the Foil Packets:
- Tear off 4 large sheets of heavy-duty aluminum foil.
- Divide the chicken chunks and veggies evenly among the foil sheets.
- Drizzle the olive oil and seasoning mixture over each portion.
- Add the optional olives and feta cheese if desired.
- Fold the foil over the ingredients and seal the edges tightly to create packets.
- Cook the Packets:
- Place the foil packets over the campfire or on a portable camping stove.
- Cook for about 15-20 minutes, turning occasionally, until the chicken is cooked through and the vegetables are tender.
- Serve:
- Carefully open the foil packets (watch out for steam) and serve hot.
Tips for Camping:
- Pre-Cut and Pack: Pre-cutting the chicken and veggies and packing them separately will save you time and effort at the campsite.
- Use a Cooler: Ensure your cooler is well-stocked with ice packs to keep the prepped ingredients fresh until you’re ready to cook.
- Heavy-Duty Foil: Using heavy-duty aluminum foil ensures that the packets hold up well over the campfire and prevents leaks.
Optional Oven Method:
- Preheat your oven to 400°F (200°C).
- Place the foil packets on a baking sheet and cook for 20-25 minutes, or until the chicken is cooked through and the vegetables are tender.
Enjoy your flavorful and healthy Mediterranean Chicken Foil Packets around the campfire or in the comfort of a cabin!
6) Instant Pot Pulled Pork
Pulled pork just might be our top camping meal. It’s versatile, delicious, and ridiculously easy if you use an Instant Pot.
We start with a pork shoulder (or pork butt) and rub it down with spices. Searing the meat first gives it amazing flavor.
After that, we pressure cook it with chicken broth until it’s super tender. Shredding is a breeze—the meat just falls apart.
We stir in our favorite BBQ sauce and let it soak up all that goodness. This meat reheats perfectly at camp, which is a lifesaver.
At camp, we use it for sandwiches, nachos, tacos, or even quesadillas. There are so many possibilities.
We always make this at home, then freeze or refrigerate it until we’re ready to go. At camp, we just reheat it over the fire or on a camp stove—and dinner’s ready in minutes.
Instant Pot Pulled Pork Recipe
Ingredients:
- 4-5 lb pork shoulder (pork butt)
- 2 tbsp olive oil
- 1 cup chicken broth
- 1 cup BBQ sauce (your favorite brand)
- Salt and pepper, to taste
For the Rub:
- 2 tbsp brown sugar
- 1 tbsp paprika
- 1 tbsp garlic powder
- 1 tbsp onion powder
- 1 tsp ground cumin
- 1 tsp chili powder
- 1 tsp salt
- 1/2 tsp black pepper
Instructions:
At Home Preparation:
- Prep the Pork:
- In a small bowl, combine all the rub ingredients.
- Rub the mixture all over the pork shoulder, ensuring it’s evenly coated.
- Sear the Pork:
- Set your Instant Pot to the “Sauté” function and add the olive oil.
- Once hot, sear the pork shoulder on all sides until it’s nicely browned (about 3-4 minutes per side). This step adds a great depth of flavor.
- Pressure Cook:
- Add the chicken broth to the Instant Pot.
- Secure the lid and set the Instant Pot to “Manual” or “Pressure Cook” on high for 60 minutes.
- Once the cooking time is up, allow the pressure to release naturally for 15 minutes, then perform a quick release for any remaining pressure.
- Shred the Pork:
- Remove the pork from the Instant Pot and place it on a large cutting board.
- Use two forks to shred the meat. It should fall apart easily.
- Discard any large pieces of fat.
- Mix in BBQ Sauce:
- Transfer the shredded pork to a large bowl.
- Mix in your favorite BBQ sauce until the pork is well-coated.
- Pack for Camping:
- Allow the pulled pork to cool completely.
- Transfer it to airtight containers or heavy-duty zip-top bags.
- Refrigerate or freeze the pulled pork until you’re ready to head out.
At the Campsite:
- Reheat the Pulled Pork:
- If frozen, allow the pulled pork to thaw in your cooler.
- Reheat the pulled pork over a campfire or on a portable camping stove until it’s hot and bubbly. You can use a cast iron skillet or a pot for this.
- Serve:
- Enjoy the pulled pork in various ways:
- Pulled Pork Sandwiches: Serve on buns with extra BBQ sauce and coleslaw.
- Nacho Toppings: Spread over tortilla chips with melted cheese, jalapeños, and sour cream.
- Tacos and Quesadillas: Use as a filling with your favorite toppings like shredded cheese, lettuce, and salsa.
- Enjoy the pulled pork in various ways:
Tips for Camping:
- Pre-Cook and Pack: Cooking and packing the pulled pork at home saves you time and effort at the campsite.
- Use a Cooler: Ensure your cooler is well-stocked with ice packs to keep the pulled pork fresh until you’re ready to reheat.
- Versatile Dish: Pulled pork is incredibly versatile and can be used in various dishes, making it a great option for multiple meals.
Enjoy your delicious, juicy Instant Pot Pulled Pork in the great outdoors!
7) Instant Pot Carnitas
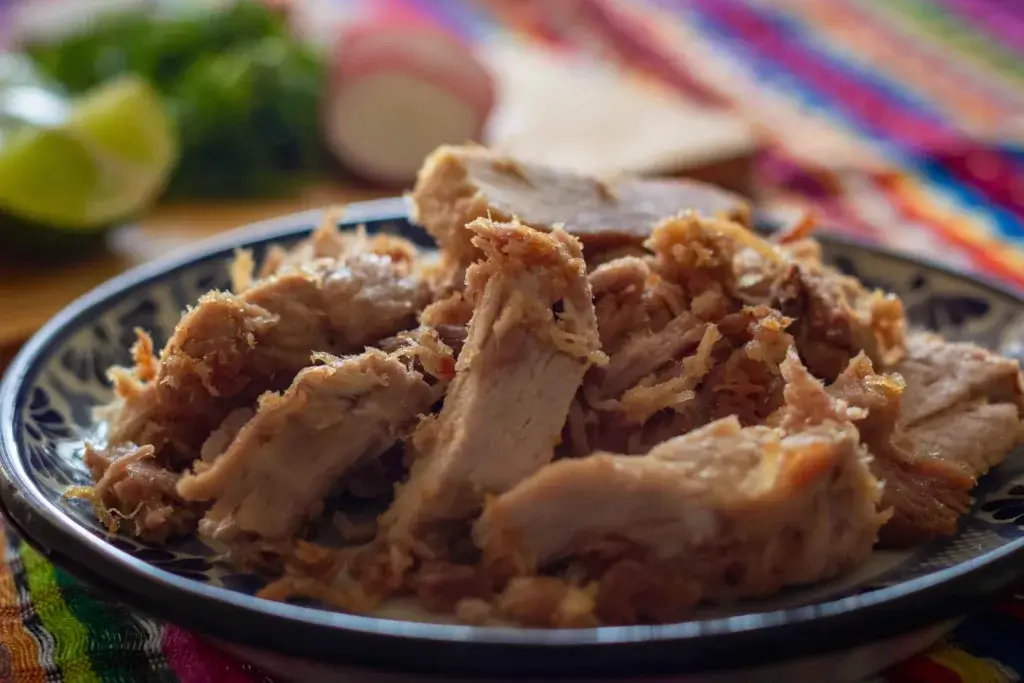
Instant Pot carnitas have become one of our favorite make-ahead camping meals! We love how this Mexican pulled pork is fall-apart tender and full of flavor, making it perfect for outdoor adventures.
The best part? This dish comes together fast in the Instant Pot.
No need to spend hours cooking when we’re scrambling to pack for the trip. The pressure cooker handles all the heavy lifting for us.
We usually prep a big batch before heading out and stash it in airtight containers. The carnitas reheat beautifully at the campsite, and those crispy edges add such amazing texture to every bite.
What really makes carnitas shine is how versatile they are. We stuff them into tacos, burritos, or pile them on salads—sometimes even quesadillas for a quick lunch between hikes.
For easy meal prep, we like to package our carnitas with a mix of fixings. Maybe tortillas and cheese one night, maybe over rice the next. Having multiple meal options from one protein just makes camping menu planning feel so much less stressful.
Instant Pot Carnitas Recipe
Ingredients:
- 4-5 lb pork shoulder (pork butt), cut into large chunks
- 1 cup chicken broth
- 1/2 cup orange juice
- 1/4 cup lime juice
- 1 large onion, quartered
- 4 cloves garlic, minced
- 2 tsp ground cumin
- 2 tsp dried oregano
- 1 tsp smoked paprika
- 1 tsp salt
- 1/2 tsp black pepper
- 2 bay leaves
- 2 tbsp olive oil (for searing and crisping)
Instructions:
At Home Preparation:
- Prep the Pork:
- Cut the pork shoulder into large chunks and season with salt and pepper.
- Sear the Pork:
- Set your Instant Pot to the “Sauté” function and add 1 tbsp of olive oil.
- Once hot, sear the pork chunks on all sides until browned (about 3-4 minutes per side). Work in batches if necessary.
- Remove the pork and set aside.
- Pressure Cook:
- Add the quartered onion and minced garlic to the Instant Pot and sauté for about 2 minutes.
- Pour in the chicken broth, orange juice, and lime juice, scraping up any browned bits from the bottom of the pot.
- Add the cumin, oregano, smoked paprika, bay leaves, and the seared pork chunks back into the pot.
- Secure the lid and set the Instant Pot to “Manual” or “Pressure Cook” on high for 60 minutes.
- Once the cooking time is up, allow the pressure to release naturally for 15 minutes, then perform a quick release for any remaining pressure.
- Shred the Pork:
- Remove the pork from the Instant Pot and place it on a large cutting board.
- Use two forks to shred the meat. Discard any large pieces of fat.
- Remove the bay leaves from the cooking liquid and discard.
- Crisp the Pork:
- Heat a large skillet over medium-high heat and add 1 tbsp of olive oil.
- Add the shredded pork in batches and cook until the edges are crispy (about 3-4 minutes per batch).
- Pack for Camping:
- Allow the carnitas to cool completely.
- Transfer to airtight containers or heavy-duty zip-top bags.
- Refrigerate or freeze the carnitas until you’re ready to head out.
At the Campsite:
- Reheat the Carnitas:
- If frozen, allow the carnitas to thaw in your cooler.
- Reheat the carnitas over a campfire or on a portable camping stove until hot and crispy. You can use a cast iron skillet or a pot for this.
- Serve:
- Enjoy the carnitas in various ways:
- Tacos: Serve in tortillas with your favorite toppings like diced onions, cilantro, salsa, and lime wedges.
- Burritos: Wrap in large tortillas with rice, beans, cheese, and your favorite fillings.
- Salads: Use as a topping for a fresh salad with greens, avocado, and a tangy dressing.
- Quesadillas: Stuff in tortillas with cheese for a quick and delicious lunch.
- Enjoy the carnitas in various ways:
Tips for Camping:
- Pre-Cook and Pack: Cooking and packing the carnitas at home saves you time and effort at the campsite.
- Use a Cooler: Ensure your cooler is well-stocked with ice packs to keep the carnitas fresh until you’re ready to reheat.
- Versatile Dish: Carnitas are incredibly versatile and can be used in various dishes, making meal planning simpler and more flexible.
Enjoy your flavorful and crispy Instant Pot Carnitas in the great outdoors!
8) Crockpot Chicken BBQ Sandwiches
We absolutely love these Crockpot BBQ Chicken Sandwiches for camping trips! They’re super easy to prepare and always a hit with everyone around the campfire.
Just toss about 3½ pounds of chicken breasts in your crockpot, pour your favorite BBQ sauce over, and let it cook on low for 7 hours. The chicken turns out incredibly tender and easy to shred with a couple of forks.
We usually prep this at home, stash it in airtight containers, and bring it along. When it’s time to eat, we just reheat and pile it onto soft buns.
Couldn’t get simpler, honestly. These sandwiches are wonderfully versatile too.
The shredded BBQ chicken works great for quesadillas or as a topping for baked potatoes if you have leftovers the next day.
For a full meal, we usually grab some pre-made coleslaw or just a bag of chips. It’s comfort food that takes almost no effort—exactly what you want after a day of hiking or swimming.
Crockpot Chicken BBQ Sandwiches Recipe
Ingredients:
- 3½ pounds boneless, skinless chicken breasts
- 2 cups of your favorite BBQ sauce
- Soft buns for serving
- Optional: Pre-made coleslaw or a simple bag of chips for serving
Instructions:
At Home Preparation:
- Cook the Chicken:
- Place the chicken breasts in your crockpot.
- Pour the BBQ sauce over the chicken, ensuring it’s evenly coated.
- Cover and cook on low for about 7 hours, or until the chicken is incredibly tender.
- Shred the Chicken:
- Once cooked, remove the chicken from the crockpot and place it on a large cutting board.
- Use two forks to shred the chicken. It should fall apart easily.
- Return the shredded chicken to the crockpot and mix it with the remaining BBQ sauce.
- Pack for Camping:
- Allow the shredded BBQ chicken to cool completely.
- Transfer it to airtight containers or heavy-duty zip-top bags.
- Refrigerate or freeze the BBQ chicken until you’re ready to head out.
At the Campsite:
- Reheat the BBQ Chicken:
- If frozen, allow the BBQ chicken to thaw in your cooler.
- Reheat the BBQ chicken over a campfire or on a portable camping stove until hot. You can use a cast iron skillet or a pot for this.
- Serve:
- Serve the hot BBQ chicken on soft buns.
- Pair with pre-made coleslaw or a simple bag of chips for a complete meal.
Tips for Camping:
- Pre-Cook and Pack: Cooking and packing the BBQ chicken at home saves you time and effort at the campsite.
- Use a Cooler: Ensure your cooler is well-stocked with ice packs to keep the BBQ chicken fresh until you’re ready to reheat.
- Versatile Dish: The shredded BBQ chicken can be used in various ways, making meal planning simpler and more flexible.
Additional Serving Ideas:
- Quesadillas: Use the shredded BBQ chicken as a filling for quesadillas with cheese and any other desired toppings.
- Baked Potatoes: Top baked potatoes with the BBQ chicken and a sprinkle of cheese for a hearty meal.
- Salads: Add the BBQ chicken to a fresh salad for a protein-packed meal.
Enjoy your easy and delicious Crockpot Chicken BBQ Sandwiches in the great outdoors
9) Breakfast Burritos-Campfire Style
Nothing beats waking up in the fresh morning air with the promise of a hot breakfast burrito. These make-ahead breakfast burritos save us time during busy camping mornings while still delivering a satisfying meal.
We assemble them at home with our favorite ingredients, wrap them in foil, and stash them in the cooler until breakfast time. This way, we get to enjoy those slow, peaceful mornings around camp instead of standing over a stove.
For fillings, we go for a hearty mix of scrambled eggs, cheese, and breakfast meats. Spicy ground sausage adds a nice kick on chilly mornings.
Potatoes are a must! Some folks swear by tater tots, others go for diced breakfast potatoes.
Adding refried black beans gives your burritos extra protein and keeps you fueled for big hiking days. We like to mix it up with different proteins.
When it’s time to eat, just toss the foil-wrapped burritos on the campfire grate or hot coals. They’ll heat through in about 10-15 minutes, and you’ll have a delicious start to your day in nature.
Breakfast Burritos-Campfire Style Recipe
Ingredients:
- 12 large flour tortillas
- 12 eggs, scrambled
- 2 cups shredded cheese (cheddar, Monterey Jack, or a mix)
- 1 lb spicy ground sausage, cooked and crumbled
- 2 cups tater tots or diced breakfast potatoes, cooked
- 1 can (15 oz) refried black beans
- Salt and pepper, to taste
- Optional: Salsa, hot sauce, chopped green onions, or cilantro for serving
Instructions:
At Home Preparation:
- Cook the Fillings:
- Scrambled Eggs: Scramble the eggs in a large skillet until fully cooked. Season with salt and pepper. Let them cool.
- Sausage: Cook the ground sausage in a skillet until browned and fully cooked. Drain excess fat and let it cool.
- Potatoes: Cook the tater tots or diced breakfast potatoes according to package instructions. Let them cool.
- Refried Beans: Warm the refried black beans in a small pot. Let them cool.
- Assemble the Burritos:
- Lay out a large flour tortilla.
- Spoon a portion of scrambled eggs, cooked sausage, potatoes, refried black beans, and shredded cheese onto the center of the tortilla.
- Fold in the sides of the tortilla and then roll it up tightly from the bottom.
- Wrap each burrito individually in heavy-duty aluminum foil.
- Pack for Camping:
- Place the foil-wrapped burritos in a large zip-top bag or airtight container.
- Refrigerate or freeze the burritos until you’re ready to head out.
At the Campsite:
- Heat the Burritos:
- Place the foil-wrapped burritos on the campfire grate or directly on hot coals.
- Heat for about 10-15 minutes, turning occasionally to ensure even heating.
- Carefully remove the burritos from the fire and let them cool slightly before unwrapping.
- Serve:
- Serve the hot breakfast burritos with optional salsa, hot sauce, chopped green onions, or cilantro.
Tips for Camping:
- Pre-Cook and Pack: Cooking and assembling the burritos at home saves you time and effort at the campsite.
- Use a Cooler: Ensure your cooler is well-stocked with ice packs to keep the burritos fresh until you’re ready to heat them.
- Heavy-Duty Foil: Using heavy-duty aluminum foil ensures that the burritos hold up well over the campfire and prevents leaks.
Additional Serving Ideas:
- Customize Fillings: Feel free to customize the fillings to your liking. Add bell peppers, onions, or other favorite breakfast ingredients.
- Make-Ahead: These burritos can be made ahead of time and stored in the freezer for up to a month. Just thaw them in your cooler before reheating at the campsite.
Enjoy your hearty and delicious Breakfast Burritos-Campfire Style in the great outdoors
10) Shrimp and Summer Veggie Foil Packets
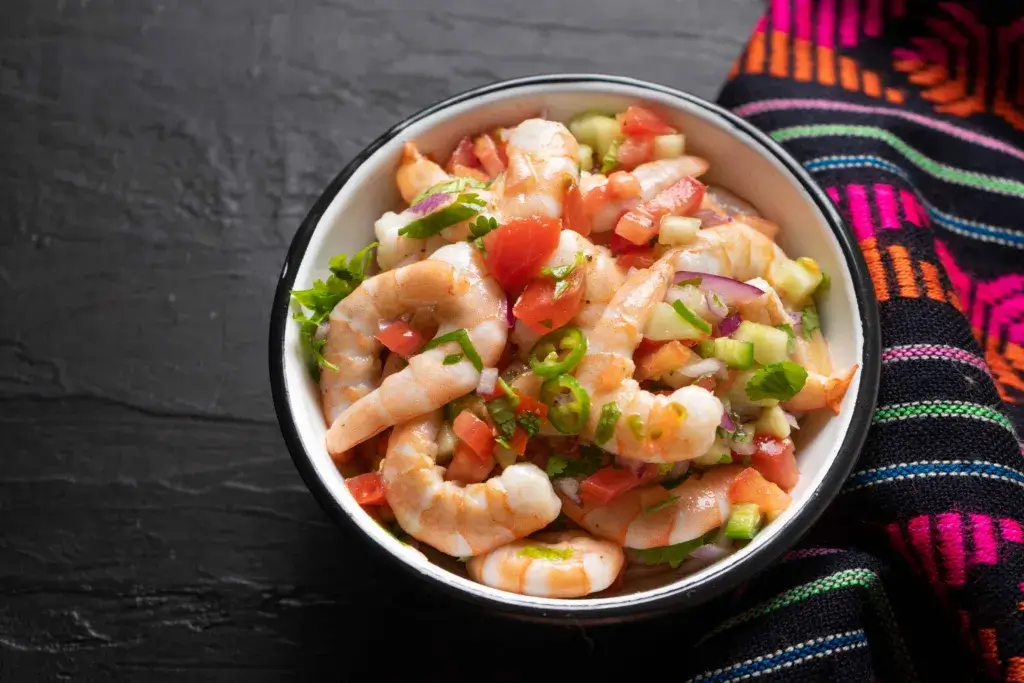
We absolutely love these Shrimp and Summer Veggie Foil Packets for camping! They’re one of our go-to meals when we want something that feels a bit fancy but requires minimal effort.
They’re so simple. We just toss shrimp, zucchini, corn, and whatever veggies we have with some seasonings, wrap them in foil, and they’re ready to cook when we are.
We can prep these completely ahead of time and keep them chilled in the cooler until dinner.
Cooking is a breeze—just set the packets on the campfire grill for about 10-12 minutes. No campfire? That’s fine. These work in an oven if you’re in an RV or cabin with a kitchen.
We’re big fans of the coconut-lime marinade for a tropical twist, but a quick garlic butter sauce is always a win. The packets create steam chambers that infuse everything with flavor.
Shrimp and Summer Veggie Foil Packets Recipe
Ingredients:
- 1½ pounds large shrimp, peeled and deveined
- 2 bell peppers, sliced (any color)
- 1 zucchini, sliced
- 1 yellow squash, sliced
- 1 red onion, sliced
- 1 cup cherry tomatoes, halved
- Salt and pepper, to taste
For the Coconut-Lime Marinade:
- 1/4 cup coconut milk
- 2 tbsp lime juice
- 2 tbsp olive oil
- 2 cloves garlic, minced
- 1 tsp ground cumin
- 1 tsp paprika
- 1/2 tsp salt
- 1/4 tsp black pepper
For the Garlic Butter Sauce:
- 1/4 cup unsalted butter, melted
- 3 cloves garlic, minced
- 2 tbsp lemon juice
- 2 tbsp chopped fresh parsley
- 1/2 tsp salt
- 1/4 tsp black pepper
Instructions:
At Home Preparation:
- Prep the Shrimp and Veggies:
- Peel and devein the shrimp.
- Slice the bell peppers, zucchini, yellow squash, and red onion. Halve the cherry tomatoes.
- Combine the shrimp and veggies in a large bowl.
- Make the Marinade/Sauce:
- Coconut-Lime Marinade: In a small bowl, whisk together the coconut milk, lime juice, olive oil, minced garlic, ground cumin, paprika, salt, and pepper.
- Garlic Butter Sauce: In a small bowl, mix the melted butter, minced garlic, lemon juice, chopped parsley, salt, and pepper.
- Marinate the Shrimp and Veggies:
- Pour your chosen marinade or sauce over the shrimp and veggies. Toss to coat evenly.
- Let it marinate for at least 30 minutes (or up to 2 hours) in the refrigerator.
- Assemble the Foil Packets:
- Tear off 4 large sheets of heavy-duty aluminum foil.
- Divide the shrimp and veggie mixture evenly among the foil sheets.
- Fold the foil over the ingredients and seal the edges tightly to create packets.
- Pack for Camping:
- Place the foil-wrapped packets in a large zip-top bag or airtight container.
- Keep them chilled in your cooler until you’re ready to cook.
At the Campsite:
- Cook the Packets:
- Place the foil packets on the campfire grill or directly on hot coals.
- Cook for about 10-12 minutes, turning occasionally to ensure even cooking.
- Carefully remove the packets from the fire and let them cool slightly before unwrapping.
- Serve:
- Serve the shrimp and summer veggie packets hot, straight from the foil.
Tips for Camping:
- Pre-Cook and Pack: Prepping and packing the foil packets at home saves you time and effort at the campsite.
- Use a Cooler: Ensure your cooler is well-stocked with ice packs to keep the foil packets fresh until you’re ready to cook.
- Heavy-Duty Foil: Using heavy-duty aluminum foil ensures that the packets hold up well over the campfire and prevents leaks.
Optional Oven Method:
- Preheat your oven to 400°F (200°C).
- Place the foil packets on a baking sheet and bake for 12-15 minutes, or until the shrimp are cooked through and the veggies are tender.
Enjoy your flavorful and easy Shrimp and Summer Veggie Foil Packets in the great outdoors or the comfort of a cabin!
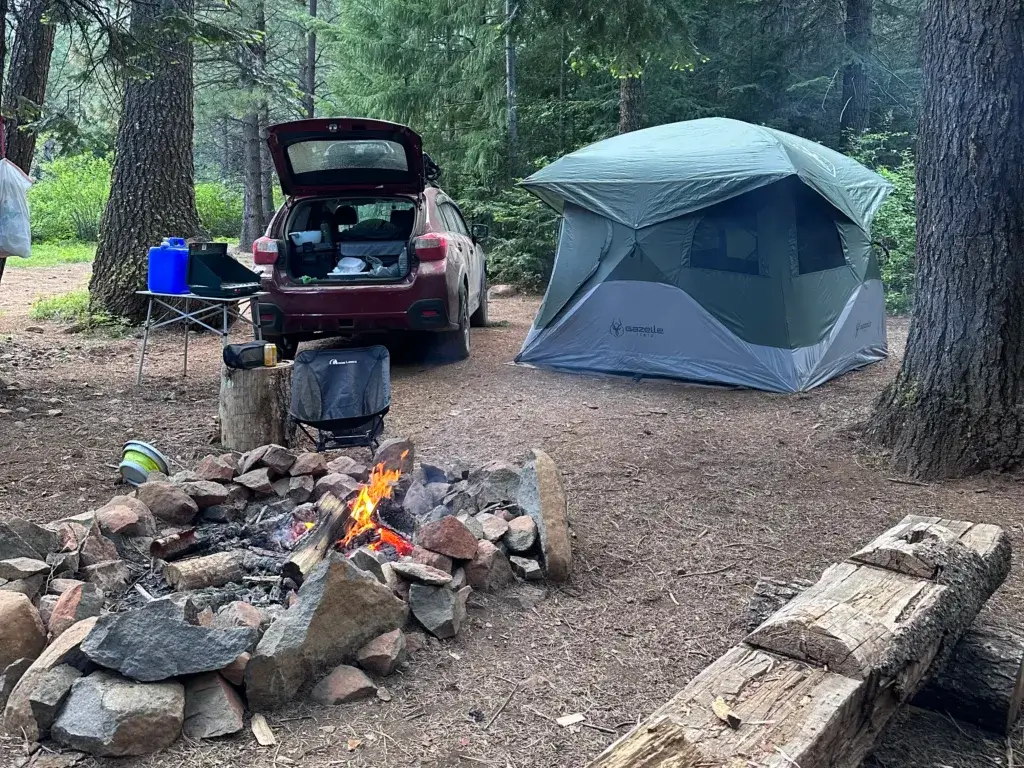
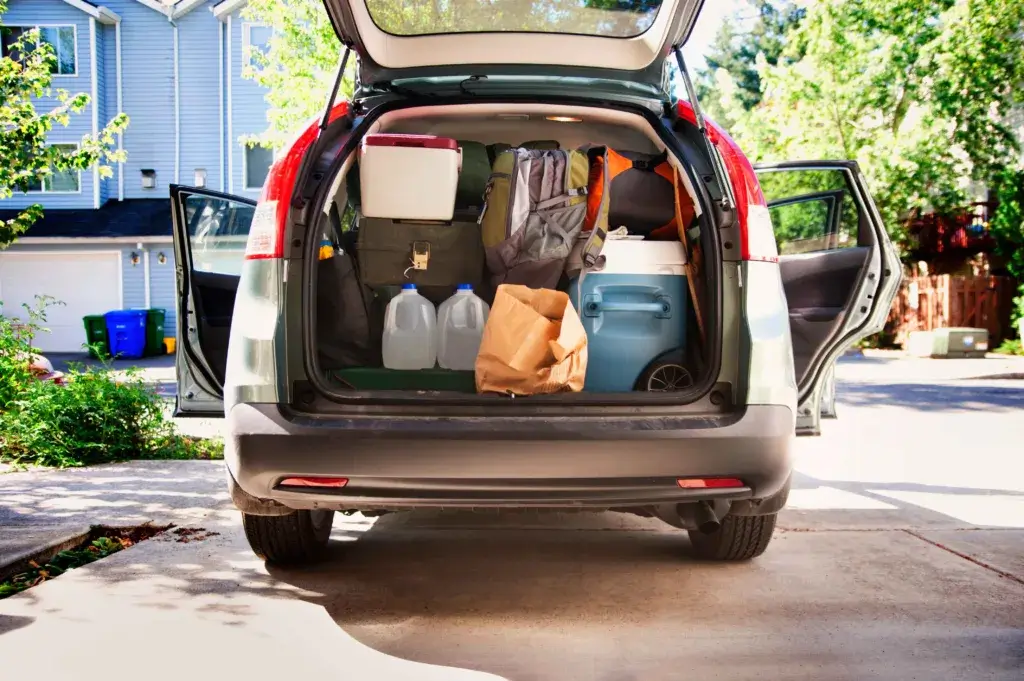
Benefits of Premade Camping Meals
Preparing food in advance for camping trips can turn our outdoor experience from stressful to delightful. These ready-to-go meals solve so many common camping headaches and give us more time to actually enjoy nature.
Convenience and Time-Saving
Let’s be honest—cooking at a campsite can be a pain. With make-ahead camping meals, we just heat and eat, saving that precious vacation time for the fun stuff.
No more chopping veggies on a wobbly camp table or scrubbing dishes in cold water. Pre-made meals mean we pack exactly what we need—no more, no less.
This organized approach helps us:
- Reduce food waste significantly
- Save cooler space with properly portioned meals
- Minimize cooking equipment needed at the campsite
Many premade options only need hot water to prepare, so we get a warm, satisfying meal with almost no cleanup. After a long hike, that’s honestly the dream.
Reducing Stress and Enhancing Enjoyment
When we prep meals in advance, we skip the stress of campsite cooking. No more last-minute ingredient runs or complicated recipes to follow.
This mental freedom means we can actually be present for the adventure. With heat-and-serve premade meals, we spend less time fussing with food and more time hiking, swimming, telling stories, or just soaking up the outdoors.
Ready-made meals also help us dodge:
- Weather-related cooking headaches (chopping veggies in the rain? Nope!)
- Wildlife encounters while cooking
- Campsite messes that could attract animals
We’ve found that having meals ready ahead of time makes for a way more relaxed camping vibe. People can eat when they’re hungry, no need to wait for the designated camp chef to whip something up from scratch.
Planning Your Meals Ahead
Taking time to plan your camping meals before your trip saves you stress and ensures you’ll eat well in the great outdoors. Smart prep means you can enjoy good food without spending your whole camping trip cooking.
Balancing Nutrition and Taste
We think camping food should be both nutritious and actually taste good. When planning your menu, try to include a mix of proteins, carbs, and fresh produce.
Make-ahead camping meals give you the freedom to create balanced options that fuel your outdoor adventures. Try prepping protein-packed options like marinated chicken kebabs for the campfire.
Whole grain pasta salads with veggies make great side dishes and stay fresh for days. We like to have a few breakfast options ready too—overnight oats in jars or premade egg muffins reheat quickly on a camp stove.
Don’t forget fruits and nuts for quick energy on hikes. And yes, treats matter! A batch of homemade energy bars or cookies really lifts everyone’s spirits after a long day outside.
Storage and Preservation Tips
Proper storage keeps your make-ahead camping meals fresh and safe. I always say: invest in a quality cooler and, if you can, swap out regular ice for freezer blocks.
Smart Packing Tips:
- Freeze meat marinades right in zip-top bags. Saves time and mess later.
- Mason jars are perfect for salads and overnight oats.
- Chop veggies ahead and store them in reusable containers.
- Crack eggs into water bottles for easy, spill-free transport.
Temperature matters! Keep your cooler tucked in the shade, and try not to open it more than you need to. For longer trips, freeze meals you’ll eat later in the week.
Vacuum sealers work wonders for camping food prep. They keep food fresh and make everything fit better in your cooler, honestly.
For no-cook options, try wraps, pre-made salads, or charcuterie ingredients. They’re easy, tasty, and don’t need refrigeration.
Safely Packing and Transporting Meals
Food safety doesn’t get a break just because you’re camping. How you pack really shapes your whole outdoor eating experience.
First up, you’ll need good containers. I’m a fan of stackable plastic bins for dry stuff and sturdy freezer bags for prepped ingredients. Aluminum foil pans are great for meals like enchiladas you plan to reheat at camp.
Temperature control is huge. We always bring two coolers:
- Food Cooler: Only open it when you must.
- Drink Cooler: Open and close as you please.
Here’s a trick: crack eggs into a bottle before you leave. It saves space and, honestly, you’ll thank yourself when you’re not cleaning up broken shells.
Freeze meat solid before packing. It doubles as an ice pack and stays fresh longer. Hobo dinner foil packets with hamburger and potatoes freeze well and are easy to cook later.
When loading the cooler, I always follow the “last out, first in” rule. Put what you’ll eat first on top.
For longer trips, we use an ice box for meats, dairy, and drinks. Eggs and butter go in a separate esky with ice bricks.
Keep raw meats away from ready-to-eat foods to avoid cross-contamination. Bring more hand sanitizer than you think you’ll need—trust me.
Frequently Asked Questions
Planning meals for camping is a puzzle. We get these questions all the time, so here’s what works for us and might help you too.
What are some tasty no-cook meals I can take on my next camping trip?
No-cook meals are a lifesaver when you just want to chill after a hike. Mason jar parfaits—just layer yogurt, granola, nuts, and fruit. Done.
Wraps with pre-cooked chicken, hummus, and veggies? Super easy. Assemble at camp and eat.
And you really can’t beat peanut butter with apples or bananas for a quick, filling snack.
Can you share some clever camping meals I can make ahead of my adventure?
Our Make Ahead Camping Mac n Cheese is a crowd-pleaser. Prep it at home, portion into foil pans, and heat over the fire.
Chicken Tortilla Stew is another go-to. Make a big batch, freeze it flat in bags, and it’ll thaw by the time you’re hungry.
How can I keep my camping meals budget-friendly while still full of flavor?
Rice and pasta dishes are our budget heroes. Our Dutch Oven Potato Soup uses basic ingredients but really hits the spot after a day outdoors.
We often pre-cook cheaper cuts of meat, like chicken thighs, and toss them into meals at camp.
Bringing a little spice kit from home adds flavor without bulking up your pack or budget.
Do you have any family-friendly meal ideas that are perfect for a camping trip?
Mediterranean Chicken Foil Packets are always a win with kids. Everyone gets to pick their own veggies and customize their packet.
Skillet Philly Cheesesteak is another favorite. It’s hearty, familiar, and even picky eaters usually dig in after a day outside.
And, I mean, it’s not camping without s’mores. Don’t forget those ingredients!
What are your favorite easy-to-prepare meals for a stress-free camping experience?
Foil packet meals top my list. Prep at home, seal in foil, then just toss them on the fire or grill. Couldn’t be easier.
One-pot meals like Chicken Tortilla Stew cut down on cleanup and still taste amazing.
We also bring pre-cooked breakfast burritos wrapped in foil. They heat up fast over the fire, and breakfast is ready with almost no effort.
Got any tips for delicious camping meals that don’t require refrigeration?
Freeze-dried food packs actually taste pretty good now, and there are lots of flavors out there. They’re super light to carry and you just add hot water—couldn’t be easier.
Grab some packaged tuna or chicken pouches since they don’t need a fridge. I like mixing them with instant rice or pasta, and you’ve got a filling meal with decent protein.
We always toss in a bunch of nuts, dried fruit, and shelf-stable wraps for those times when nobody feels like cooking. You can throw these together in all sorts of combos, and they really keep you going out there.