15 Winter Camping Tips For Beginners Who Want To Embrace The Magic Of Cold-Weather Adventures
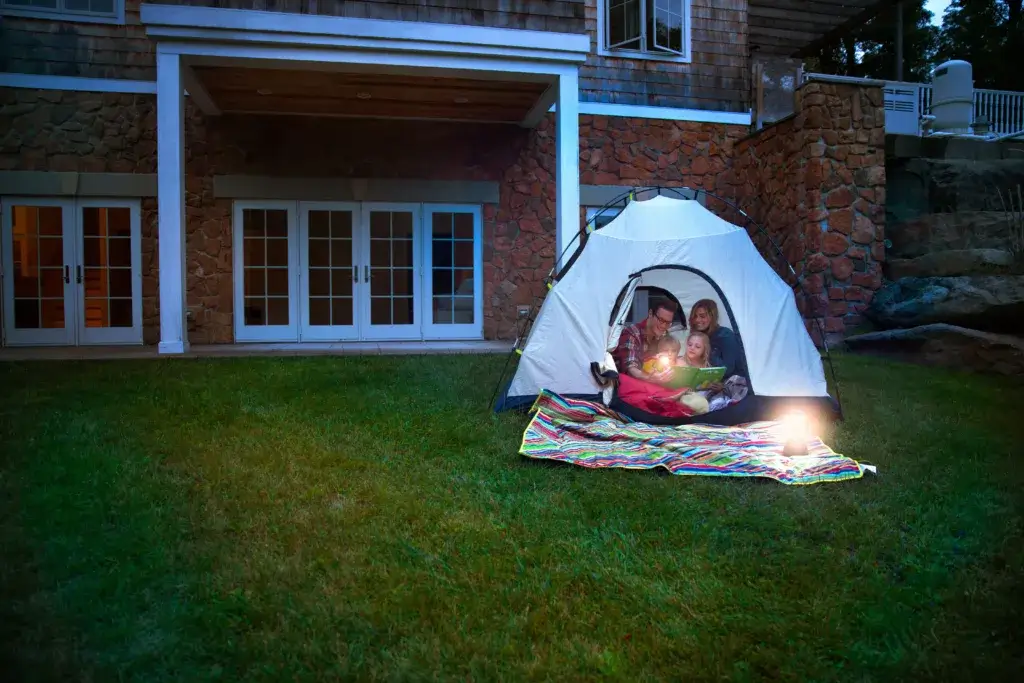
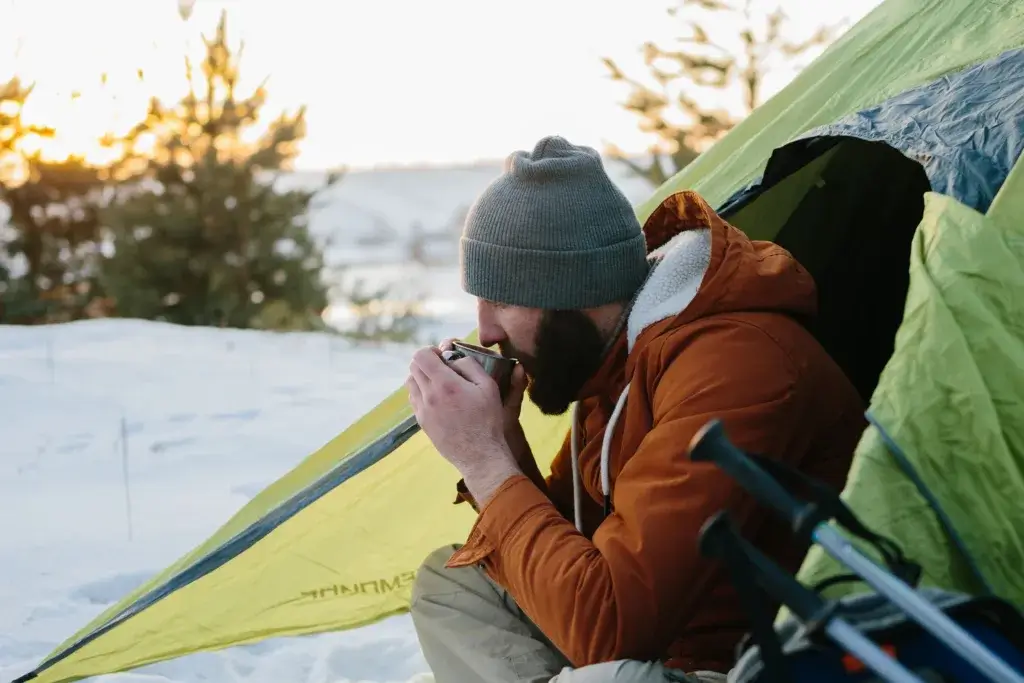
Winter camping might sound like something only the bravest folks try, but I promise, with a little prep, it can be one of the most rewarding outdoor experiences out there. There’s something about waking up in a snow-covered forest, sipping hot coffee, and soaking in the quiet, white landscapes that summer campers totally miss out on.
The secret to enjoying winter camping is knowing how to stay warm, dry, and safe through good gear choices, layering your clothes, and a few smart tricks.
I’ll never forget my first winter camping trip. My air mattress deflated. The heater failed. And I swore I’d never do it again. But I did because it was so beautiful, I decided to give it one more go, armed with more wisdom from my first failed trip.
Once I picked up a few essential strategies, I realized cold-weather camping can actually be comfier than sweating through a sticky July night.
From picking a solid four-season tent and a proper sleeping system to figuring out layering and keeping your phone alive in the cold, these basics will turn winter camping from a survival test into a cozy getaway. Whether you want to build snow walls for wind protection or just need to know which foods keep you energized in the cold, getting these winter camping basics down will make a huge difference.
1) Choose a four-season tent designed for winter conditions to keep out the snow and wind
My first winter camping trip taught me a painful lesson. My three-season tent collapsed under six inches of snow, and I ended up scrambling for shelter in the middle of the night.
Four-season tents can handle high winds and snowstorms. They use beefier poles and tough fabrics that won’t rip when the weather gets wild.
The steep tent walls make a big difference. They keep snow from piling up and crushing your shelter while you sleep.
Regular tents have those bowl-shaped walls that just collect snow. Not ideal.
I switched to a tent with great portability at 4 pounds and a small packed size. It sets up fast, even when my fingers are numb, which I really appreciate.
Look for double-wall construction and strong aluminum poles. These help trap heat inside and keep the cold out. My current tent has handled 40-mph winds without budging.
It’s worth spending a little more for a quality four-season tent. It really can be the difference between a fun trip and a dangerous one.

GEERTOP Lightweight, Double Layer Waterproof, Cold Weather Tent for Camping, Hunting, Hiking, Climbing, Outdoor Travel - Easy Set Up
2) Invest in a down sleeping bag rated at least 10 degrees colder than the temperatures you expect
I brought a 30-degree bag for a 20-degree night on my first winter camping trip. I spent the whole night shivering and barely slept.
Temperature ratings on sleeping bags can be misleading. The number listed is usually the survival temp, not the comfort temp.
Experts say to buy a bag rated ten degrees colder than what you expect. So for 20-degree weather, grab a 10-degree bag.
Down insulation is hard to beat for winter camping. It’s lighter, packs smaller, and keeps you warmer (as long as it stays dry).
A 10-degree sleeping bag keeps you warm in surprisingly cold conditions. Both down and synthetic insulations work, but down just feels toastier to me.
Your sleeping bag is your lifeline out there. Don’t skimp on this essential piece of gear.
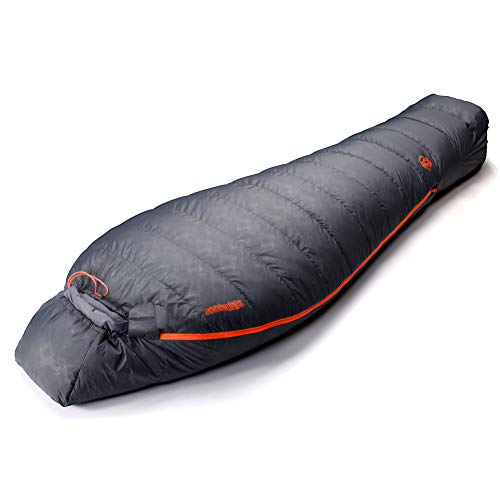
Hydrophobic Down Sleeping Bag for Adults - Lightweight and Compact for Backpacking, Camping, Mountaineering and Other Outdoor Activities
3) Layer your clothing – start with moisture-wicking base layers, add insulating mid-layers, and top with a waterproof shell.
On my first winter camping trip, I wore cotton everything and felt like a wet popsicle by lunchtime. Live and learn. The right layering system makes all the difference.
Start with a moisture-wicking base layer. Merino wool or synthetic fabrics work best – they pull sweat off your skin and keep you dry. Cotton is a no-go in cold weather.
The mid-layer is your warmth booster. I like a lightweight fleece or a down vest to trap body heat without making me feel bulky.
Top it off with a waterproof shell. I look for a jacket that keeps out wind and snow but still breathes, so I don’t feel like I’m wrapped in plastic.
The best part about this three-layer system is you can swap layers in and out as you go. Hiking uphill? I shed a layer. Sitting around camp? I pile it back on.

4) Practice setting up your winter tent at home so you’re not fumbling with frozen fingers in the cold.
On my first winter camping trip, I tried setting up my tent in 20-degree weather with the wind howling. My fingers felt like frozen sausages, and I could barely figure out which pole went where.
Practicing your tent setup beforehand is so important. Cold fingers make everything harder, so I always run through the setup at least three times before heading out.
Try it in your backyard or even your living room. Time yourself, and make sure you can assemble everything – rainfly, guy lines, all of it. Notice which parts are tricky or confusing.
Practice with gloves on, too. I found out the hard way that my favorite liner gloves made it impossible to grab certain clips.
It’s all about muscle memory. When you’re tired, cold, and losing daylight, you want the setup to feel automatic. I can pitch my tent in the dark now, just because I’ve done it so many times at home.
5) Bring a sleeping pad with high R-value insulation to keep the cold from creeping up under your sleeping bag.
Don’t make the rookie mistake of bringing a summer sleeping pad on a winter outing. (Ask me how I know!) Even with my warmest sleeping bag, I woke up shivering because the frozen ground just sucked the heat right out of me.
R-value is how well your pad keeps the cold earth from stealing your warmth. Think of it as your personal shield against the chill.
For winter camping, I always grab a pad with an R-value of at least 4. Once it’s below freezing, you really need a 4-season sleeping pad.
Higher R-values mean more insulation. Lower R-values work for summer, but in winter they just don’t cut it.
Your sleeping pad is as important as your sleeping bag. If you’re cold at night, your pad is probably the problem.

Gear Doctors - Self Inflating Camping Sleeping Pad for Camping
6) Pack hand warmers – they’re a tiny luxury that can change a miserably cold night into a cozy one.
It’s really hard to work your tent zipper or light the stove when your hads are frozen.
Hand warmers are tiny but mighty. Cold hands aren’t just uncomfortable – they can be dangerous when you need to set up camp or handle gear.
I pack rechargeable hand warmers now. The Zippo HeatBank 9s Plus is my favorite after trying a bunch. Battery-powered ones beat disposables since you can use them again and again.
Slip them into your gloves or tuck them in your sleeping bag before bed. They keep working for hours and make a huge difference on freezing nights.
Rechargeable hand warmers are lightweight, compact, and totally worth the space in your pack when it’s cold out.

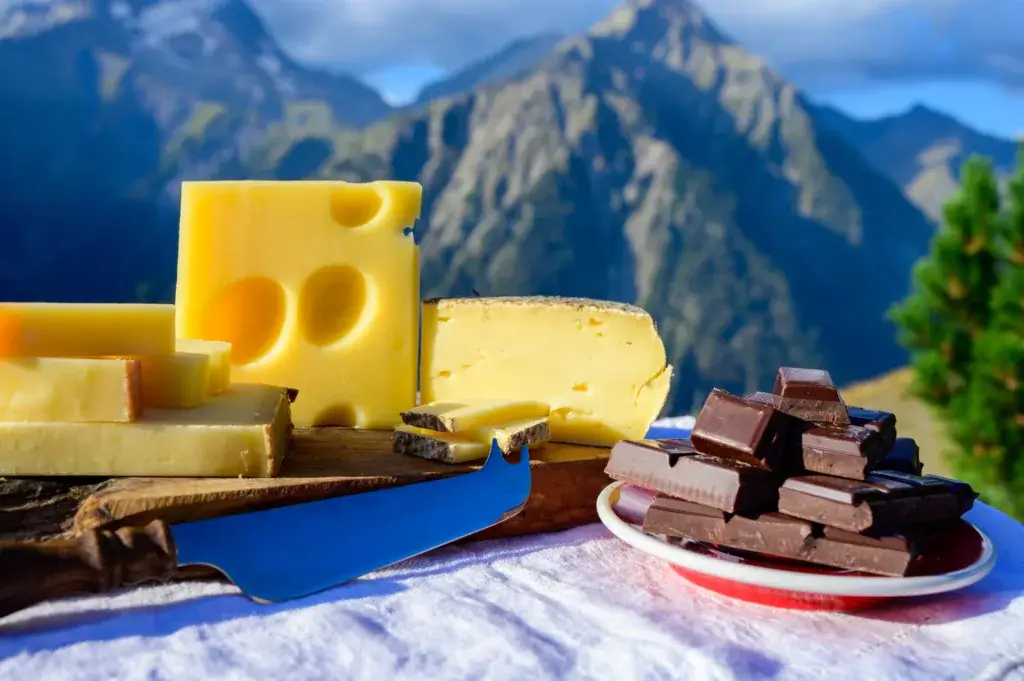
7) Eat calorie-dense foods like nuts, cheese, and dark chocolate to keep your energy and body heat up.
Your body burns more calories trying to stay warm in cold weather. Regular trail mix and granola bars just don’t cut it when temperatures drop below freezing.
High-calorie foods are total lifesavers out there. I always pack mixed nuts, aged cheddar cheese, and dark chocolate squares in my jacket pockets.
These foods give you quick energy while helping your body generate heat from the inside out. Nuts have healthy fats that burn slowly and steadily.
Hard cheeses travel well and don’t freeze solid like some other foods. Plus, they taste incredible when you’re tired and cold.
Dark chocolate is my favorite for morale and energy. I save it for the moments when the cold really starts getting to me.
Pack calorie-dense foods you can eat with gloves on. Nobody wants to peel off their gloves just to grab a snack when it’s snowing.
8) Avoid cotton clothing; it holds moisture and will chill you fast. Wool and synthetics are your best friends.
Cotton absorbs moisture and holds it against your skin, making you feel colder. When you sweat or get wet from snow, cotton keeps that dampness close to your body instead of letting it dry.
This is why cotton is dangerous for cold-weather camping. It loses its ability to keep you warm when wet.
I always pack wool or synthetic materials. Merino wool feels amazing against your skin and stays warm even when damp.
Synthetic fabrics like polyester dry quickly and move sweat away from your body. They’re lighter than wool and often cost less too.
I keep one simple rule: no cotton anything when winter camping. That means no cotton socks, underwear, or shirts.
Your body will thank you when you stay warm and dry all night. Trust me, it’s worth it.

Heavyweight, Midweight, Lite Merino Wool Thermal Underwear For Men Top, Bottom
9) Hydrate often [ even in cold weather, your body loses water through breath and sweat
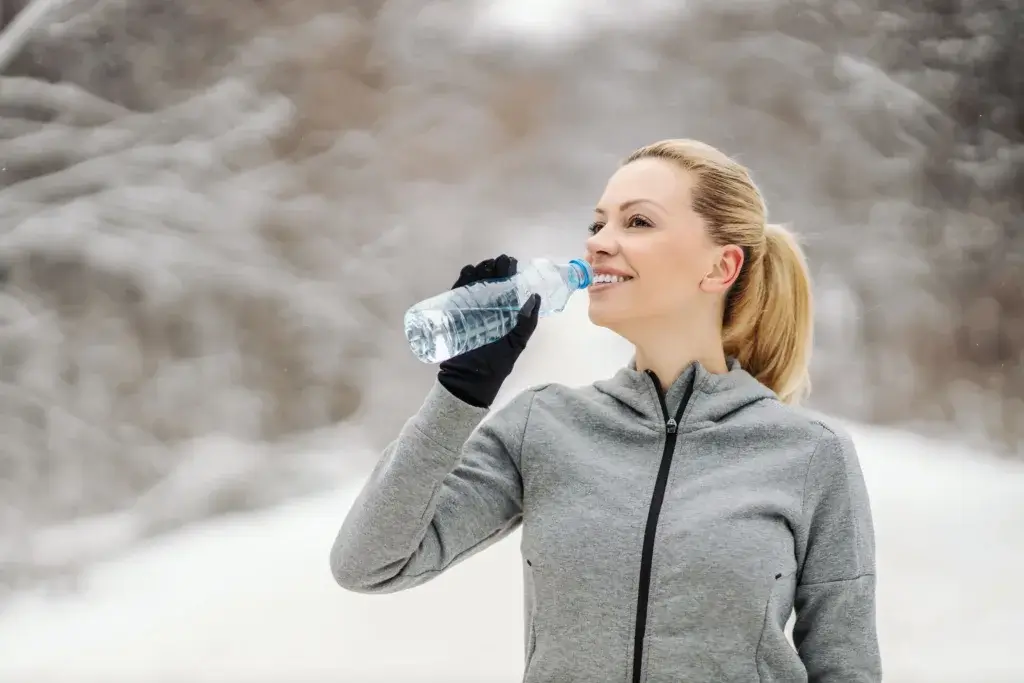
Here’s another lesson I learned the hard way on a winter hiking/camping trip. I figured since I wasn’t sweating buckets like summer hikes, I could skip the frequent water breaks.
Big mistake. By evening, I had a pounding headache and felt exhausted.
Your body actually loses more water in winter than you might think. Every breath creates that visible puff of vapor, which is moisture leaving your body.
All those layers make you sweat more than expected. Cold air needs to be warmed and moistened before entering your lungs, causing extra fluid loss through breathing.
The tricky part is you don’t feel as thirsty in cold weather. Your body’s thirst signals get confused by the temperature.
I now set hourly reminders on my watch to take water breaks. Warm drinks work great too – herbal tea or hot chocolate from a thermos feels amazing and keeps you hydrated.
Keep your water bottle inside your sleeping bag overnight so it doesn’t freeze solid. Seriously, this one tip has saved me a ton of frustration.

Insulated Stainless Steel - Wide Mouth Chug Lid, Non Spill, Leakproof in 32 Oz Black
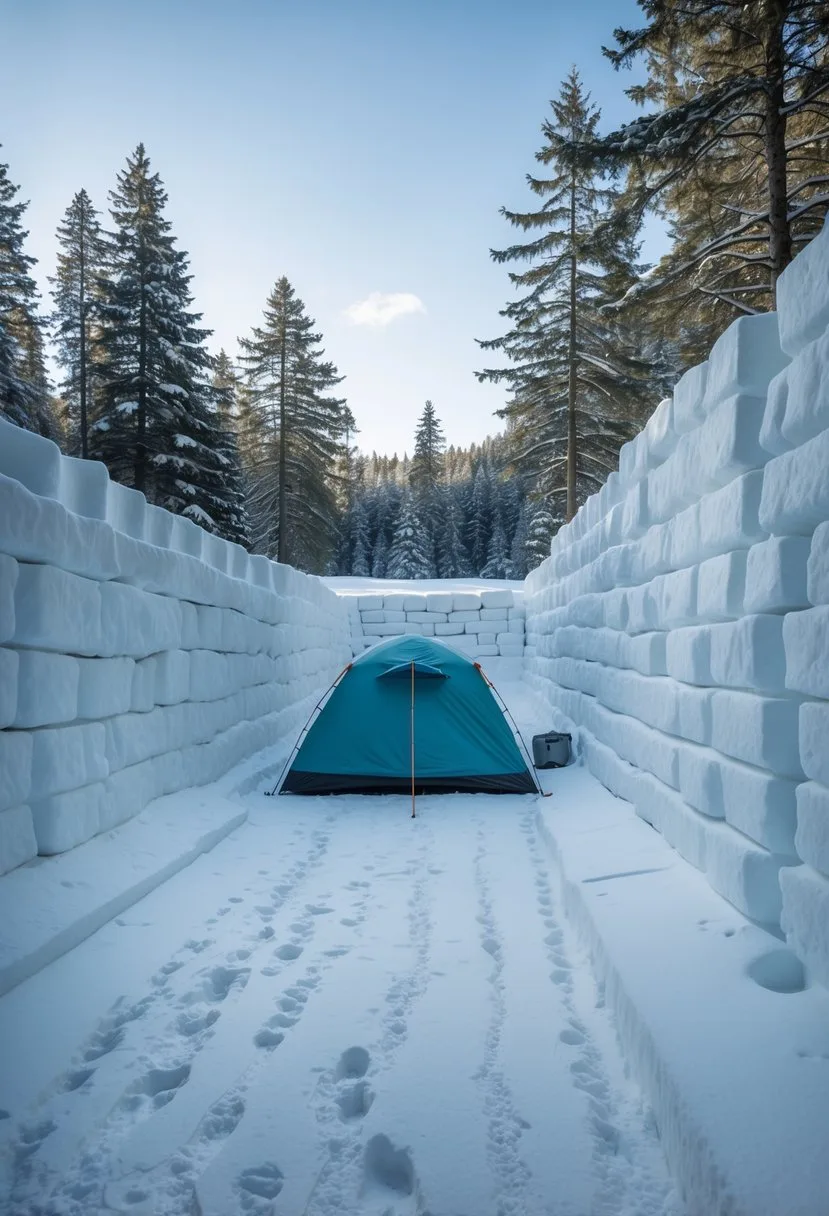
10) Create a windbreak with snow walls if your campsite is exposed; it makes a huge difference in warmth.
I learned this trick on YouTube University!
Building snow walls changes everything. Snow walls act as windbreaks, trapping heat around your tent and blocking those brutal gusts that make you question your life choices.
Start by piling snow about three feet high on the windward side of your tent. Make it wider than your tent footprint.
I usually build mine in a crescent shape to wrap around the tent sides, too. Pack the snow down firmly with your boots or shovel.
Loose snow just blows away when the next gust hits. Don’t build the wall too close to your tent, though.
Snow naturally accumulates behind windbreaks, and you don’t want it piling up against your shelter.
The difference is incredible. My thermometer showed a 15-degree temperature increase inside the tent after building our first snow wall.
My feet actually stayed warm that night! I couldn’t believe it.
11) Use gaiters and waterproof boots to keep snow out and your feet dry and happy
Nothing ruins a winter camping trip faster than wet, cold feet.
Waterproof boots are your first line of defense. They keep moisture out while your feet stay warm inside.
But boots alone aren’t enough in deep snow. That’s where gaiters come in.
These simple leg coverings wrap around your ankles and lower legs. Gaiters prevent snow, water, dirt and pebbles from sneaking into even the most waterproof boots.
I always pack my gaiters now, especially for deeper snow conditions. They’re great for keeping snow from going down your boots, melting, and freezing your feet.
The combination works perfectly together. Waterproof boots and gaiters help keep your socks and ankles dry, keeping your feet warmer as you winter hike.
Your feet will thank you when you’re cozy around the campfire instead of nursing frostbitten toes. It’s worth the extra effort.
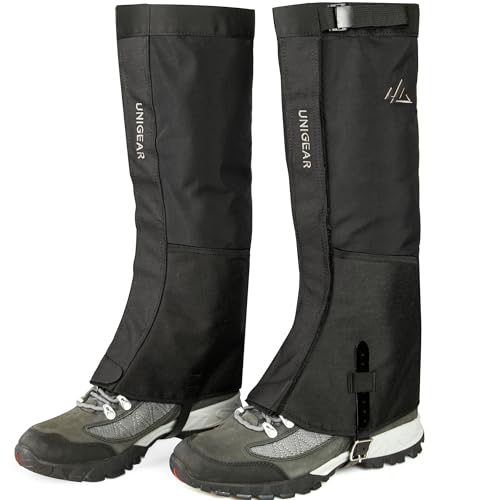
Waterproof Boot Gaiters for Hiking, Walking, Climbing, Hunting, Skiing
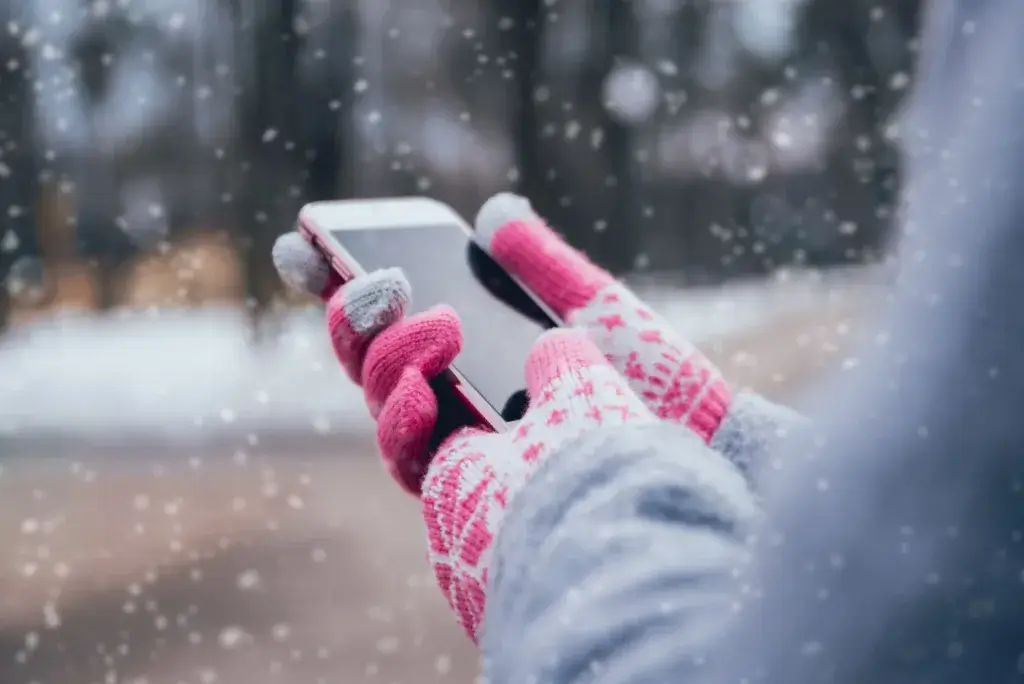
12) Keep your phone and electronics warm by storing them close to your body overnight

Cold weather drains batteries fast. Freezing temperatures can have an impact on how well your tech works and whether it works at all.
I always tuck my phone into my sleeping bag with me. Keep your device warm and close to your body in an inside pocket to prevent losing charge overnight.
Your body heat works like a natural warmer. I slip my phone into a sock first to avoid getting woken up by notifications or the screen light.
This simple yet effective sleeping bag hack provides a convenient solution to keep devices charged and ready.
Camera batteries, GPS units, and power banks all benefit from the same treatment. Just remember to keep everything in waterproof bags.
Nobody wants a soggy phone at breakfast time. That’s a headache you don’t need.
13) Bring a small camp stove designed for winter use, like an MSR WhisperLite, for melting snow to drink and warming meals.
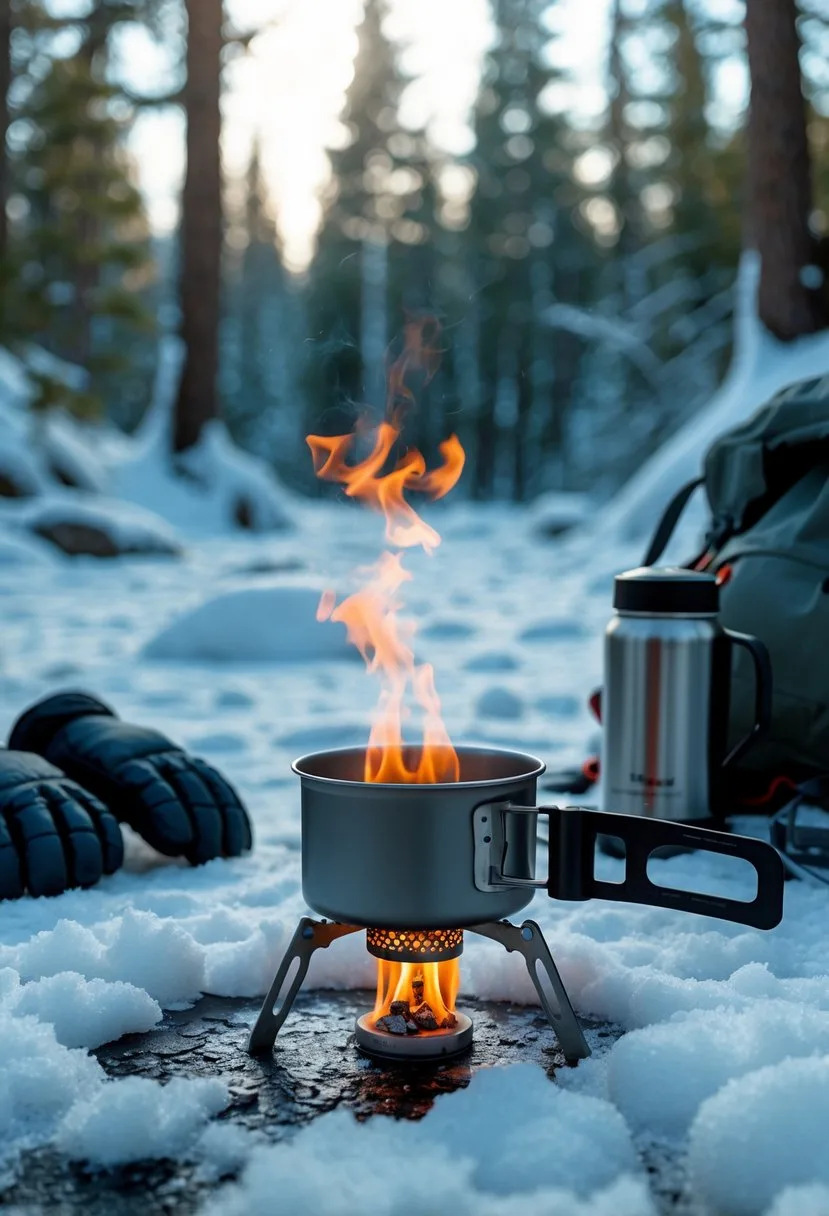
Regular canister stoves can refuse to work in freezing temperatures, leaving you with no way to melt snow for water.
Winter camping demands a reliable stove that can handle extreme cold. The MSR WhisperLite stands up to extremely cold weather, high altitude, and blustery winds, making it perfect for winter conditions.
Liquid fuel stoves work much better than canister stoves in cold weather. The MSR Whisperlite remains the best-selling liquid-fuel backpacking stove ever made for good reasons.
You’ll need that stove for two main jobs: melting snow for drinking water and warming your meals. Never eat snow directly – it lowers your body temperature and wastes precious energy.
The MSR Whisperlite is extremely compact at 14 ounces and fits nicely into most camping pots.
Its simple design makes it easy to maintain and repair in the field. I always pack extra fuel for winter trips since melting snow takes more time and fuel than you’d expect.

International Compact Multi-fuel Camping and Backpacking Stove
14) Wear a warm hat and a balaclava or neck gaiter – most body heat escapes through your head and face
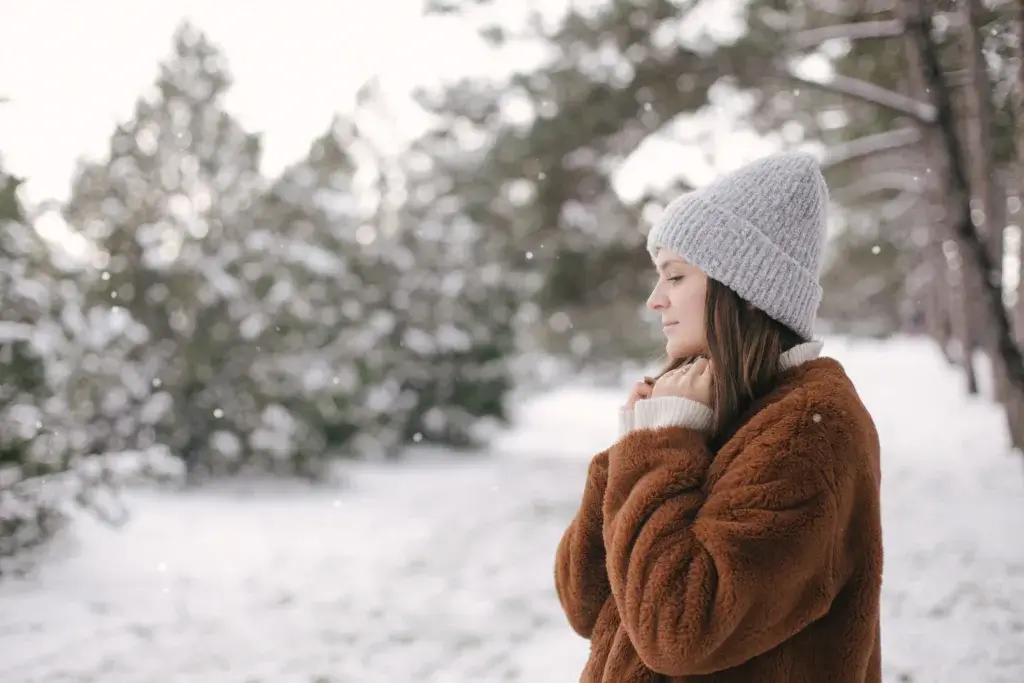
Your head and face lose heat faster than anywhere else.
A quality winter hat is my first line of defense against the cold. I always bring a warm hat and either a balaclava or neck gaiter for backup.
The balaclava covers your entire head, neck, and face in one go. A neck gaiter is more flexible, so I can pull it up when the wind bites or drop it down when I need to breathe easier.
A good balaclava fits snugly and traps warmth. Neck gaiters are looser, but they block drafts well.
I usually go for neck gaiters since they’re easier to adjust through the night. Don’t skimp on materials here – merino wool or synthetics work best.
Cotton? Leave it at home. It just gets damp and cold.

Face Mask Neck Warmer for Men & Women
15) Check weather forecasts obsessively and have a backup plan in case conditions turn nasty
This one got me on my second winter camping trip. I checked the forecast once and thought I was good.
Then a storm hit, way harder than predicted. That was a long, miserable night.
Now I check the weather several times before heading out. You can check forecasts up to 15 days in advance by plugging in your destination’s zip code.
I use at least two different weather apps and websites. Mountain weather changes in a blink, so having a few sources helps me figure out what’s really going on.
Some weather apps offer live radar and community updates, which are pretty handy.
But just checking isn’t enough. I always have a backup plan, whether that’s a heated cabin nearby or a shorter trail closer to the car.
If the forecast looks rough, I’ll postpone the trip. No shame in living to camp another day.
Your backup plan should have alternative campsites and escape routes. Future me is always grateful to past me for this.
Essential Gear Considerations
When temps drop below freezing, your gear is your lifeline. The right sleeping system keeps you warm, and a well-insulated tent blocks out harsh winds.
Layering smartly helps keep your body temp steady no matter what Mother Nature throws at you.
Choosing the Right Sleeping System
On my first winter camping trip in Colorado, I brought a three-season sleeping bag. It left me shivering at 15 degrees, and I barely slept.
Temperature ratings matter more than you think. I always pick a sleeping bag rated at least 10-15 degrees below the coldest temp I expect.
If I’m camping in 20-degree weather, I grab a bag rated for 5-10 degrees. Sleeping pad insulation is crucial.
The ground just drains heat from you, way faster than the air. I look for pads with an R-value of 4 or higher for winter.
Now I use a winter setup with both a foam pad and an inflatable pad. Foam goes on the ground, inflatable on top.
Down vs synthetic fill? Down packs smaller and lighter, but synthetic works better when things get wet. I go with down for dry, cold trips and synthetic when I expect wet snow.
Bag shape affects warmth, too. Mummy bags trap heat best, but can feel tight. Semi-rectangular bags give you a little more wiggle room.
Insulation Strategies for Tents
Your tent is your winter fortress. The right insulation can mean the difference between a cozy night and pure misery.
Four-season tents handle snow and wind way better than three-season ones. The extra poles and tougher fabric are worth the extra weight when it’s gnarly out.
Footprints and ground barriers add another layer between you and the frozen ground. I never skip the footprint, even if it’s optional.
Internal condensation is a pain in winter. Ventilation feels wrong when it’s freezing, but I always crack a vent to keep moisture from building up.
Here are a few tent insulation tricks I swear by:
- Pack snow around the tent base for wind protection
- Use a small tarp as an extra vestibule
- Hang reflective emergency blankets inside for radiant heat
- Keep wet gear in the vestibule, not inside
Dead air space insulates best. Lots of thin layers beat one thick one, whether it’s tent walls or clothing.
Must-Have Clothing Layers
Knowing what each layer does helps you stay comfortable and safe when the weather changes fast.
Base layers need to wick moisture away. Merino wool or synthetics work; cotton just soaks up sweat and chills you.
Insulation layers trap warmth. Down jackets are awesome at camp, but I use synthetic for hiking or when I might get sweaty.
Shell layers keep out wind and moisture. I look for breathable, waterproof stuff that won’t turn me into a sweaty mess.
| Layer Type | Best Materials | When to Wear |
|---|---|---|
| Base | Merino wool, synthetic | Always next to skin |
| Insulation | Down, synthetic fill | When stationary or very cold |
| Shell | Gore-Tex, similar | Wind, rain, or snow |
Extremities need extra care in winter. I pack several pairs of gloves, warm socks, and a solid hat.
Your body focuses on keeping your core warm, so your hands and feet get cold first. Essential winter camping gear means backup clothing for every layer.
I always pack at least one extra set in case my main layers get wet. Avoid overdressing when you’re moving.
I start out a little cool and let my body warm up as I hike. Too many layers just make you sweat, and wet clothes in winter are a disaster.
Staying Comfortable and Safe in the Cold
For me, cold-weather camping always comes down to three things. Eat warm meals, stay hydrated, and keep your head in the game when the temps drop.
Easy Campfire Cooking Ideas
I tried making pasta primavera on my first winter trip, with frozen fingers. Never again.
Now, one-pot meals are my go-to. I just toss everything in one pot and let it simmer.
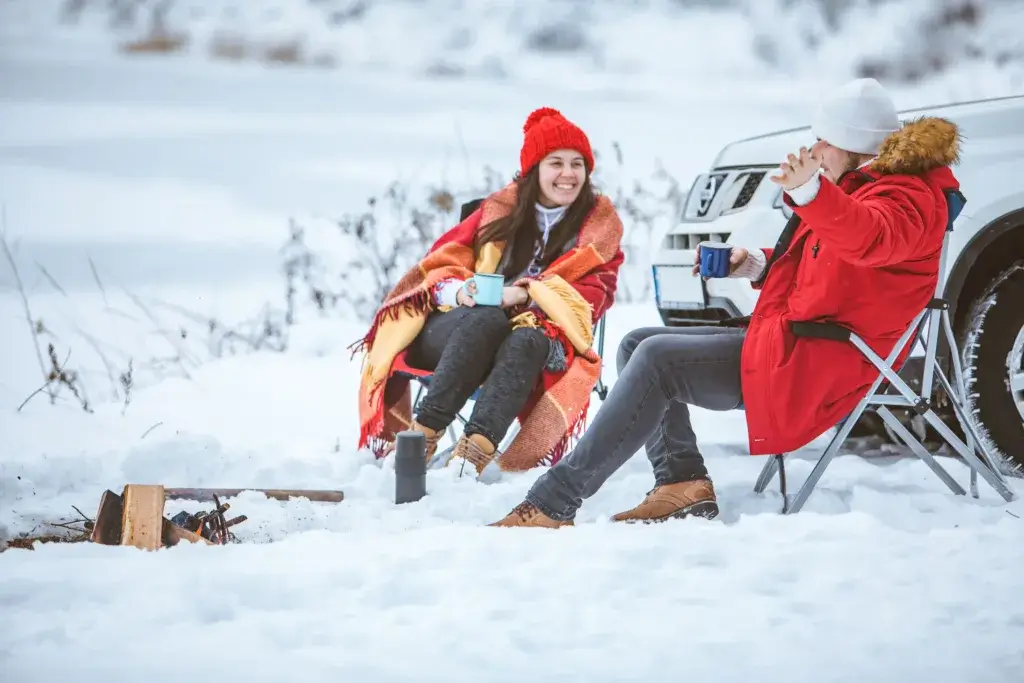
Chili, stew, or a thick soup – these meals stay warm longer and don’t leave much cleanup. Hot drinks are a must, too.
I always bring instant hot chocolate, coffee packets, and herbal teas. They warm you up and give you something to look forward to.
Here’s a tip: a pinch of salt in hot chocolate makes it even better. My winter camping menu usually looks like this:
- Breakfast: Oatmeal with dried fruit and nuts
- Lunch: Instant soup with crackers
- Dinner: Rice and beans with canned veggies
- Snacks: Trail mix, energy bars, and beef jerky
I keep my stove close to my body before cooking. Cold fuel just won’t light right, and I’ve wasted way too much time trying to get a frozen stove going.
Hydration and Nutrition in Subzero Conditions
Cold weather makes your body work harder, even if you’re just sitting around camp. Staying tuned in to what your body needs can keep you out of real trouble.
I drink water all the time, even when I’m not thirsty. Cold air tricks you into thinking you’re fine, so I set a timer to remind myself to drink every hour or so.
I keep water bottles in my sleeping bag overnight. Waking up to frozen water is the worst, especially if you want coffee.
I use wide-mouth bottles since they freeze more slowly. Your body burns 20-30% more calories in the cold just trying to stay warm, so I pack calorie-dense foods like these:
| Food Type | Examples | Why It Works |
|---|---|---|
| Fats | Nuts, cheese, olive oil | Slow-burning energy |
| Carbs | Granola, dried fruit | Quick energy boost |
| Protein | Jerky, canned fish | Muscle recovery |
I eat before I feel hungry. Once I’m both cold and hungry, it’s way harder to warm up, so I snack every couple of hours no matter what.
Keeping Spirits High on Frosty Nights
Winter camping really tests your mental game, not just how well you pack. I’ve watched some tough hikers get totally thrown off by long, cold nights.
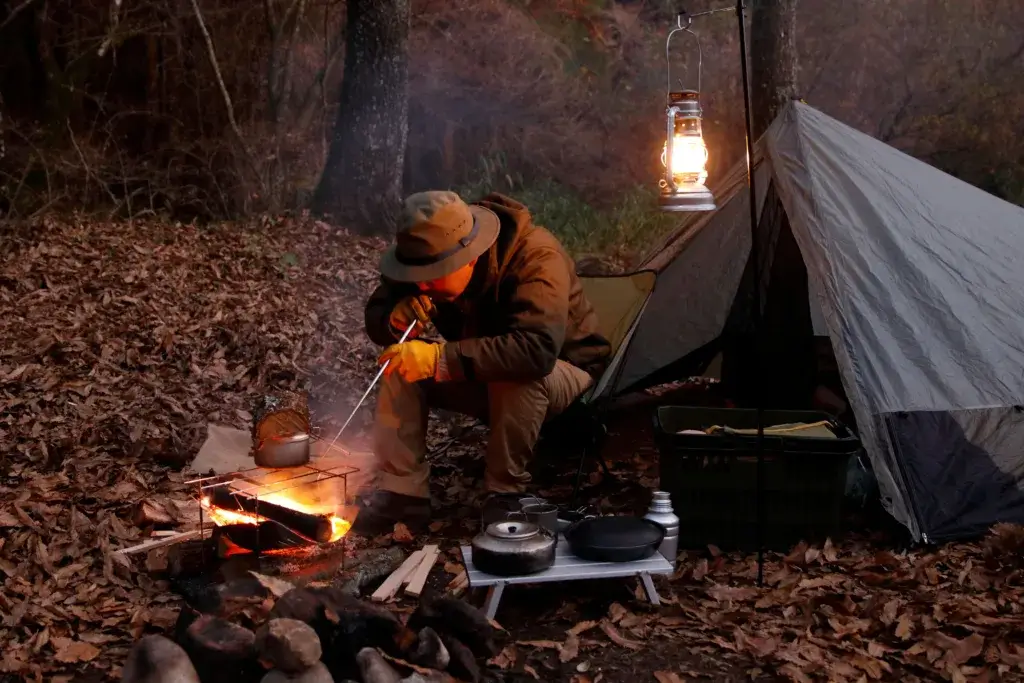
Light makes everything better. I always stash extra batteries for my headlamp and bring a little lantern for the tent.
Warm light changes the whole vibe in the tent. It just feels cozier and helps shake off the winter blues.
Long winter evenings can drag on, so I pack a deck of cards and a paperback book. Card games barely take up any room, and a book is perfect for winding down by the fire.
Stay busy when it’s daylight. I like to explore the area, build goofy snow sculptures, or practice some random camp skills.
If I keep my body moving and my brain occupied, I notice I sleep warmer and feel way more upbeat.
I try to plan a little treat for each day. It could be my favorite candy bar or a weird tea blend I never drink at home.
Having something to look forward to makes the cold less annoying, at least for me.
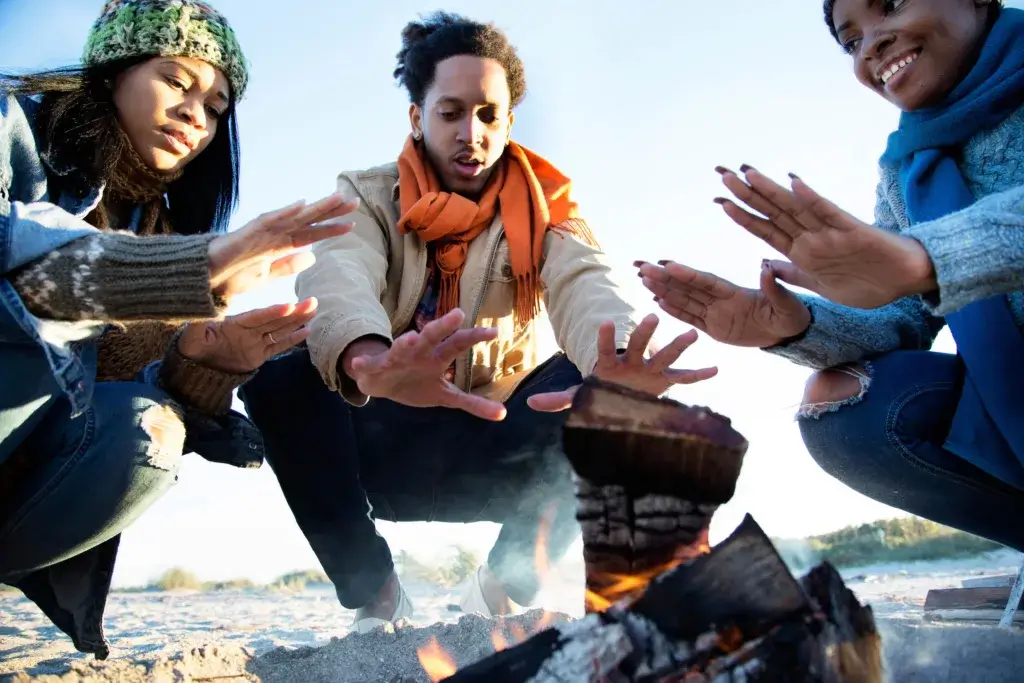
Sharing stories around the campfire is a classic. Even if I’m solo, I’ll call a friend before bed.
Staying connected matters more than you’d think when winter starts to feel a bit much.
Frequently Asked Questions
New winter campers usually have a bunch of the same worries about staying safe and comfortable in the cold. Here are the big questions I get about gear, safety, and just making your first snowy trip less intimidating.
What essentials should be on my checklist for camping in the cold?
My winter camping checklist has changed a lot over the years. The main things I never skip are a four-season tent, a sleeping bag rated for at least 10 degrees colder than you expect, and a sleeping pad with a high R-value.
I always bring more batteries than I think I’ll need since the cold drains them fast. Hand and foot warmers can seriously save the day when temperatures drop out of nowhere.
Don’t forget a solid headlamp and backup batteries. The sun sets early, and you’ll probably end up setting up camp in the dark at some point.
Essential winter camping gear also includes some weird stuff, like duct tape for surprise repairs and a small shovel for digging out snow.
How can I keep my tent warm during those frosty winter nights?
I’ve learned that keeping a tent warm actually starts with where you set it up. I look for a spot that’s sheltered from the wind and pack down the snow so I’ve got a solid base.
My body heat does most of the work inside the tent. A good sleeping bag and insulated pad make the biggest difference for me.
Don’t ever use propane heaters or stoves inside your tent for warmth. The carbon monoxide risk isn’t worth it, and you’ll end up with wet gear from condensation anyway.
Sometimes I’ll fill a hot water bottle with boiling water before bed and toss it in my sleeping bag. It stays warm for a few hours and helps me fall asleep faster.
Are there specific activities to make my winter camping experience more enjoyable?
Winter camping opens up a bunch of stuff you can’t really do any other time. Snowshoeing around camp lets me explore places that would be a pain to reach in summer.
Building snow kitchens and windbreaks is actually pretty fun. Plus, it keeps me moving and makes camp life way more comfortable.
Taking photos in the winter is a whole different thing. The way the light hits fresh snow in the morning is unreal – it’s one of those things you have to see for yourself.
Hot drinks taste way better when sitting around a winter campfire. I always bring stuff for hot chocolate or mulled cider to share if I’m with friends.
Can you recommend the best ways to use a heater safely while camping in winter conditions?
Heating a tent safely in winter takes a bit of planning and the right gear. I stick to heaters made for camping – never those big household propane ones.
Ventilation is key with any fuel-burning device. Carbon monoxide can build up fast in a tent, and that’s not a risk I’m willing to take.
Battery-powered heaters are the safest, but they’re not super powerful. I mostly use them to warm up my sleeping bag before I crawl in.
Layering clothes and using the right sleeping system works better than relying on a heater. Trapping my own body heat keeps me warmer than any tiny camping heater ever could.
What should I look for in a winter camping tent that can accommodate a stove?
If I plan to use a stove inside, I look for tents with built-in stove jacks or ports. Those openings let the stovepipe exit safely without melting the tent.
Hot tents made of canvas or fire-resistant fabric work best with wood stoves. They’re more expensive, but they completely change the winter camping game.
Make sure there’s enough space to keep the stove away from the tent walls and your sleeping area. You don’t want any accidents in the middle of the night.
Winter camping shelter tips always remind me that ventilation matters, even with stove-ready tents.
At what temperatures does winter camping become too risky for beginners?
For your first winter camping trips, I’d say stick with nights above 20°F. That way, you’ve got some wiggle room if things don’t go perfectly.
Wind chill is a bigger deal than the number on the thermometer. A 25°F night with gusty winds can feel way colder and, honestly, a lot more dangerous than a calm 15°F evening.
Your gear really sets the limits. If your sleeping bag says it’s rated for 10°F, I wouldn’t try camping out in 5°F weather right away.
As you gain experience, those limits shift. I can handle colder nights now, but when I first started, those temps would’ve been a hard no for me.