Tent Floor Insulation: Keep Your Tent Toasty When Camping Cold
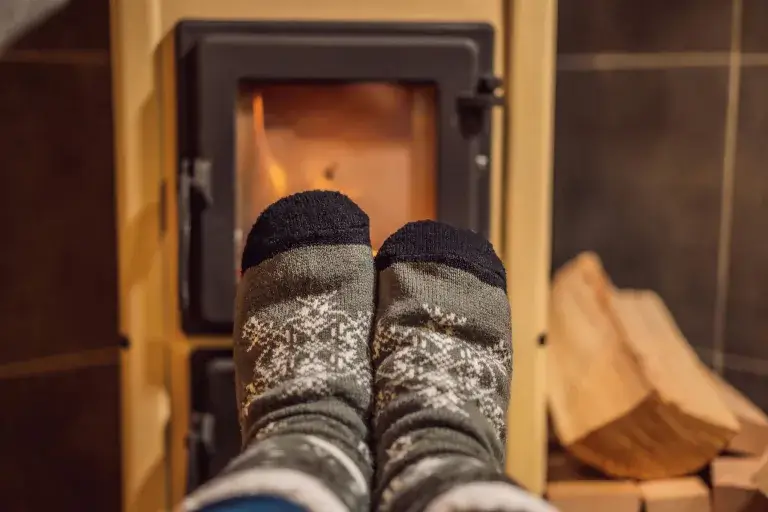
Cold feet and a chilly tent floor can ruin what should be an awesome camping trip. There’s no reason to just accept freezing toes or a miserable night.
Proper tent floor insulation means adding layers like foam pads, blankets, or reflective insulation under and inside your tent to stop heat from leaking into the ground.
The ground beneath you acts like a giant heat sink, sucking warmth away all night long. Even the best sleeping bag can’t save you if cold air keeps creeping up from below.
If you want to stay comfortable, you really have to deal with the tent floor, not just pile on more blankets or wear another pair of socks.
There’s a whole range of options, from foam tiles and emergency blankets to creative stuff like dry leaves. Car campers can bring more, but backpackers can still find lightweight tricks that work.
The right insulation can turn a shivery night into a cozy memory. Why not give yourself the best shot at a good night’s sleep?
Key Takeaways
- Tent floor insulation keeps you warmer by stopping heat loss to the ground during cold weather camping.
- Layer up with foam pads, blankets, and reflective insulation both under and inside your tent for extra warmth.
- Cover the tent floor and run insulation a few inches up the walls to block sneaky drafts and cold air.
Why Tent Floor Insulation Matters
The ground under your tent just keeps pulling heat away from your body all night. Good floor insulation acts like a barrier, helping you actually rest and stay warm, especially on cold nights.
How Insulation Keeps You Warm
Cold ground steals heat way faster than cold air. If you lie right on the tent floor, your body heat just drains away into the earth.
Insulation traps air pockets that slow down this heat loss. Dead leaves work because they trap air, just like puffy sleeping bags do.
Foam tiles and reflective stuff both help, but in different ways. Foam blocks cold from coming up, while reflective insulation bounces your body heat back at you.
If you run a tent heater but skip the floor insulation, the heater has to work overtime. That’s just a waste of fuel and effort.
Preventing Heat Loss and Hypothermia
Heat loss through the floor isn’t just uncomfortable; it can be dangerous. The body loses heat in a few ways, but conduction through the ground is especially sneaky in cold weather.
Hypothermia can start if your core temperature drops even a little. First, you shiver, then your coordination and thinking get fuzzy. Not a great combo in the wild.
Sleeping pads with R-values from 4.0 to 8.0 help, but sometimes they’re not enough if it’s really cold out.
The ground can stay freezing even if the air warms up a bit during the day. Snowy ground? Forget about it, it’s always cold.
Layering insulation gives you backup in case something fails or the weather turns ugly. It’s good peace of mind.
Impact on Comfort and Sleep Quality
Cold floors make it tough to fall asleep and keep you awake all night. Shivering stops your body from getting real rest.
Lousy sleep messes with your judgment and reaction time the next day. Not exactly what you want if you’re hiking or climbing.
Insulation that goes up the tent walls (at least 5 inches) blocks cold air from sneaking in along the floor. That little extra makes a huge difference.
Insulated floors also help control moisture. Cold surfaces cause condensation, which means wet sleeping bags and clothes – nobody wants that.
When you’re comfortable, camping is way more fun. Miserable nights just make people swear off winter camping.
Getting good sleep helps you pack up faster and make smarter choices about your route and the weather, too.
Types of Tent Floor Insulation
You really have two main ways to stop the cold ground from stealing your heat. Foam-based stuff gives you both padding and warmth, while reflective layers bounce your body heat back at you.
Foam Pads and Mats
Foam pads are the classic go-to for tent insulation. They block the cold and give you a softer place to sleep.
Closed-cell foam is the best bet. It doesn’t soak up water and keeps you warm even if things get wet.
Open-cell foam is cheaper but turns into a soggy mess in the rain. I wouldn’t risk it if the weather looks iffy.
Key benefits of foam insulation:
- Lightweight and easy to carry
- Won’t pop like air mattresses
- Works even when it’s freezing
- Doesn’t break the bank
Lots of campers just stack a couple of thin foam pads for extra warmth. You can mix and match thickness depending on how cold it’s gonna get.
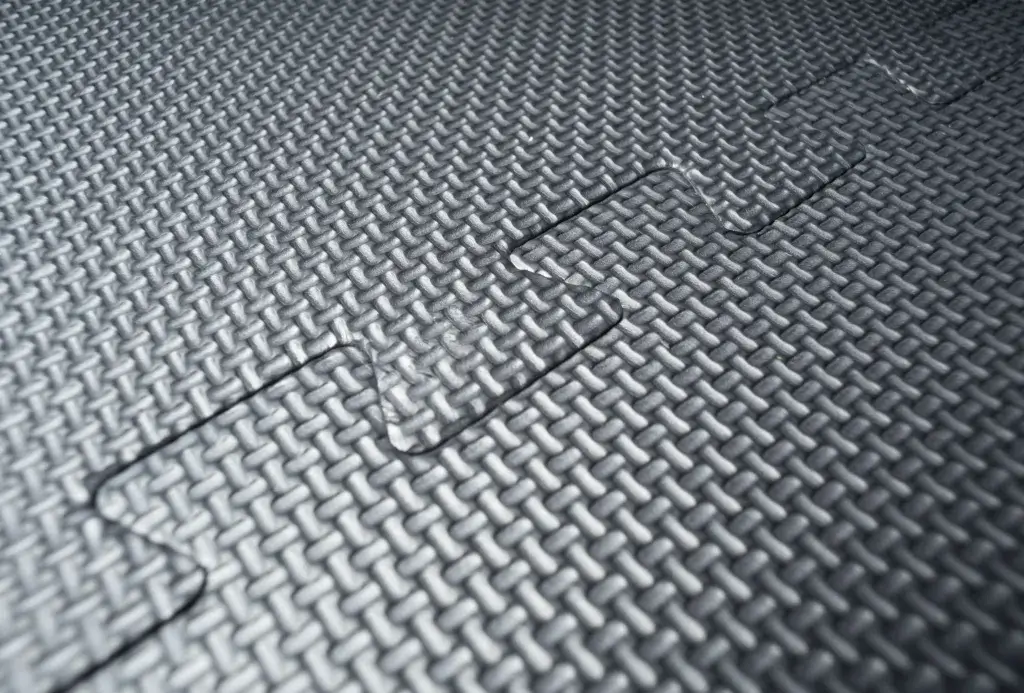
Exercise mats from regular stores actually work great for insulation. Those puzzle-piece ones cover a big area and cost way less than fancy camping gear.
The only real downside? Foam pads are bulky. They take up more space in your pack than inflatables.

150x200 cm Foam Insulating Foil Sleeping Tent Pad, Camping mat for Reflecting Heat Silver 59in x 78.7in / 150cmx200cm
Reflective and Bubble Wrap Layers
Reflective insulation uses foil to bounce your heat back at you. Some types combine reflective layers with foam for double the effect.
This combo works by having the shiny side up to reflect heat, and the foam underneath to block cold from below.
Bubble wrap insulation traps air in those little pockets, slowing down heat loss. It’s surprisingly effective for something so simple.
Popular reflective options:
- Mylar emergency blankets
- Reflective car windshield covers
- Space blankets built for camping
Most people mix reflective stuff with foam for max warmth. Reflective layer on top, foam underneath for comfort.
These materials pack down smaller than thick foam, and they’re super light, perfect for backpackers.
Just be careful, because thin reflective stuff tears easily. Take your time when setting up so you don’t wreck it.
Choosing the Right Insulation for Your Tent
Picking the right tent floor insulation comes down to three things: the weather, how warm your gear is, and what kind of tent you have. Nail these basics, and you’ll sleep like a champ.
Suitability for Different Weather Conditions
For spring and summer, light foam pads or a simple ground tarp keep you dry without weighing you down.
In the fall, thicker insulation is smart. Closed-cell foam works great since it stays dry and keeps the chill out.
Winter’s a different beast. You need serious insulation – think thick foam pads or insulated air mattresses. Some folks layer both for extra warmth.
If it’s wet, go waterproof. Foam pads with a waterproof back or a special tent footprint stop moisture from soaking through. No one wants to wake up soggy.
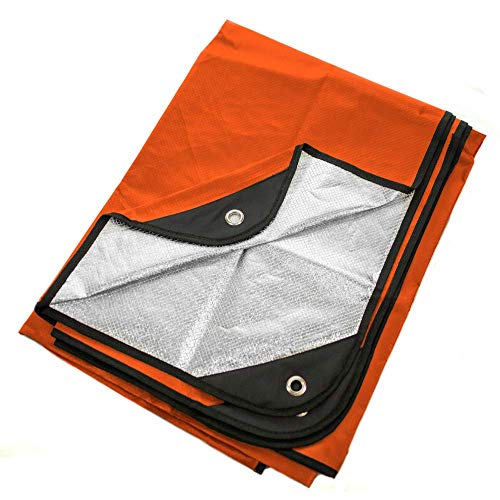
Reusable Heavy Duty Thermal Survival Blanket 60x82in, Reflects 90% Body Heat, Waterproof, Windproof, 3-Layer Design, Reinforced Grommets, Orange
Understanding R-Value and Thickness
R-value tells you how well insulation blocks heat loss. Higher is better. For summer, R-1 or R-2 is fine, but winter needs R-4 or more.
Thickness matters too. Thin half-inch pads are okay for mild weather, but you’ll want at least an inch if the ground’s frozen.
Quick R-Value Guide:
- Summer: R-1 to R-2
- Spring/Fall: R-2 to R-3
- Winter: R-4 and up
Air mattresses usually have higher R-values than foam at the same thickness, and they pack smaller. But they’re easier to puncture on rocky ground.
Selecting for Tent Size and Type
Small tents don’t need as much insulation, but you have to measure carefully to avoid gaps. Nobody likes cold spots.
Big family tents work well with modular insulation like puzzle mats. You can fit them together to cover weird-shaped floors.
Four-season tents have better floors, but you still want extra insulation for real cold. Layering just helps the built-in protection do its job.
Ultralight tents have thin floors that need extra care. Rocks or sticks can tear both the tent and your insulation. Adding a ground tarp helps without much extra weight.
Dome tents fit rectangular foam pads easily. Cabin tents might need you to trim insulation to fit the square corners.
DIY Tent Floor Insulation Ideas
Making your own tent insulation doesn’t have to be fancy or expensive. You can find plenty of good barriers against the cold ground just by getting creative with stuff you already have at home.
Even simple reflective materials can help bounce your body heat back up, making a big difference on chilly nights.
Repurposing Household Items
Old yoga mats make surprisingly good tent floor insulation when camping gets chilly. They’re designed to cushion bodies from hard floors, so why not slide one under your sleeping bag?
Thick moving blankets are another clever fix. These heavy-duty blankets trap air and create a warm barrier between you and the cold ground.
Pool noodles, yep, those goofy foam tubes, work wonders if you slice them lengthwise. Stuff them around the tent edges where cold air sneaks in. They’re light and easy to pack if you cut them thin.
Got more random stuff lying around? Try these:
- Cardboard boxes – Flatten and layer for quick insulation
- Bubble wrap – Air pockets block cold surprisingly well
- Old sleeping bags – Even ripped ones add warmth
- Thick towels – Beach towels make decent moisture barriers
Exercise mats (the puzzle piece kind) lock together to cover big tent floors. They’re water-resistant and are easy to clean after muddy trips.
Homemade Reflective Barriers
Emergency blankets from first aid kits make powerful reflective barriers for cold weather camping. The shiny side bounces your body heat back instead of letting it seep into the ground.
Aluminum foil works too, though it tears easily. You can tape several sheets together or sandwich foil between tarps for a little more muscle.
Reflective car sunshades are tougher than emergency blankets. They fold up small and stand up to rough handling better than thin foil.
Space blankets paired with foam padding create a killer DIY system. Put the reflective layer closest to your body, with foam underneath for comfort and extra warmth.
For a double-sided barrier, tape two emergency blankets together with shiny sides out. That way, heat bounces from both directions and the ground chill stays out.
Installation Tips for Maximum Warmth
Getting your setup right is the difference between a cozy night and shivering until sunrise. Layering creates air pockets that trap warmth, and plugging up every gap keeps the cold from creeping in.
Layering Techniques
The real secret? Stack up multiple insulation layers that work together. The air trapped between layers does most of the heavy lifting for warmth.
Start with a base layer right on the ground. Foam tiles work great because they block the cold earth. Fit them edge-to-edge, no gaps if you can help it.
Toss a second layer on top. Wool blankets or reflective emergency blankets make excellent middle layers. That little air space between layers acts like a natural heater.
Layer Order (Bottom to Top):
- Tarp or footprint
- Foam tiles or rigid insulation
- Blanket or reflective material
- Sleeping pad
- Sleeping bag
Don’t ignore the walls. Cover at least 5 inches up the tent sides with insulation. Cold air loves to sneak in where the floor meets the wall.
Sealing Drafts and Gaps
Cold air will hunt down every little opening. Even tiny gaps let frigid air in and warmth out.
Check the floor-to-wall seams first. That’s usually the worst draft zone. Stuff extra blankets or foam pieces into those seams until they’re snug.
Don’t forget tent zippers and doors. Small gaps in these spots can ruin your insulation game. Try to keep your sleeping gear away from these chilly trouble zones.

Camping Tarp, Heavy Duty Tent Floor Saver, Ultralight Ground Sheet Mat for Hiking, Backpacking, Hammock, Beach - Storage Bag Included
Common Draft Locations:
- Floor-to-wall seams
- Zipper tracks
- Tent corners
- Ventilation panels
If you’re using a tent heater, sealing up drafts matters even more. Leaks make heaters work overtime and chew through fuel. Patch up every gap before you fire up anything hot.
Duct tape can seal small gaps in a pinch. Just peel it off before packing up, or you might mess up your tent fabric.
Integrating with Tent Footprints
Tent footprints work best when they fit your tent just right. Make sure the footprint covers only the tent floor and doesn’t stick out at all.
If it sticks out, rain or snow will pool and sneak under your tent. That’s a recipe for wet insulation and a soggy night.
Layer your insulation between the footprint and the tent floor. This “sandwich” keeps insulation dry and in place, even if the wind picks up.
Setup Order:
- Lay the footprint on the ground
- Stack insulation materials on top
- Pitch your tent over everything
- Stake the edges down
Some footprints have clips or loops for insulation. Use them to keep foam pads or blankets from sliding around.
The footprint also protects your insulation from sharp rocks or sticks. That way, foam and reflective materials last longer.
Tent and Gear Selection for Cold Weather
Picking the right tent and heating setup can make a winter camping trip. Four-season tents offer real protection against nasty weather, and floor insulation is even more important if you’re using a heater.
Four-Season Tents vs. Insulated Pads
A four-season tent insulates better than a three-season tent because it uses less mesh. That keeps cold air out and body heat in, exactly where you want it.
Four-season tents feature:
- Thick, heavy-duty fabric
- Minimal mesh vents
- Extra-strong guy lines and stakes
- Low profile to fight wind
Even the best four-season tent needs solid floor insulation, though. The ground will suck away your body heat faster than the air ever could.

Lightweight 2 Person Backpacking Tent, Waterproof Cold Weather Tent for Camping, Hunting, Hiking, Climbing, Outdoor Travel - Easy Set Up
Insulated pads are a different animal:
- Closed-cell foam pads block ground chill directly
- High R-value air mattresses trap warm air
- Reflective layers bounce heat back at you
The real trick is combining both. Use a four-season tent plus foam tiles or blankets on the floor. That way, you get multiple layers of protection from the cold.
Let the tent block wind and snow while the floor insulation keeps your heat from leaking into the ground.
Using Floor Insulation with Tent Heaters
Tent heaters add warmth, but they also bring some safety headaches. Hot surfaces can melt tent floors or set insulation on fire if you’re not careful.
Smart heater placement means:
- Fire-resistant material under heaters
- Clear space around anything hot
- Good airflow to prevent carbon monoxide
Emergency blankets reflect heat and don’t catch fire easily. Wool blankets are also safer than synthetic ones.
Floor insulation helps heaters work smarter:
- Keeps warm air from leaking through the tent bottom
- Creates a thermal barrier that holds heat
- Saves fuel for portable heaters
Don’t ever set heaters right on foam or synthetic insulation. Use a metal plate or ceramic tile as a safe buffer between the heater and your insulation.
Maintenance, Safety, and Storage Tips
If you treat your insulation materials right, they’ll last a long time and keep working well. Good moisture management stops mold from ruining your camping gear. And safe heater habits? Non-negotiable if you want to avoid disasters.
Caring for Insulation Materials
Each insulation material needs a little different TLC. Clean foam pads with mild soap and water, then let them air dry fully before you stash them away.
Inflatable sleeping pads are a bit delicate. Check for holes after each trip by listening for leaks. Most pads come with repair kits, patches, and glue included.
Wool blankets usually survive the washing machine on a gentle cycle. Exercise mats? Just wipe them down with a damp rag.
Storage Tips:
- Keep foam pads flat or loosely rolled – never folded tight
- Store inflatable pads partly inflated to protect the valves
- Don’t fold anything in the same spot every time
- Pick breathable storage bags, not plastic ones
Never stash insulation when it’s wet. That’s just asking for mold, and nobody wants to sleep on that.
Moisture Control and Drying
Wet insulation just can’t keep you warm. Ground moisture creeps up, and condensation forms when warm air hits cold surfaces.
Ground tarps create a barrier between your tent floor and soggy earth. Make the tarp a bit smaller than your tent so rain doesn’t pool on top and seep in.
Good ventilation keeps condensation in check. Crack a window or vent, even if it’s cold, to let damp air escape.
Drying Strategies:
- Shake out insulation every morning
- Hang wet stuff on tent lines when you can
- Use camp towels to soak up extra moisture
- Set up in sunny spots if you’re lucky enough to find one
If your insulation gets soaked, drying it out before nightfall is a must. Wet gear steals your heat instead of keeping you toasty.
Safe Use of Heating Gear
Tent heaters can make cold camping way more comfortable, but you’ve gotta pay close attention to safety. Never use propane heaters built for outdoor use inside a tent unless you’ve got proper ventilation.
Carbon monoxide is no joke with fuel-burning heaters. Bring a battery-powered carbon monoxide detector made for camping; think of it as your backup plan.
Electric heating pads and blankets are a safer bet for tent insulation if you’ve got access to power. They keep you warm and skip the whole combustion risk.
Heater Safety Rules:
- Keep heaters away from tent walls and sleeping materials
- Never leave heaters running while sleeping
- Ensure adequate ventilation at all times
- Check for gas leaks before each use
Set up any tent heater on solid, level ground and keep it clear of foot traffic. Stash a flashlight and a fire extinguisher somewhere you can grab them fast, just in case.
Frequently Asked Questions
People are always asking about the best tent floor insulation and how to block out the cold and damp. These questions get right to the heart of staying warm and dry when you’re out winter camping.
What’s the scoop on keeping my toes from turning into icicles inside my tent? Any ‘hot’ tips for floor insulation?
Warm toes start with solid ground insulation under your tent. Reflective insulation, blankets, and foam pads are some of the best materials for stopping cold from sneaking up through the floor.
Grab a sleeping pad with an R-value between 4.0 and 8.0 – it’s a game changer. The R-value tells you how well the pad stops heat from leaking from your body to the ground.
Stack up a few layers for max warmth. Foam tiles or thick blankets go down first, then your sleeping pad on top. That way, you’ve got a bunch of barriers fighting off the chill.
Oh, and don’t skip insulating about 5 inches up the tent walls. Cold air loves sneaking in where the floor meets the sides.
Can I DIY my way into a cozier tent, or am I dreaming of warmer nights for nothing?
DIY tent insulation totally works and can save you a bunch of cash. Lots of campers whip up good floor insulation using stuff from home improvement stores or just whatever they have lying around.
Foam tiles from Home Depot or Lowes cost only $15 to $30 and work great as a base layer. You know, those colorful puzzle tiles kids use in playrooms? Same idea.
Old moving blankets or wool blankets are awesome for insulation. They trap warm air and put a solid barrier between you and the cold ground.
Emergency blankets reflect up to 90% of your body heat back at you. A pack costs about $10 and barely adds any weight to your pack.
If I want to pretend I’m walking on a cloud, what’s the best padding I could lay under my sleeping bag?
Want that cloud feeling? Go with multiple layers. Start with foam tiles for structure and insulation.
Throw thick moving blankets or wool blankets on top. That combo gives you cushioning and keeps the heat in.
Reflectix or reflective foam fits between layers to bounce your body heat back up. It’s about $0.40 to $0.50 per square foot, so not too bad.
Put your best sleeping pad on top of everything else. Soft, warm, and you get all the insulation from the layers underneath.
Any wizards here know how to conjure up a water barrier for my tent floor? What’s the spell for waterproof insulation?
Lay a tarp under your tent for the first line of defense against ground moisture. Make sure it only covers the tent’s footprint so rain doesn’t pool on the edges.
Emergency blankets pull double duty; they reflect heat and block water. Not bad for something so lightweight.
Pick your campsite carefully and skip low spots where water likes to gather. Go for a slightly raised, well-drained spot, even if it means a little extra effort.
If the ground’s already wet, pile dry leaves under your tarp. That gives you some drainage and keeps the floor drier.
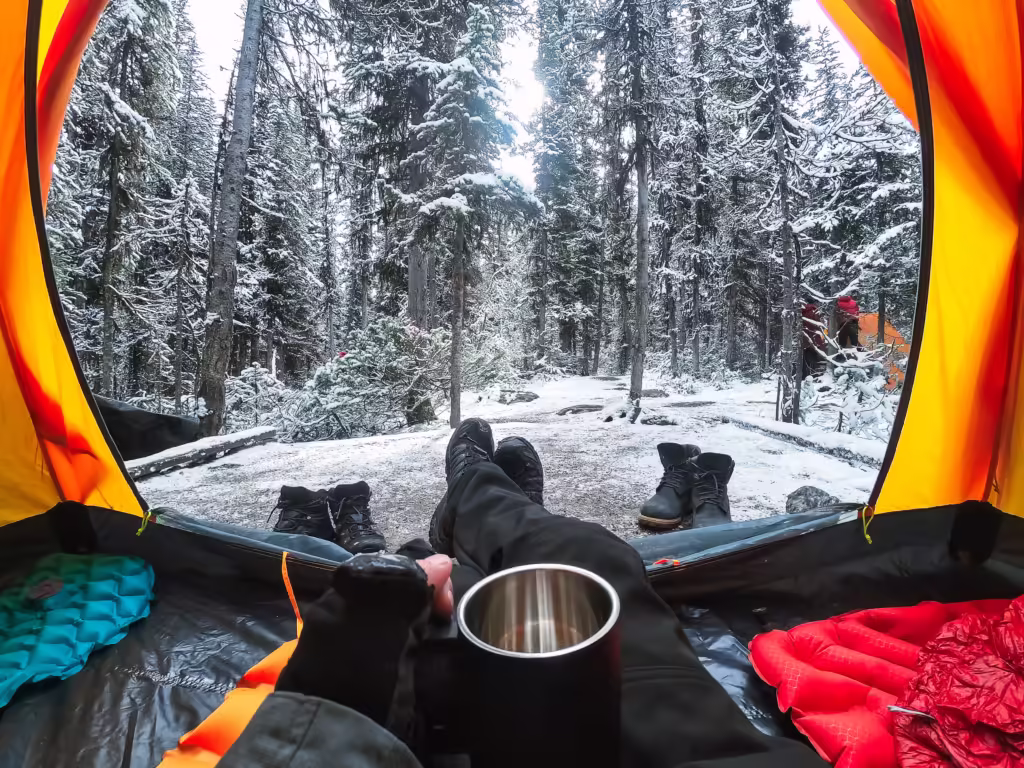
Winter is coming, and I’m not a Stark. How do I turn my tent into a snuggly den before the white walkers—sorry, the frost—hits?
Start with a tarp, then cover your tent floor with mats, blankets, or foam. Extend the coverage about 5 inches up the walls to keep cold air from sneaking in.
Look for campsites with natural wind breaks, like trees or hills. Wind will steal your warmth faster than you’d think.
Layer up your insulation—if you’ve got foam pads and blankets, use both. More layers, more warmth.
Bring gear rated for winter. Sleeping bags and pads with R-values of 4.0 or higher are your best bet when it’s freezing out.
Sure, I’ve got a tent, but it feels like I’m sleeping on a glacier. What insider secrets are there to warm up the joint from the ground up?
Dead leaves make surprisingly effective free insulation when you can find them dry. Just pile them under your tarp for some natural cushioning and a little extra warmth.
Body heat tricks can help a ton. Eat a few extra calories before bed since your body burns energy to stay warm.
And hey, don’t forget to empty your bladder before crawling into your sleeping bag. Your body actually wastes energy keeping urine warm, which is kind of weird but true.
Hand and foot warmers are clutch on those nights when it feels like your toes are about to fall off. Toss them into your sleeping bag or boots for a little burst of heat right where you need it.
Hot water bottles are a must-have. Fill up a sturdy bottle with hot water before bed and keep it close inside your sleeping bag for your own personal heater.