DIY Dog Zip Line: Keep Your Pup Happy and Safe
Making a DIY dog zip line is honestly one of the best ways to let our pups roam outdoors without worrying about them wandering off. It’s a pretty simple, low-cost project that can keep our dogs entertained and active for hours.
We picked up a bunch of helpful tips from building our own zip line, and we’re more than happy to share what worked (and what didn’t) with you.

First things first: check out your space. You don’t need much, just a couple of sturdy trees or posts and some basic gear.
It’s easy to tweak the setup for different yards, big or small. Flexibility is key here.
Choosing solid equipment matters for safety and longevity. The line has to handle your dog’s weight, and all the connections need to be rock-solid.
Stick to a few simple rules, and you’ll have a safe outdoor spot where your dog can go wild (in a good way, of course).
Key Takeaways
- Make sure your space and gear are up for the job.
- Pick strong, secure materials to keep everyone safe.
- Train your dog and always keep an eye out when the zip line’s in use.
Assessing Your Space
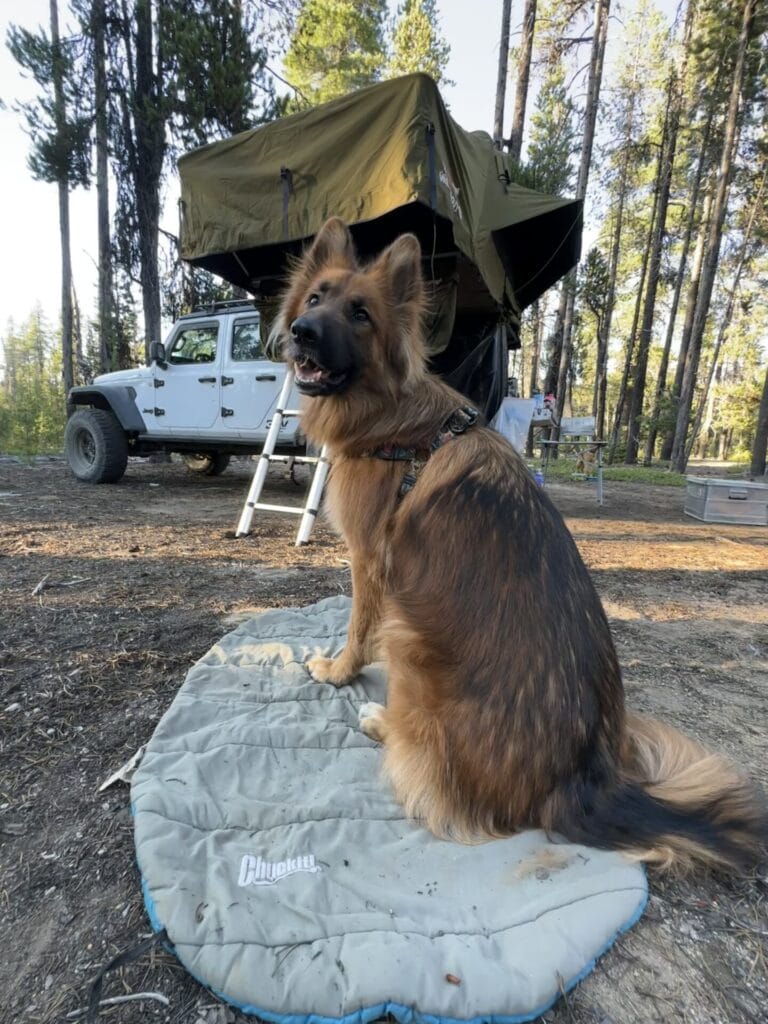
Before you start, just take a walk around and really look at your yard or campsite. You’ll want sturdy, reliable objects to anchor the line—trees with thick trunks are perfect, but avoid anything with soft bark.
If you’re camping or hanging out at an RV site, you can use whatever’s available as long as it’s solid. Don’t overthink it, just make sure it’s not going anywhere.
Shade is a game-changer, so set up near a picnic table or somewhere cool if you can. Water nearby? Even better—your dog will need to stay hydrated after all that running around.
Think about the distance between anchor points. Keep the zip line at a length that’s manageable and safe. Set it high enough so people won’t have to duck under it, especially in busy or communal spots.
Here’s a quick checklist to keep things simple:
- Sturdy trees or solid stationary objects
- Plenty of shade
- Access to water
- Safe, easy-to-reach anchor points
- Line high enough for people to walk under
When you nail these basics, you and your furry sidekick can kick back and enjoy the outdoors. Imagine your dog exploring, tail wagging, whether you’re at home or out camping—doesn’t get much better than that.
Choosing the Right Equipment

Setting up a DIY dog zip line starts with picking the right gear. We’re talking a sturdy cable, proper attachment gear, and a few safety extras to keep things secure.
Selecting the Cable
Go for a zipline cable that’s tough enough for your dog’s size and energy. Vinyl-coated aircraft cable is a solid choice—it’s weather-resistant and won’t snap under pressure.
Nylon rope can work for smaller dogs, but it’s not as tough as steel. If your dog’s a powerhouse, stick with steel cable and make sure it’s long enough for a good run.
Harness vs. Collar
Deciding between a harness and a collar is actually a big deal. Harnesses spread out the tension, so they’re safer and more comfortable for most dogs.
Brands like Ruffwear make some great options. Collars might do the trick for small or super chill dogs, but harnesses generally win for safety. Some even have shock absorbers or springs for that extra bit of comfort.
Safety Features
Safety isn’t something you want to skimp on. Use heavy-duty carabiners and spring clasps—nothing flimsy, please.
Add a shock absorber or spring to soften any wild lunges or sudden stops. Set the line high enough to avoid tangles and add a stopper at the end so your dog can’t crash into anything at full speed.
Always give the whole setup a good test before letting your dog loose. Better safe than sorry, right?

30ft Reflective Tie-Out Cable for Heavy Dogs - Up to 125 Pounds
Setting Up Your DIY Dog Zip Line
Ready to give your pup a little more freedom? Here’s how to set up your DIY dog zip line, step by step.
Installing the Anchors
Start by picking two solid anchors—trees or posts work best. Wrap your cable or rope around them and make sure the line sits high enough off the ground.
If you’re using walls or something similar, attach threaded eyebolts and crank them down tight. For trees with softer bark, slip a piece of webbing between the tree and the rope to avoid damage.
Double-check those anchors. If anything wobbles, fix it now—no shortcuts here.
Assembling the Line
With anchors set, it’s time for the main line. Choose a sturdy rope or coiled cable, and get it as taut as possible. You want it high enough for people to walk under, but not so high that your dog can’t reach it.
Secure the line with clamps, and if you want a smoother ride, add a chain or pulley system. These come in handy for longer setups and help keep things from getting tangled.
Give the line a few strong tugs to make sure it’s not going anywhere before letting your dog try it out.
Creating Connections
Now, connect your dog to the zip line with a cable or runner that slides along the main line. Ten feet is a good length for most setups.
Use heavy-duty carabiners or spring clasps—easy to clip, tough enough to hold up. If your dog’s a puller, don’t mess around with cheap hardware.
Attach everything so it slides smoothly but won’t get tangled. The goal? Let your dog run without getting stuck or caught up.
Once it’s all set, step back and watch your pup go nuts—in a good way, of course.
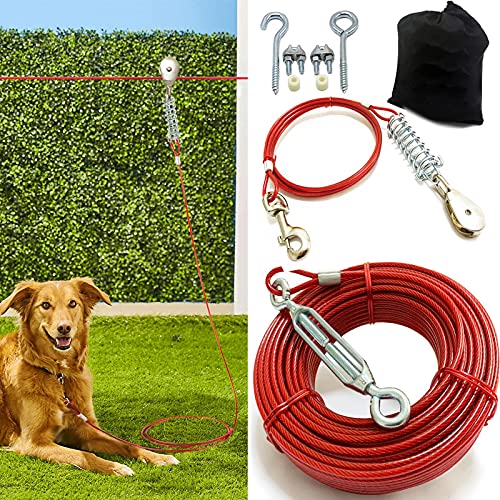
Heavy Duty for Small to Large Dogs - 100ft Run Cable Zipline with 10ft Runner Cable
Training Your Dog to Use the Zip Line
Getting your dog used to the zip line can take a little time. The point is to make it fun, not scary.
Introducing the Concept
Start by letting your dog sniff around the setup. Don’t attach them right away—just let them check it out at their own pace.
Once they’re curious (or at least not freaked out), put on the harness or collar. If your dog’s a ball of energy, the harness is usually the way to go.
Clip the leash to the zip line, but keep a hand on it for now. Walk your dog along the line, handing out treats and plenty of praise.
Go slow. Repeat these short intro sessions until your dog seems comfortable. Use a calm voice—they’ll pick up on your vibe.
Ensuring Comfort and Familiarity
Once your dog’s cool with the zip line, check the harness or collar fit. You don’t want any rubbing or pinching.
If you’ve got a shock absorber on the line, it’ll help with any sudden pulls. Place toys or treats along the zip line to make it a spot your dog actually wants to be.
Watch their body language. If you see signs of stress, back off and try again later.
Start with short practice runs and slowly add more time. With patience and positive vibes, your dog will start loving their new zip line—and you’ll both get more out of your time outside.
Safety Precautions and Considerations
Keeping our furry buddies safe while they zip around is a top priority. Here are a few things to keep in mind:
Height and Placement:
- Set the zip line high enough—no one wants to duck every time they cross the yard.
- Keep the line away from obstacles. Our playful pups don’t need extra hazards.
Proper Materials:
- Go with heavy-duty ropes and clasps, especially if your dog is a powerhouse.
- Slip some webbing between trees and ropes to protect that soft bark. Trees deserve love, too.
Health Checks:
- Watch for signs of dehydration, especially on hot days. Dogs can’t always tell us when they’re thirsty.
- Double-check the collar and leash attachment. Make sure they’re both safe and sturdy.
Flexibility:
- The zip line should move smoothly. Tangled lines equal frustrated dogs (and humans).
Materials Checklist:
- Nylon rope
- Spring clasps
- Carabiners
- Webbing for tree protection
Potential Dangers:
- Keep an eye out for tripping hazards. A good setup helps everyone avoid spills—two legs or four.
- Check the installation often. Loose parts spell trouble.
Additional Tips and Tricks
When you’re setting up a DIY dog zip line, a few extra tips can make things easier. Let’s talk about managing multiple dogs, working with different personalities, and using the zip line in all sorts of places.
Dealing With Multiple Dogs
Handling multiple dogs on a zip line? It can get chaotic. Give each dog their own line—separate lines mean less tangling and fewer headaches.
If you’re out at a park or camping, set up individual lines. Space them out so each dog has room to explore without bumping into each other.
Got an aggressive pup? Use tough cables and strong clasps. Keep a close eye on their interactions and give them space if needed.
Adjusting for Dog Behavior
Every dog is different. For nervous dogs, keep the zip line short and in a familiar spot. Let them get used to it, then slowly give them more room.
Energetic dogs love a longer zip line—they’ll burn off energy and get their fill of sniffing. Fence jumpers or dogs with attitude? Shorter, controlled lines help keep things safe.
The gear matters, too. Heavy-duty lines are best for strong dogs, so nothing snaps if they pull hard.
Managing the Zip Line in Different Settings
Zip lines need to adapt. At a campsite or RV, go for a portable zip line with easy clasps and adjustable lengths. Trees, RVs, or sturdy posts all work as anchor points.
Heading out hiking or to a restaurant? Quick-setup, travel-friendly lines are a lifesaver. Many come with a carrying case—super handy.
Enhancing Your Dog’s Zip Line Experience
Let’s make zip lining extra awesome for our pups! When you set up the zip line, pick a spot with some shade. Dogs overheat fast, and nobody wants a tired, panting friend.
Add toys and treats along the path. Seriously, a mini picnic area with chew toys? Dogs love that. It’s like a playground with snacks.
Zip lines give dogs freedom to move and burn energy. That’s great for their health, especially if they’re usually cooped up inside.
Set up a rest spot, too. A blanket or a small tent gives your dog a cozy place to chill when they’re tuckered out.
Here are a few quick tips:
- Use Soft Materials: Protect trees by putting webbing between the rope and bark.
- Height Matters: Make the line at least a foot taller than the tallest person in your family. No ducking required.
- Secure Fastening: Tighten the rope with proper clamps and check it often.
Need more ideas? Check out this DIY Dog Zip Line guide or tips from GoPetFriendly.
Let’s make zip lining a highlight of every dog’s day!
Maintenance and Inspection
Taking care of our dog’s zip line keeps things safe and running smoothly. It doesn’t take much time, but it matters.
Regular Checks: Look over the cable or rope often. If you spot fraying or wear, swap it out right away.
Pulley Inspection: Make sure the pulley glides along the line. If it sticks, lubricate it so your dog isn’t stuck in one spot.
Fasteners and Clamps: Tighten all the hardware. Loose parts can cause the whole thing to fail, and nobody wants that.
Cleanliness: Wipe down cables and pulleys with a damp cloth. Dirt builds up fast, and clean gear works better.
Avoid Rust: Using metal? Watch for rust. A bit of rust-preventative spray goes a long way, especially if the setup lives outside.
Wear and Tear: Check the tie-out system. If the trolley or tie-out looks worn, replace it. Better to be safe than sorry.
Routine Testing: Give the zip line a test run without your dog now and then. It helps spot problems before they get serious.
Storage Tips: If you’re packing the zip line away, keep it dry and out of the sun. Moisture and UV rays can ruin materials over time.
Selecting the Best Commercial Dog Zip Line
Choosing the right commercial dog zip line can make a world of difference. It’s all about matching the setup to your dog and checking out what other people say about the products.
Analyzing Product Reviews
Dig into product reviews before you buy. Real-world feedback tells you if a zip line is durable, easy to install, or a pain to use. Products like the Four Paws Walk-About Overhead Tie-Down get solid ratings (4.4 out of 5 stars) for being sturdy and reliable.
Look for reviews that mention weather resistance and whether the line stays tangle-free. If someone says setup was a breeze (or a nightmare), that’s good to know. Positive stories about dogs having more freedom while staying safe? Always a plus.

Considering Your Dog’s Size and Strength
Every pup is different. If your dog is big or a strong puller, grab a tough cable like a 75-ft tie-out cable.
Smaller dogs might do better with lighter materials or even a bungee cord. Make sure the clips and carabiners are rated for your dog’s weight—they need to handle sudden jerks without breaking.

Dog Hitching System, Portable Hitch for Campsites, Parks, and Yards
Frequently Asked Questions
Got questions about DIY dog zip lines? Here are some quick answers to make your outdoor adventures safer and more fun for you and your pup.
How can I create a safe and secure zip line run for my pooch?
Safety first! Use strong materials like a quality running cable and secure clamps. Don’t use nails or screws on trees—protect the bark with webbing between the rope and tree. That helps protect the trees and keeps the setup sturdy.
What’s the best way to set up a zip line for my dog if I don’t have trees in my yard?
No trees? That’s honestly not a big deal. Just grab some sturdy posts or metal poles instead.
If you cement the posts into the ground, they’ll stay put. The trick is to keep the zip line high enough so you don’t have to duck under it, but still low enough for your dog to have a good time.
Is it possible to design a zip line system for multiple dogs, and if so, how?
Yep, you can absolutely make a zip line for more than one dog. If you’ve got a couple of pups, try using a longer zip line—think 20 to 25 feet for each dog.
This gives everyone plenty of room and helps avoid tangles. Give each dog their own trolley so they don’t bump into each other while they’re out there exploring.
What are the most reliable and pup-approved zip line kits out there?
There are actually some great zip line kits out there. One that gets a lot of love is the Kurgo Ridgeline Outdoor Dog Run—it’s super handy for camping or travel.
Most of these kits use a coiled, tangle-free cable, so setup’s quick and easy. They also do a pretty solid job of keeping everything secure.
Can I DIY a trolley run that’s cat-friendly too, and what do I need?
Cats can totally get in on the action, too! For them, use a smooth cable and a smaller, lightweight trolley that matches their size.
If you add a couple of little perches or resting spots along the line, your cat can stop and check out the view. Why shouldn’t they get a little adventure, right?
What are some budget-friendly methods to build a durable dog run?
There are plenty of budget-friendly options for creating a durable dog run! Instead of buying a full kit, why not try using a strong clothesline or heavy-duty rope for the line?
You can grab eyebolts and clamps at the hardware store to secure everything. Just remember to check it all regularly for wear and tear—safety first, always.