20 Rustic Farmhouse Camper Decor Ideas on a Budget
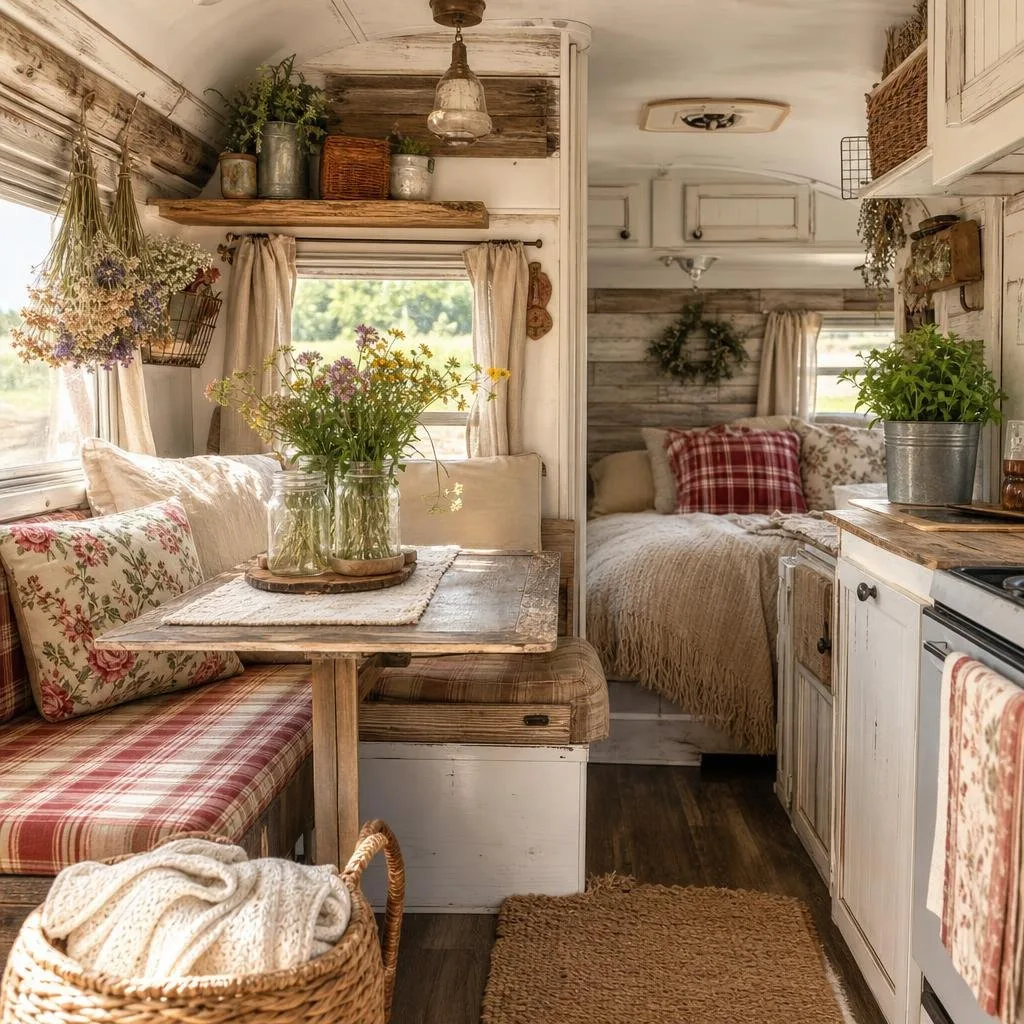
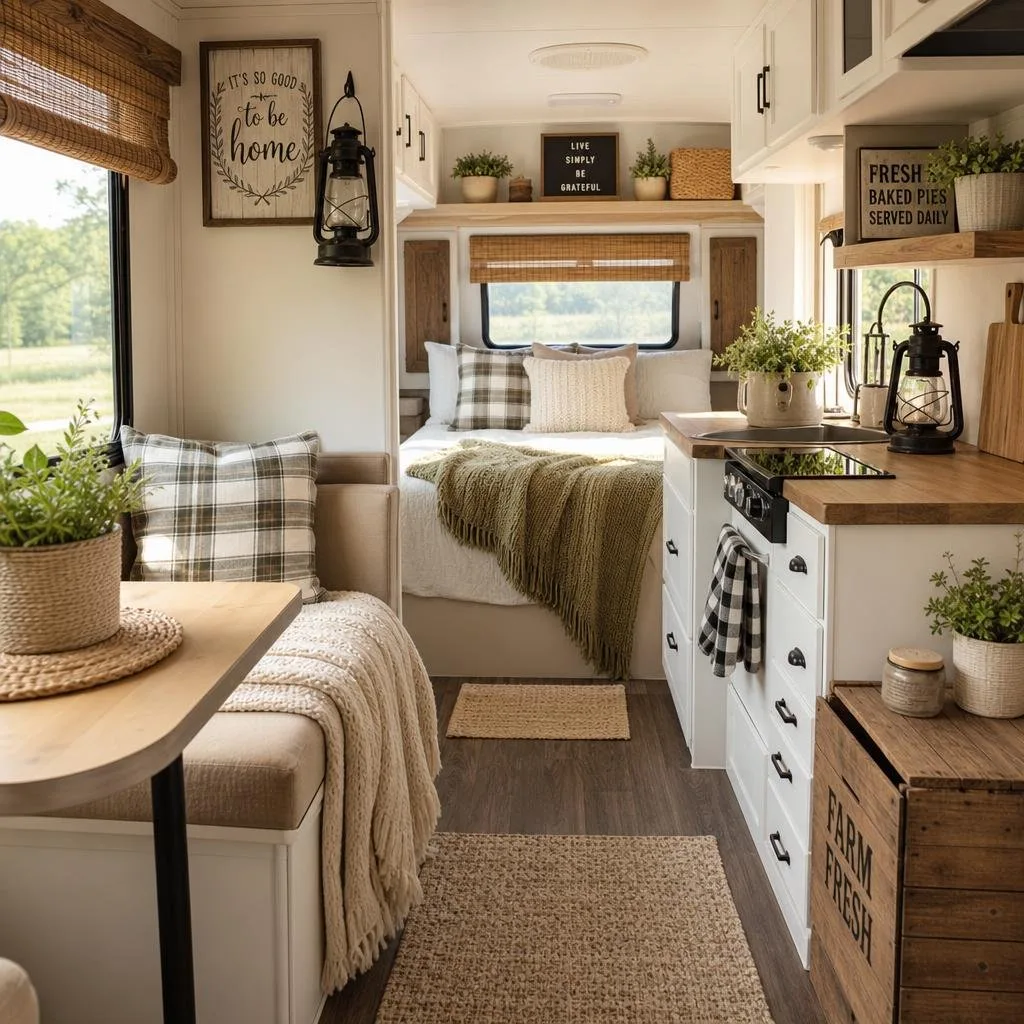
There’s something about farmhouse style that feels right in a camper. Warm wood tones, creamy whites, and a mix of rustic textures bring a sense of home to even the tiniest space.
It all comes together to make your rig feel like a cozy little home. And you don’t have to gut your camper or spend a fortune to get the look.
Most of these ideas cost under $50 each, and you can finish a lot of them in an afternoon. That’s pretty doable, right?
Whether you’re a weekend camper sprucing up a travel trailer or a full-timer wanting your space to feel a bit more “you,” these 20 rustic farmhouse camper decor ideas are a solid place to start.
I’ve tried a bunch of these in my own camper. Small changes really do add up fast – think peel-and-stick materials, thrift store finds, a coat of chalk paint, and a few textures that just feel right.
1) Peel-And-Stick White Shiplap Accent Wall
If I had to pick just one upgrade for the biggest visual impact with the least hassle, it’s peel-and-stick shiplap. White shiplap turns dated RV walls into something bright, clean, and unmistakably farmhouse.
I’ve noticed that textured panels with a raised plank look work better than flat stickers. They catch the light and create subtle shadow lines, adding a bit of depth even on a small wall.
A few things I wish I’d known sooner:
- Clean the wall with rubbing alcohol first to help it stick.
- Use a plastic smoother to push out air bubbles as you go.
- Start at the bottom and work up, so the seams look natural.
You don’t need to cover every wall. One accent wall behind the bed or in the dinette area does the job.
White shiplap acts as a crisp canvas, letting everything else in the space pop. A roll usually runs $25 to $40, depending on the brand.

Give your RV that cozy modern farmhouse look without breaking the bank. This affordable white shiplap contact paper delivers a realistic distressed wood texture for walls, cabinets, or accent panels. At just 17.7" x 78.7" per roll (under $4–$8), it’s a thin, peel-and-stick solution that costs far less than real lumber or paint. Removable, waterproof, and easy to reposition, it transforms tight RV spaces into rustic charm on a budget.
2) Rust-Oleum Chalked Linen White Cabinet Paint Refresh
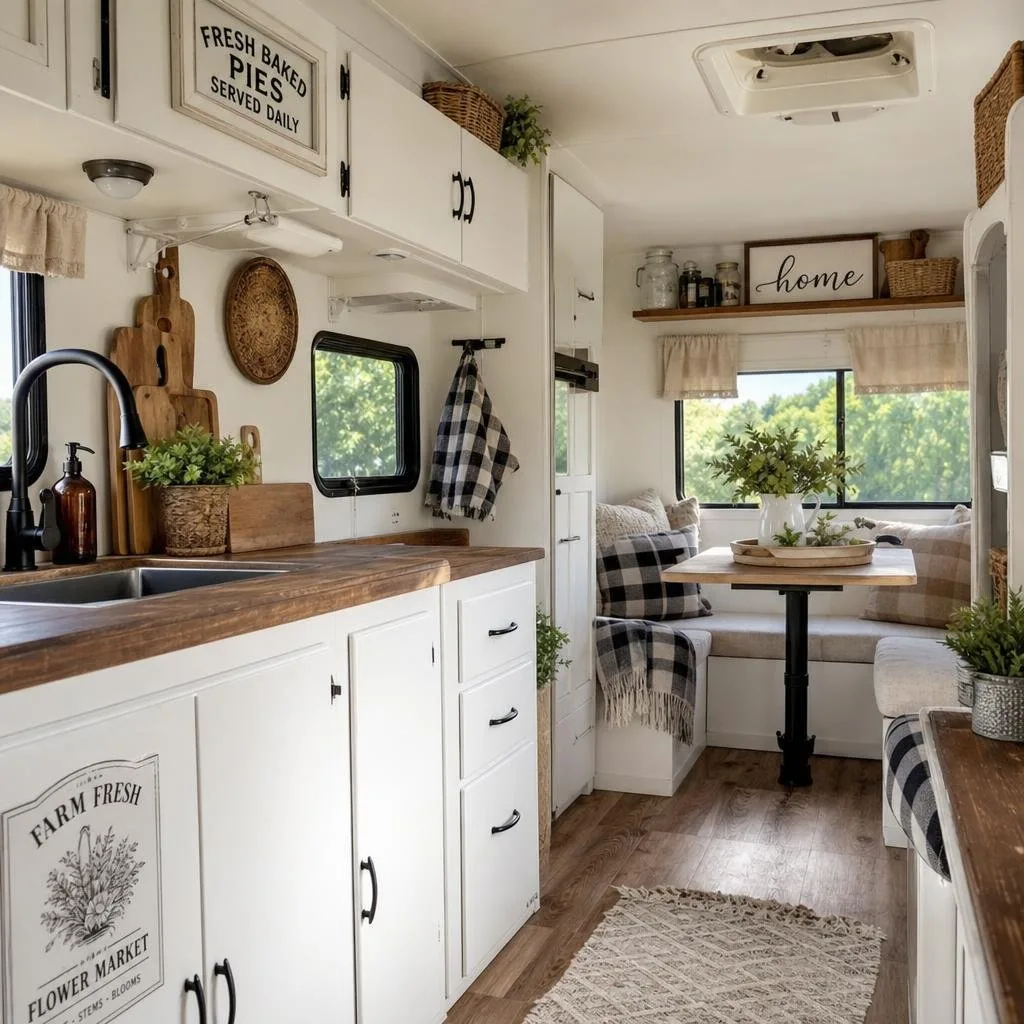
Nothing dates a camper faster than those dark, orangey oak cabinets from the early 2000s. Rust-Oleum’s Chalked paint in Linen White is my favorite way to refresh cabinets without sanding down to bare wood.
The matte, chalky finish feels right for farmhouse style and hides imperfections better than glossy paint. One quart usually covers a surprising amount of cabinetry.
In my experience, two thin coats are enough for most standard camper kitchens.
- Wipe cabinets with a degreaser.
- Give them a light scuff with 220-grit sandpaper.
- Brush or roll on two thin coats, letting each dry a couple hours.
- Seal with a clear matte wax or topcoat for extra durability.
The whole project costs about $35 for the paint and maybe another $10 for a foam roller kit. That’s way less than replacing cabinets.
Pair your freshly painted cabinets with some matte black hardware (more on that in a sec), and the space feels totally new.

Achieve that soft, vintage farmhouse look on a budget with Rust-Oleum’s ultra-matte chalked paint. The Linen White shade gives cabinets, furniture, and accents an effortless distressed finish—no primer, sanding, or topcoat needed. One-coat coverage and easy cleanup make it ideal for quick RV makeovers without spending on pro supplies. Made in the USA and low-odor, this 30 oz can delivers timeless charm for under $25.
3) D-C-Fix Sonoma Oak Peel-And-Stick Countertop Wrap
Replacing camper countertops is expensive and messy. D-C-Fix Sonoma Oak contact film gives you a warm, light wood-grain look for about $15 a roll.
It’s the quickest way I’ve found to ditch the speckled laminate counters. The Sonoma Oak shade looks natural – not too yellow, not too gray – and pairs beautifully with white cabinets and black fixtures.
Tips for a smooth application:
- Measure twice and leave about an inch extra on each side.
- Peel back a few inches at a time and use a squeegee to press out air.
- Wrap the edges under the countertop lip for a finished look.
- If you get stubborn bubbles, pop them with a pin and smooth them out.
I’ve had this stuff last through months of daily cooking and cleaning. It’s not indestructible, but for the price, it looks fantastic in person and in photos.
If a section gets damaged, just peel it off and reapply – no sticky mess left behind.

Add authentic wood-grain warmth to your RV on a budget with this Ribbeck Oak contact paper. The 17" x 78" roll delivers realistic oak texture for countertops, cabinets, or shelves at just ~$11. Waterproof, self-adhesive, and made in Germany, it peels on smoothly and removes cleanly—no tools or big spend required. A quick, low-cost way to bring farmhouse charm to tight RV spaces.
4) Matte Black Drawer Pulls And Cup Handles
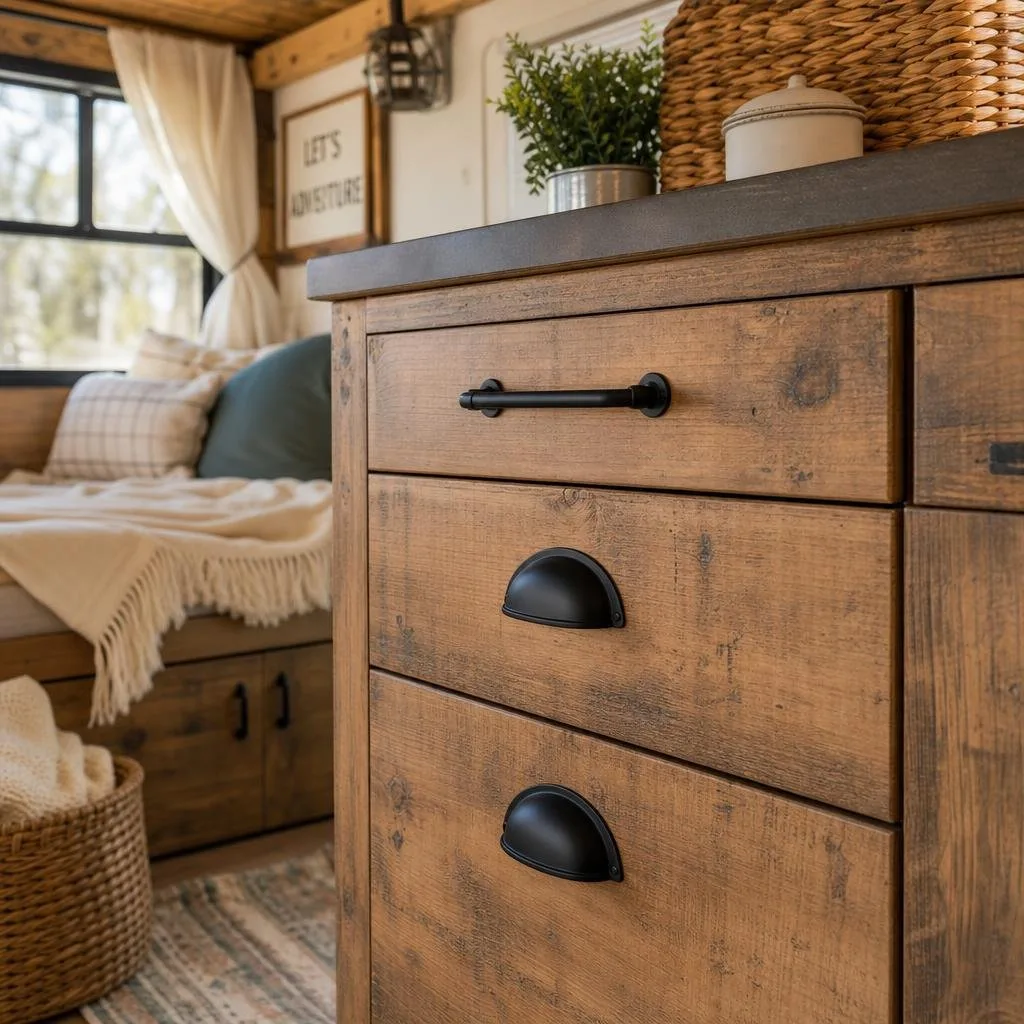
Swapping hardware is one of those five-minute upgrades that makes a huge difference. Matte black drawer pulls and cup handles instantly modernize any farmhouse camper kitchen.
They add a classic contrast against light cabinetry you see in all the best farmhouse looks. A 10-pack of matte black cup pulls is about $15 to $25 on Amazon. You really just need a screwdriver for this one.
What to look for:
- Cup pulls for drawers (3-inch or 3.75-inch center-to-center is standard).
- Simple round knobs for cabinet doors.
- Match the finish across all pieces for a cohesive look.
If your old hardware holes don’t line up, grab some wood filler, patch the old holes, let it dry, and drill new ones. That extra twenty minutes really pays off.
I like mixing cup handles on drawers with round knobs on upper cabinets. It adds variety without looking mismatched, and guests always seem to notice the detail.

Upgrade RV cabinets and drawers with timeless farmhouse charm on a budget. These matte black 3" cup pulls deliver a clean, vintage look that pairs perfectly with rustic decor. The 10-pack costs just $16 (about $1.60 each), installs easily, and features a durable metal build with a simple, enduring finish. No big spend or complicated changes needed for that classic RV farmhouse vibe.
5) Open Pine Shelves With Black L-Brackets
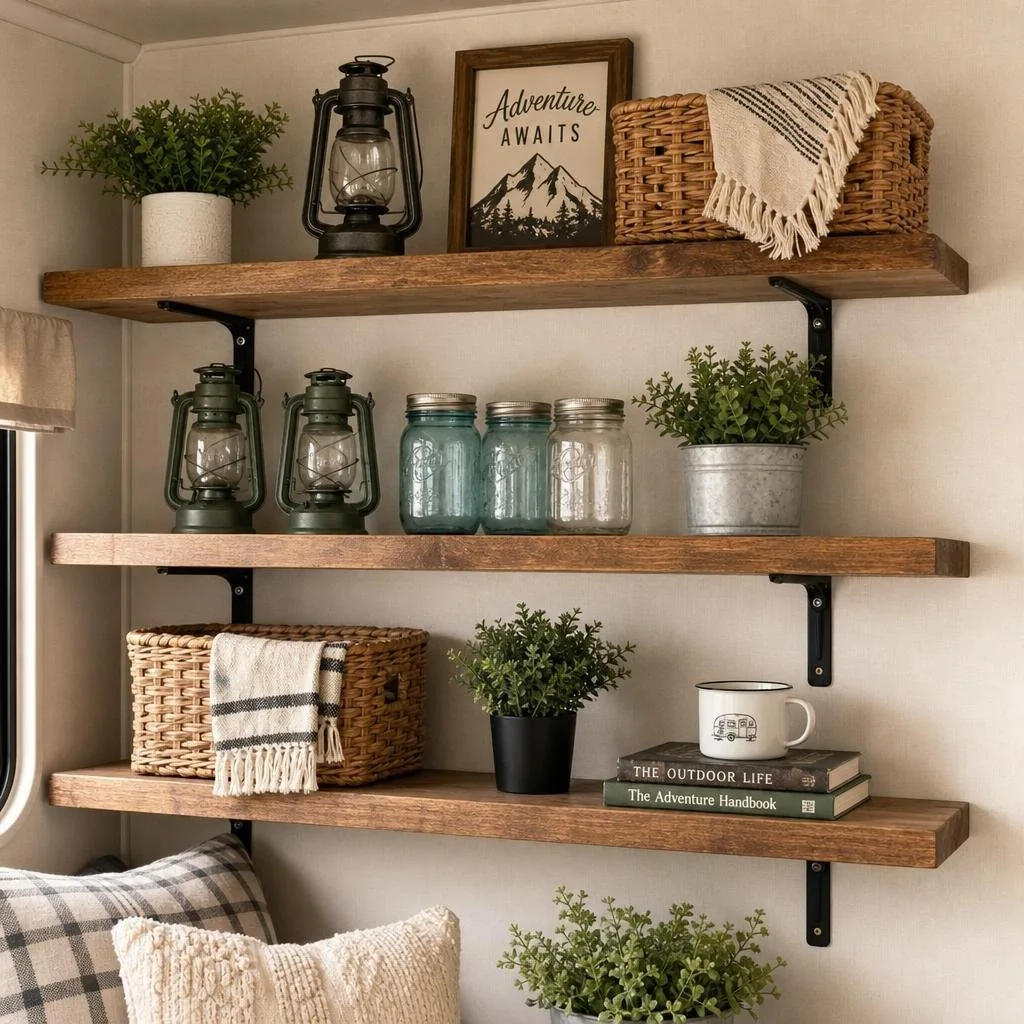
Open shelving is a farmhouse staple, and it actually works even better in a camper. Closed upper cabinets in a tiny space can feel heavy and dark.
Open pine shelves keep things light and give you a spot to show off favorite mugs, a plant, or a little stack of cookbooks. I use 1×8 common pine boards from the hardware store, cut to about 24 inches.
Sand them lightly, stain with golden oak or early American, and mount them with flat black steel L-brackets.
Budget breakdown:
| Item | Approximate Cost |
|---|---|
| Pine board (1×8, 8 ft) | $8 to $12 |
| Black L-brackets (pair) | $6 to $10 |
| Stain (small can) | $5 to $8 |
That’s a full shelf for under $30. Install two or three above the kitchen counter, and you’ve got the open display you see in every farmhouse makeover on Pinterest.
Just be sure to anchor into studs or use heavy-duty wall anchors, since camper walls are thinner than house walls.
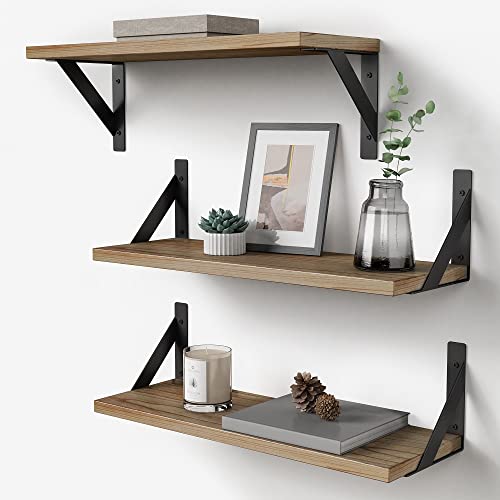
Add instant rustic charm and extra storage to your RV without taking up floor space. This set of 3 light-wood floating shelves with black metal brackets delivers a classic farmhouse look at just $23. Easy to install in multiple configurations, they’re perfect for kitchens, bathrooms, or living areas—holding decor, books, or essentials while keeping things budget-friendly and clutter-free.
6) Woven Hyacinth Storage Baskets For Open Shelving
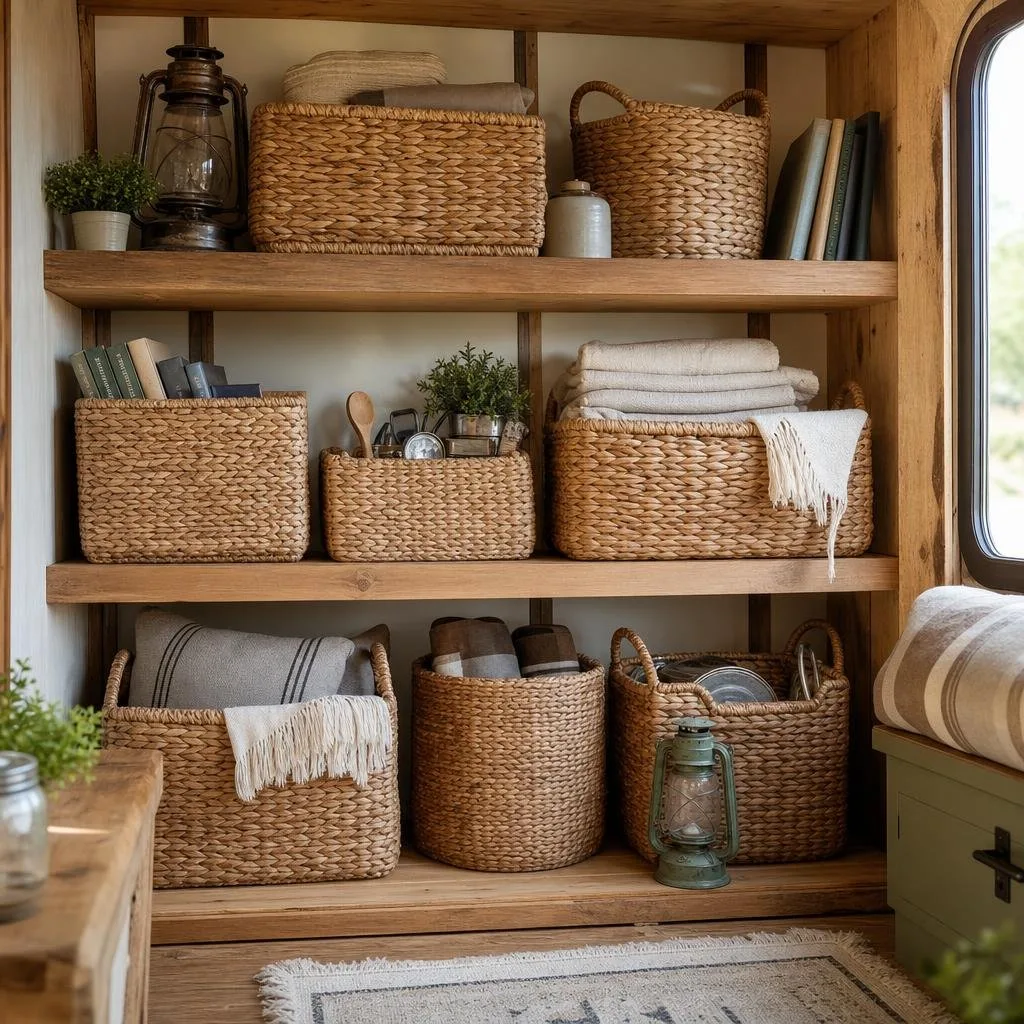
Open shelves look great, but you need a way to keep them practical: woven storage baskets. Water hyacinth baskets are my favorite – they’re lightweight, sturdy, and have a golden-tan color that feels farmhouse.
Use them to stash the stuff you don’t want on display. Napkins, snack bags, tea packets, cleaning supplies – baskets keep it all tidy, no doors required.
Sizing tips for camper shelves:
- Small (about 9×7 inches) for spice shelves and bathroom nooks.
- Medium (about 12×9 inches) for kitchen open shelving.
- Large (about 15×11 inches) for bedroom cubbies or overhead storage.
Target, TJ Maxx, and HomeGoods usually have these for $6 to $15 each. I’ve also found great ones at Goodwill for just a few bucks.
If you want them to stay put while driving, add a strip of non-slip shelf liner underneath. That trick has saved me from a lot of rattling and sliding on bumpy roads.

Bring natural texture and farmhouse warmth to your RV with these woven water hyacinth baskets. The set of 3 nesting sizes (12”, 10.5”, and 9”) offers versatile storage for pantries, closets, or shelves at just $28. Sturdy, eco-friendly, and complete with handles, they add rustic charm while keeping things organized on a budget—no bulky plastic bins required.
7) Burlap Or Drop Cloth Cafe Curtains
Those plastic mini blinds that come stock in most campers? They’re always the first thing I want to rip out.
Swapping them for simple cafe curtains made from burlap or canvas drop cloth fabric changes the whole vibe. Drop cloth material from the paint aisle costs about $10 for a 6×9-foot sheet.
You can cut several sets of curtains from a single cloth. If you don’t sew, iron-on hem tape works just fine.
How I make mine:
- Cut fabric to size (measure window width plus 2 inches for a relaxed gather).
- Fold the top edge over about 1.5 inches and iron a seam.
- Use hem tape or a quick stitch to create a rod pocket.
- Slide onto a small tension rod.
The natural linen color of drop cloth fabric fits right into a farmhouse palette. Burlap works too, but it’s scratchier and sheds a bit more.
Either way, these curtains soften the windows and filter light beautifully. They cost almost nothing.
Pair them with a sprig of faux greenery tucked above the rod for extra charm. No need to overthink it – simple works best here.

Add soft rustic charm to your RV windows without spending much. These tan burlap-look tier curtains (26" x 45" each, 2-panel set) feature a lightweight polyester blend with the natural texture of burlap. Rod-pocket design hangs easily, filters light while keeping privacy, and costs just $19. Perfect for a cozy farmhouse feel in tight RV spaces on a budget.
8) Vintage-Style Mason Jar Sconce Lights
Lighting shapes the mood more than almost anything else in a small space. Vintage-style mason jar sconces give off a warm, amber glow and make any camper feel like a cabin instead of a tin can.
You can find battery-operated mason jar wall sconces online for $15 to $30 a pair. They mount with screws or even command strips, so you don’t have to mess with any wiring.
The battery-powered route makes a lot of sense for campers. You avoid messing with your rig’s 12V electrical system.
What I look for in a good set:
- Distressed wood backing (adds rustic texture).
- LED fairy lights or Edison-style bulbs inside the jar.
- A timer function so they turn on automatically each evening.
These look awesome flanking a bathroom mirror or mounted beside the bed as reading lights. Try them on either side of a dinette window, too.
The glow they cast is the kind of thing that makes people say, “Wait, this is a camper?” That’s exactly the reaction I want.

Bring instant farmhouse charm to your RV with these oil-rubbed bronze mason jar wall lights. The 2-pack features clear glass jars and a classic vintage look that fits perfectly with rustic decor. At about $51 ($25.50 each), they offer plug-in or hardwired installation, a built-in switch, and extra cord length—delivering stylish, affordable lighting without major rewiring.
9) Faux Eucalyptus Stems In A Galvanized Pitcher
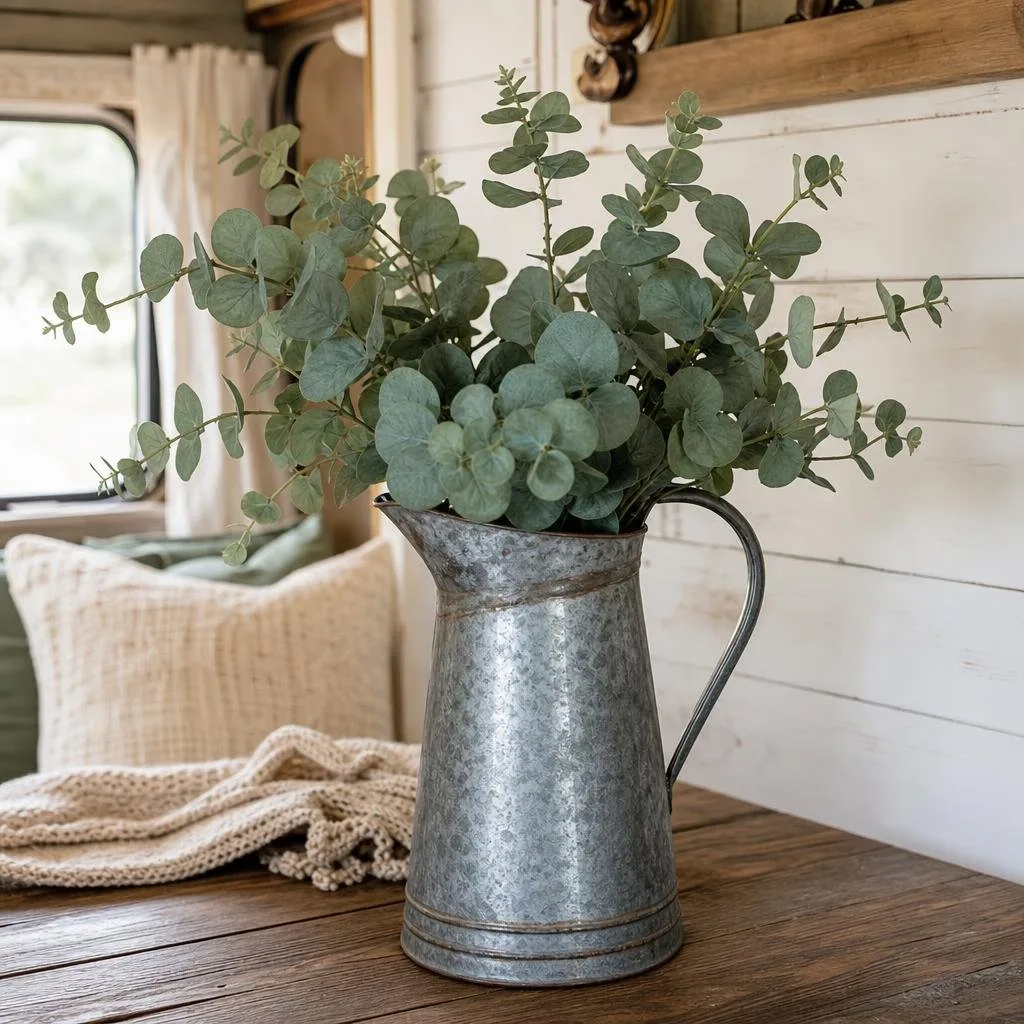
Fresh flowers look lovely but they’re not practical in a moving camper. Faux eucalyptus stems in a small galvanized pitcher give you a pop of greenery with zero maintenance and no spilled water on the highway.
I usually grab faux eucalyptus from the dollar store or Hobby Lobby. They’re about $3 to $5 per stem.
Three to five stems in a small galvanized pitcher makes a perfect little arrangement. The silvery green of eucalyptus pairs beautifully with galvanized metal, which feels very farmhouse to me.
Set it on the kitchen counter, the dinette table, or a bathroom shelf. It works anywhere.
Pro tip: Secure the pitcher to the surface with a small strip of museum putty underneath. It holds firm during travel and peels off clean when you want to move it.
This trick has saved more than a few decorative pieces from flying across the camper on bumpy roads. It’s a tiny arrangement, but it adds a surprising amount of warmth and life to any corner.

Add natural, low-maintenance farmhouse charm to your RV with these 30 mixed silver dollar eucalyptus stems. The set of 4 styles brings realistic green texture to vases, centerpieces, or shelves for just $14. No watering or sunlight needed, and they won’t fade—delivering affordable rustic decor that stays fresh in tight RV spaces.
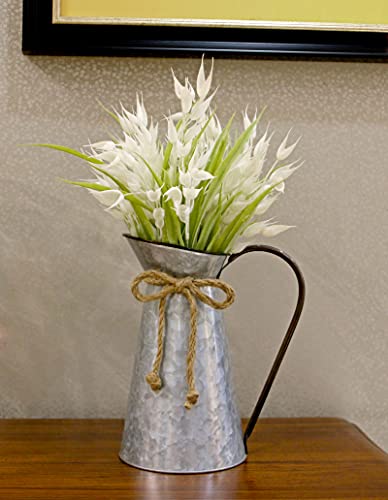
Add instant shabby-chic farmhouse charm to your RV with this galvanized metal milk jug vase. The classic pitcher shape with rope detail gives a rustic vintage look perfect for fresh or dried flowers. At just $20, it’s a durable, lightweight, non-breakable piece that brings French country style to shelves or tables without taking up much space.
10) Black-And-Cream Buffalo Check Throw Pillows
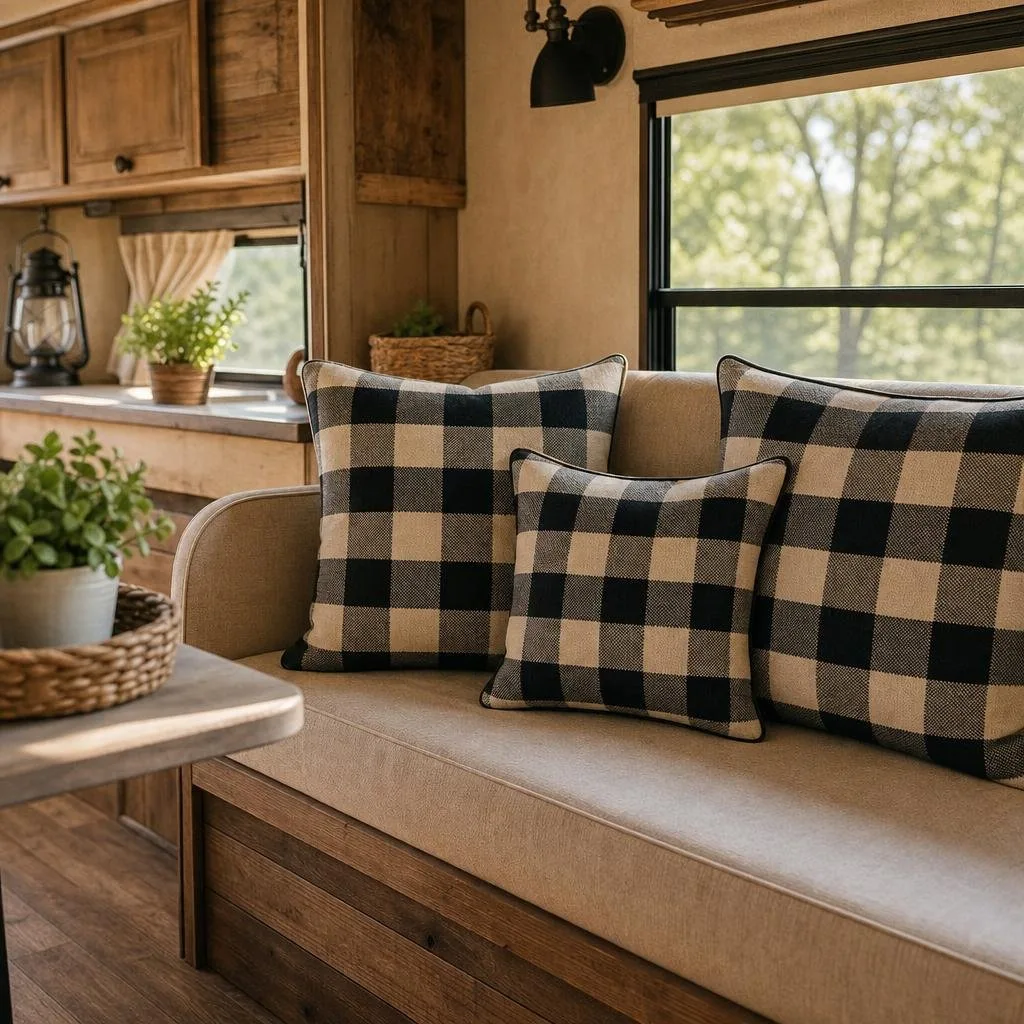
Buffalo check is basically the plaid of the farmhouse world. A couple of throw pillows in this pattern can anchor a whole camper’s design.
I stick with black-and-cream because it’s the most versatile. It works in every season and coordinates with nearly any color scheme you throw at it.
Two 18×18-inch pillow covers run about $10 to $14 on Amazon. I buy the covers separate from the inserts, so I can swap patterns with the seasons if I want.
Where they work best in a camper:
- Dinette bench seating.
- The bed, mixed with solid cream or linen pillows.
- A single accent pillow on the driver or passenger seat (if it has a swivel setup).
I like to mix buffalo check with a solid textured pillow – maybe a cream cable-knit or a natural linen – to keep things from looking too matchy. The mix of patterns and textures is what makes farmhouse spaces feel collected and layered instead of straight from the store.
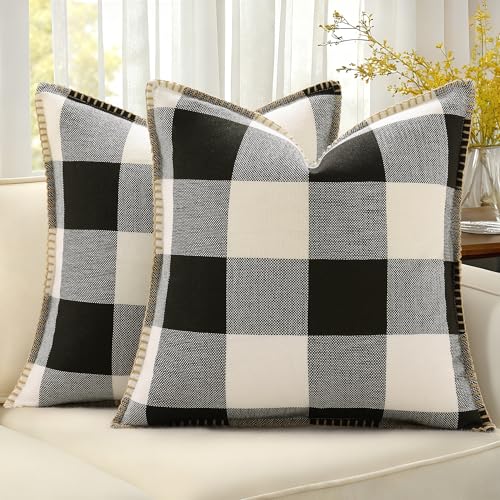
Add classic black-and-white buffalo check charm to your RV with these 18x18 farmhouse pillow covers. The set of 2 features a linen-look fabric with stitched edges and an invisible zipper for an easy, high-end look. At just $19, they’re durable, fade-resistant, and perfect for couches or beds—delivering affordable rustic style without bulky inserts.
11) A Jute Braided Runner For Narrow RV Floors
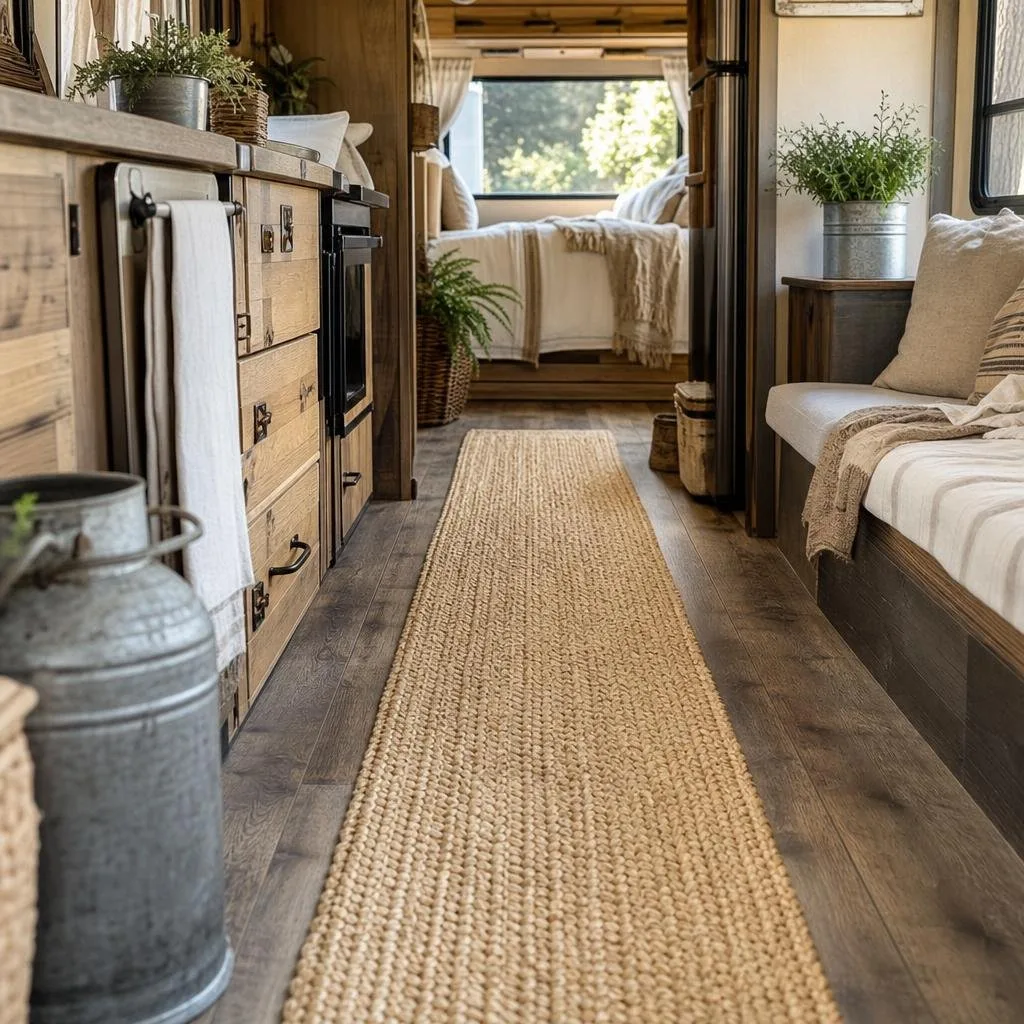
RV floors are usually cold and bland, whether they’re vinyl, laminate, or that weird industrial carpet. A jute braided runner fixes that instantly.
The natural tan and brown tones warm up the floor. The texture feels great underfoot.
Look for a runner that’s about 2 feet wide and 6 to 8 feet long. That’s the sweet spot for most camper hallways and galley kitchens.
Why jute works so well:
- It’s lightweight and easy to roll up for cleaning.
- The braided texture hides crumbs and dirt surprisingly well.
- It adds warmth without trapping moisture like thick carpet.
A basic jute runner runs about $20 to $40, depending on length. I always put a non-slip rug pad underneath because jute on smooth flooring can slide around, especially if the rig is parked on a slight incline.
Jute does shed a little during the first few weeks. Just give it a good shake outside every couple of days and it’ll settle down soon enough.

Bring authentic farmhouse warmth to your RV with this handmade 2'6" x 6' jute runner. The chunky, textured natural brown weave adds organic texture and a cozy, vintage look underfoot. At just $29, the durable 100% plant-based jute is a budget-friendly way to layer rustic style in narrow hallways or entryways without taking up much space.
12) Reclaimed Wood Headboard Made From Fence Pickets
This project sounds more ambitious than it is. A handful of cedar or pine fence pickets from the hardware store, a saw, some sandpaper, and a bit of stain is all you need to build a rustic headboard that changes the bedroom area completely.
Here’s my approach:
- Buy 5 to 7 fence pickets (usually about $2 each).
- Cut them to the width of your camper bed.
- Sand them down lightly to remove splinters.
- Apply a weathered gray or driftwood stain.
- Attach them side by side to a thin plywood backing using wood glue and small nails.
- Mount the finished piece to the wall with heavy-duty command strips or a French cleat.
The whole project costs under $30 and takes a Saturday afternoon. Fence pickets are already thin and light, which matters a lot in a camper where weight adds up quickly.
The slightly rough, imperfect look is what gives it that reclaimed character. No need to fuss over perfection – just let it be rustic.
13) A Fold-Down Dining Table In Stained Pine
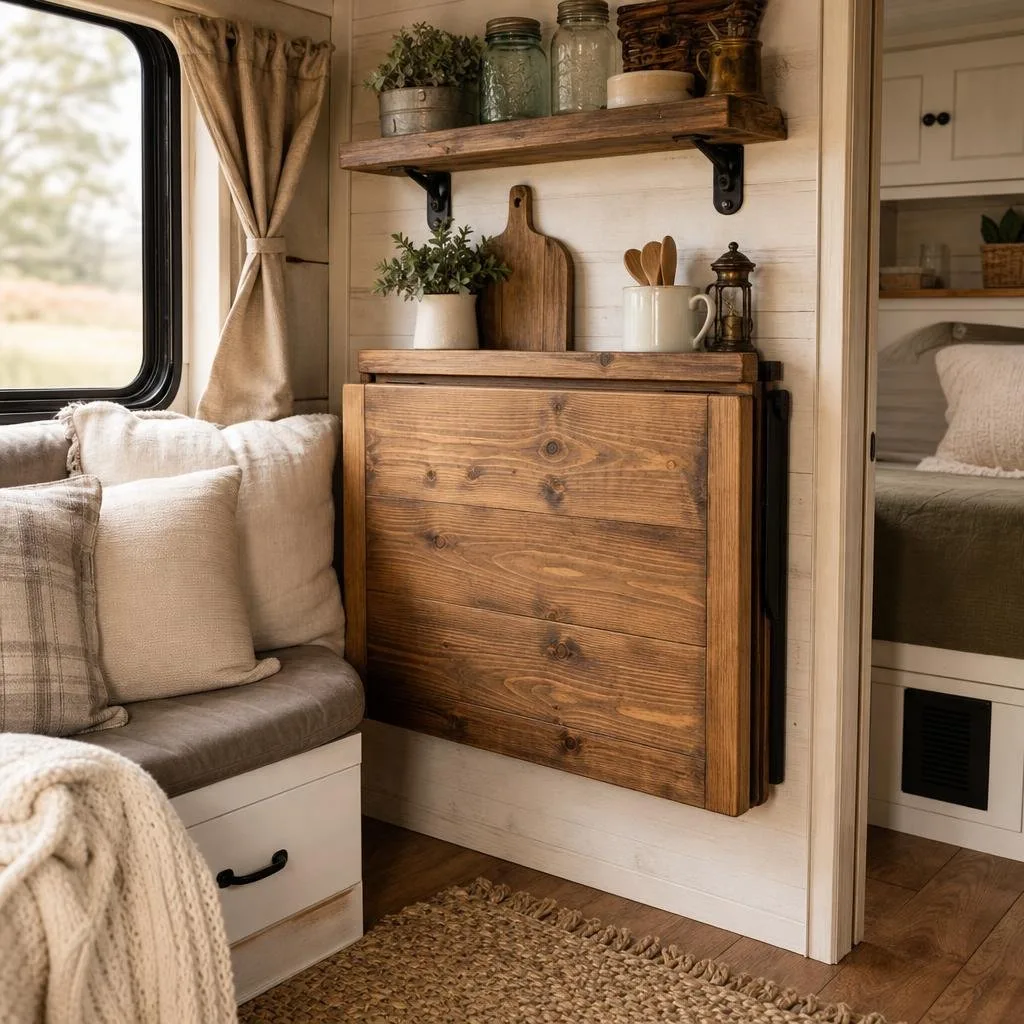
Space is the ultimate luxury in a camper. A fold-down table gives you dining space when you need it and open floor space when you don’t.
Building one from stained pine keeps it firmly in farmhouse territory. I used a 2×2-foot piece of pine panel board, stained it in a warm “Special Walnut” shade, and mounted it to the wall with a piano hinge and a pair of folding shelf brackets.
When it’s up, it’s a solid dining surface. When it’s folded down, it sits flat against the wall.
Materials cost:
| Item | Approximate Cost |
|---|---|
| Pine panel board | $10 to $15 |
| Piano hinge | $5 |
| Folding brackets (pair) | $10 to $15 |
| Stain + polyurethane | $10 |
Total: roughly $35 to $45. It’s one of the most practical upgrades I’ve made, and it looks great.
The warm stained wood against a white shiplap wall is pure farmhouse perfection. It’s a small thing, but it makes a big difference in daily life.
14) Corrugated Metal Backsplash Panels
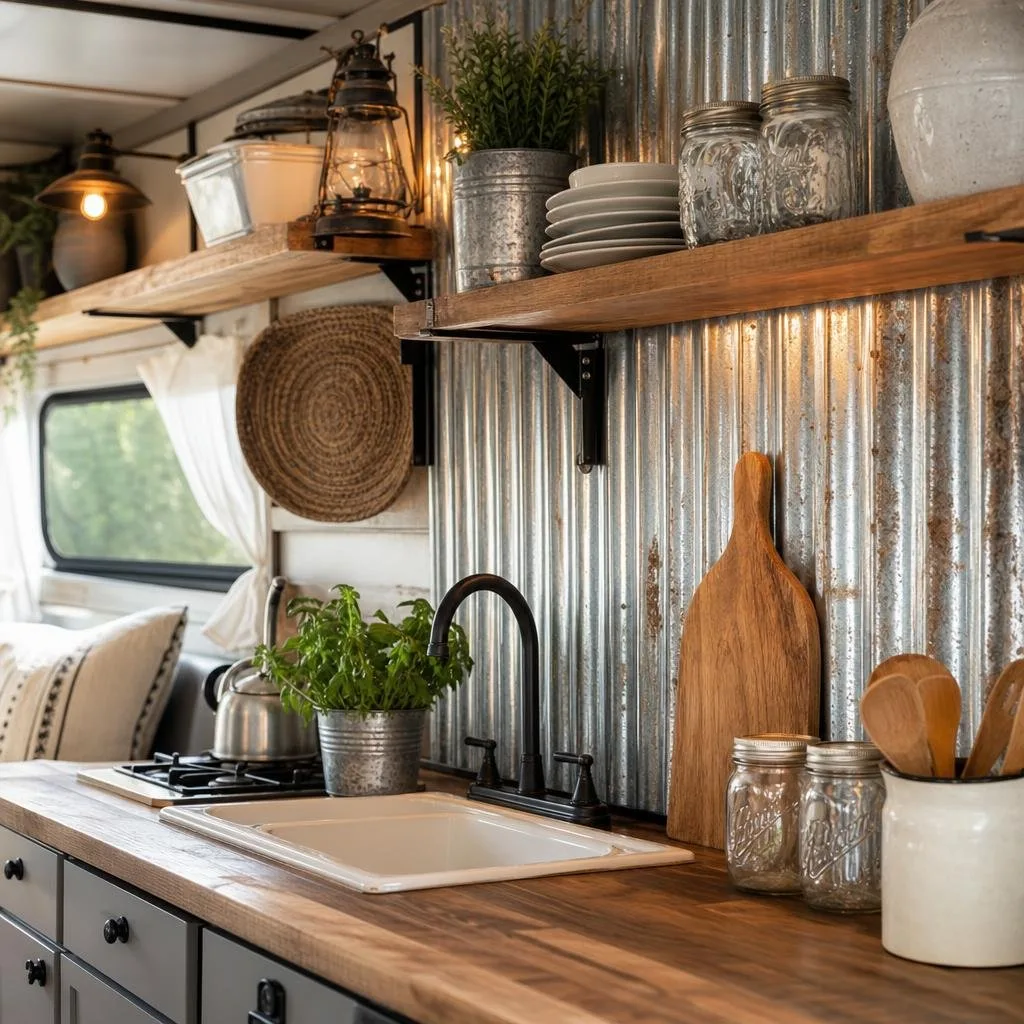
Nothing says “rustic” quite like a strip of corrugated galvanized metal behind the kitchen stove or sink. It’s waterproof and wipes down easily.
The texture adds instant interest to an otherwise flat wall. You can buy small sheets of corrugated metal at most hardware stores for $15 to $20.
Cut them to size with tin snips (wear gloves!) and attach them with construction adhesive or small screws. It doesn’t take much skill, just a bit of patience.
A couple of things to keep in mind:
- File down any sharp edges with a metal file before mounting.
- Apply a thin coat of clear matte sealer to prevent water spots and fingerprints.
- Measure your backsplash area carefully so the metal sits between the counter and the bottom of the upper cabinets.
The wavy texture of corrugated metal catches light in a way that makes the kitchen feel more dynamic. Pair it with those open pine shelves and some stoneware, and you’ve got a rustic gourmet kitchen vibe that photographs like a dream.
It’s one of my favorite high-impact, low-cost upgrades. If you want a kitchen that feels a little more “wow,” this is the move.
15) Butcher Block Contact Paper For Tabletops And Counters

Love the look of butcher block countertops but not the weight, cost, or upkeep of real wood? Butcher block contact paper gets you those cozy, honey-toned wood vibes for a tiny fraction of the price.
I’ve slapped this stuff on dinette tables, bathroom vanities, even cabinet doors just for a little surprise when you open them. A decent roll usually runs $8 to $15.
Application tips:
- Clean your surface well and let it dry all the way.
- Cut your piece a little bigger than needed, then trim after sticking it down.
- Start at one edge and smooth it out as you go with a credit card or squeegee.
- Use a hair dryer on low for curves and edges – the film gets way more flexible.
The pattern pairs nicely with white cabinets and black hardware. It’s a smart way to hide scratches or stains without making any permanent changes.
Since it peels off clean, you don’t have to worry about your security deposit if you rent or eventually resell your rig.

Give your RV counters, cabinets, or tables instant rustic farmhouse charm with this thick brown wood-grain contact paper. The 12" x 200" roll delivers a realistic butcher block look at just $13. Waterproof, self-adhesive, and removable, it’s a durable, low-cost way to refresh surfaces without expensive remodeling.
16) Beadboard Wallpaper For Dinette Or Bed Nooks
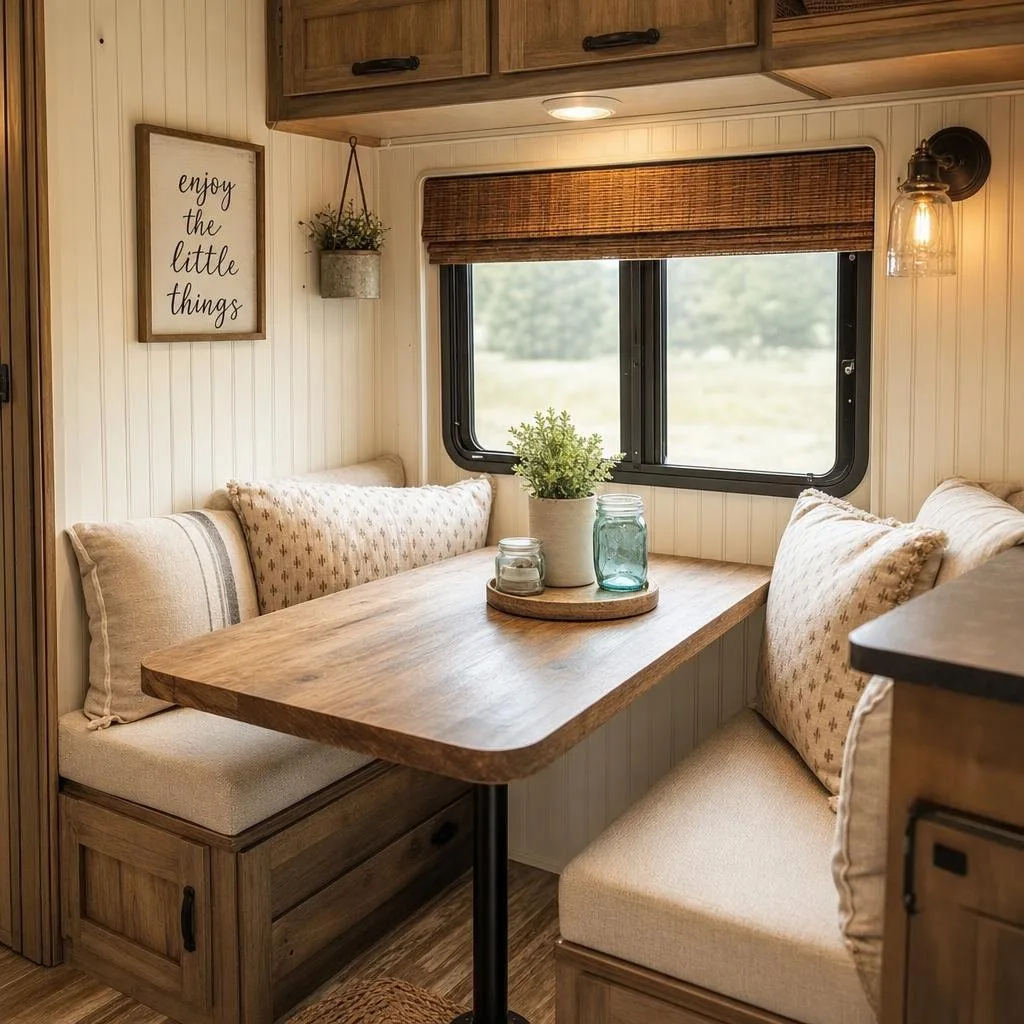
Beadboard oozes classic farmhouse charm, but real panels are heavy and a pain to install in a camper. Beadboard wallpaper gives you a vertical plank look with a quick peel-and-stick.
I like to use it in dinette nooks, bed alcoves, or even on the ceiling above the bed for a cottage vibe. White is the go-to, but light gray or a soft blue-green looks really good too.
Where beadboard wallpaper works in a camper:
- Behind dinette seating.
- Inside a bedroom slide-out.
- Bathroom walls—just make sure you get the moisture-resistant kind.
A roll covers about 28 square feet and costs $20 to $35. The texture bounces light differently than paint, which helps give small spaces some depth.
It looks like a big project but you can finish it in about an hour.
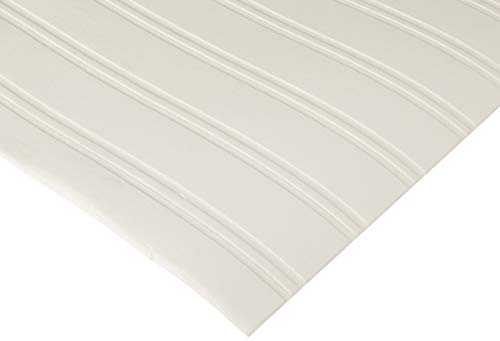
Create classic beadboard farmhouse charm in your RV without the cost or mess of real wood. This pre-pasted wallpaper gives the look of wainscoting in a single roll (20.5" x 396"). Paint it any color to match your decor, and it’s scrubbable with easy water-activated installation. At $36, it’s an affordable way to add textured rustic detail to walls or backsplashes.
17) Antique Brass Wall Hooks By The Entry
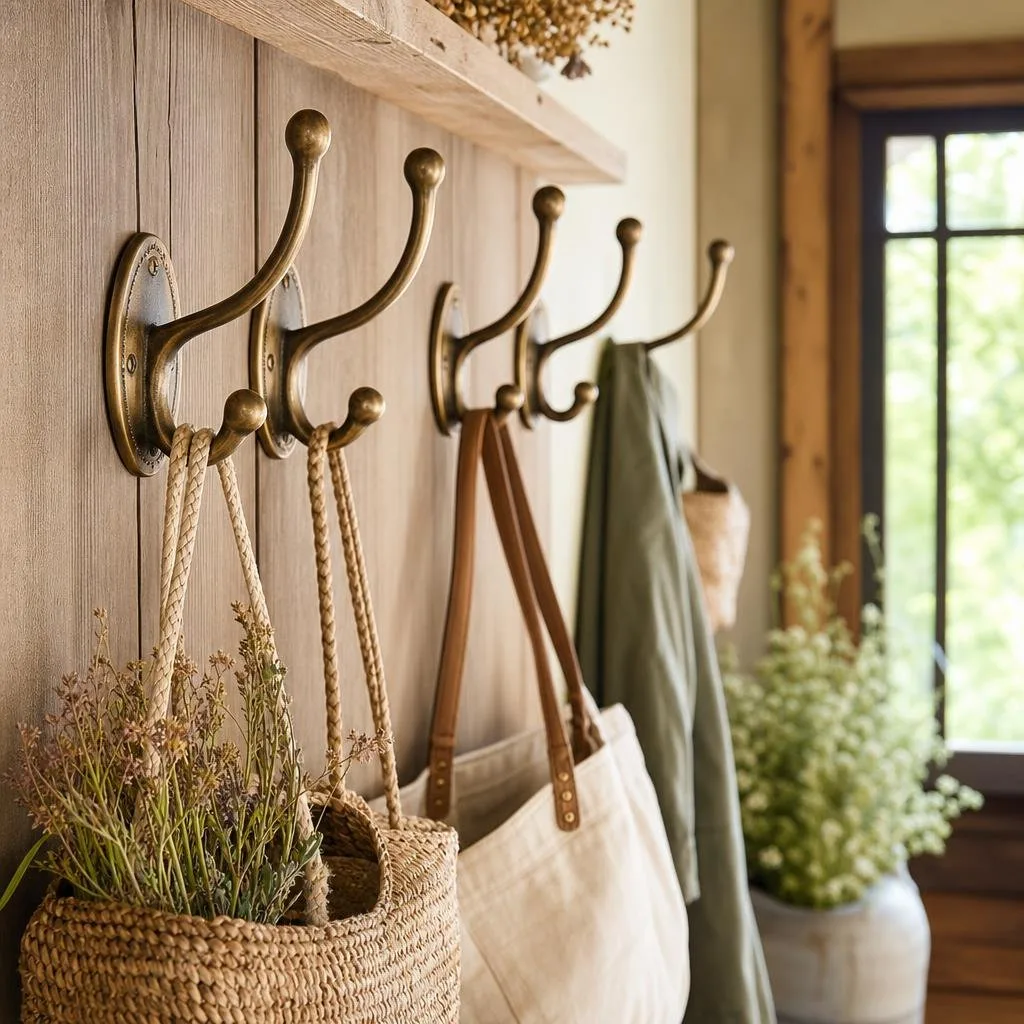
Camper life needs hooks by the door. Hats, leashes, keys, jackets – stuff you grab on your way out. Antique brass hooks bring a farmhouse vibe while helping keep things organized.
I’m partial to double-prong robe hooks in antique brass or gold. They hold heavy jackets and still look decorative. A set of 4 to 6 usually costs $10 to $18.
Installation notes:
- Mount into a stud or use heavy-duty wall anchors (rated for 15 lbs or more).
- Space hooks about 6 inches apart so everything isn’t crammed together.
- Mount them at a comfortable height for everyone (around 50 to 55 inches from the floor works for most adults).
If you want to dress it up, mount the hooks on a piece of stained or painted barn wood first, then attach that to the wall. It looks finished and protects your wall.
Traveling with dogs? Having a leash hook right by the door is a sanity-saver.

Add timeless farmhouse charm to your RV with these antique brass cast iron hooks. The set of 4 sturdy, heavy-duty hooks gives a classic rustic look perfect for entryways, bathrooms, or closets. At just $22 ($5.50 each), they include matching screws and hold coats, bags, towels, or hats—delivering affordable vintage style without taking up space.
18) A Distressed Wood Framed Mirror To Brighten Small Spaces
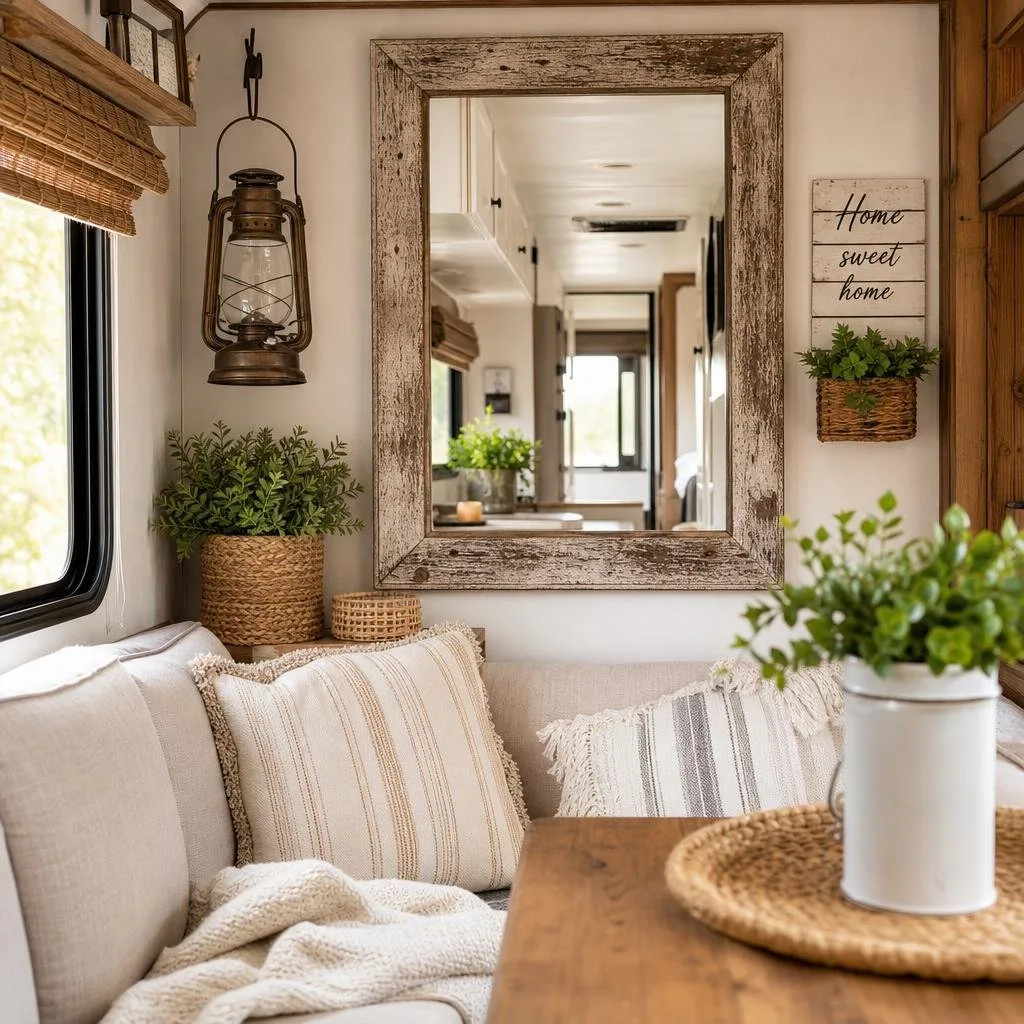
Mirrors instantly make small rooms feel bigger, and a distressed wood frame keeps things feeling farmhouse. I swapped out the basic mirror in my camper bathroom for a thrifted wood-framed one, and if made a big difference.
The mirror bounces light around, opening up the space. The rough, weathered frame adds character and warmth.
Where to find them cheap:
- Thrift stores and Goodwill (usually $5 to $15).
- Facebook Marketplace and yard sales.
- Dollar Tree – grab a small round mirror and frame it yourself with scrap wood.
If the frame isn’t rustic enough, distress it yourself. Sand the edges and corners to reveal some bare wood, then brush on a thin wash of gray or white paint and wipe most of it off. Five minutes, and suddenly it looks like you scored it at a vintage market.
19) Enamelware Mugs And Cream Stoneware For Open Display
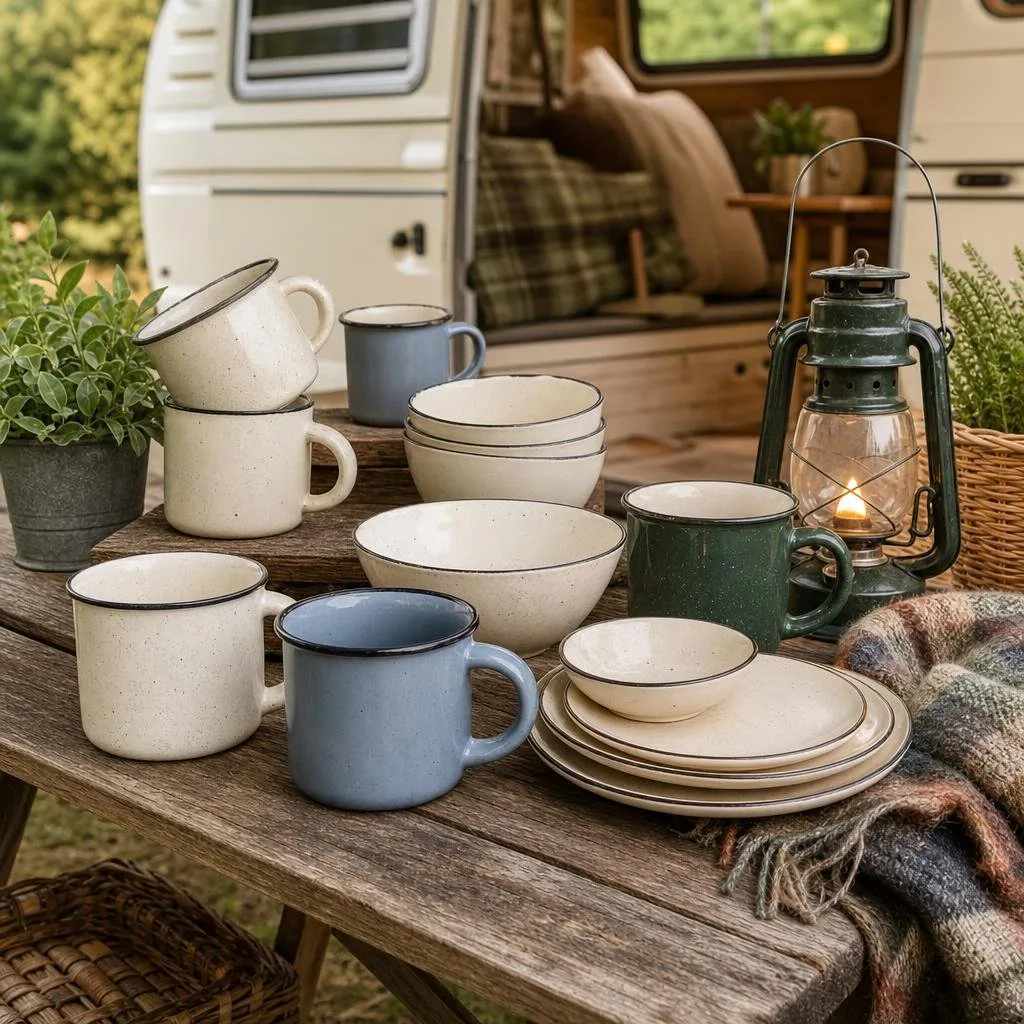
Your dishes and mugs are always on display in a camper, so why not let them double as decor? Ditch the random plastic cups and grab a set of speckled enamelware mugs and cream stoneware bowls – they tie the kitchen together and look good doing it.
Enamelware is lightweight, tough, and looks great hanging from hooks or stacked on open shelves. A set of four mugs usually goes for $15 to $25.
Cream stoneware (simple, matte bowls and plates in off-white or oatmeal) gives you that pottery-barn-on-a-budget vibe. I’d check TJ Maxx, Marshalls, or Target’s Threshold line for deals.
Display ideas:
- Hang mugs from hooks under a shelf.
- Stack bowls on an open pine shelf with a folded linen napkin underneath.
- Use a single stoneware bowl to hold fruit or keys on the counter.
These pieces pull double duty as kitchen workhorses and decorative touches. That kind of efficiency matters when you’re living in under 200 square feet.
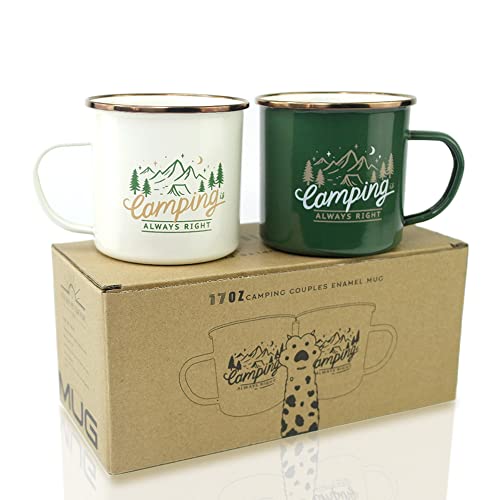
Bring classic vintage charm to your RV with these 17oz enamel mugs in forest green and cream. The set of 2 features a durable carbon steel body with a golden stainless rim for a timeless farmhouse look. At just $17, they’re break-resistant, easy to pack, and perfect for coffee or tea—adding affordable rustic style to your RV kitchen or campsite.
20) A Mini Herb Crate For The Camper Kitchen
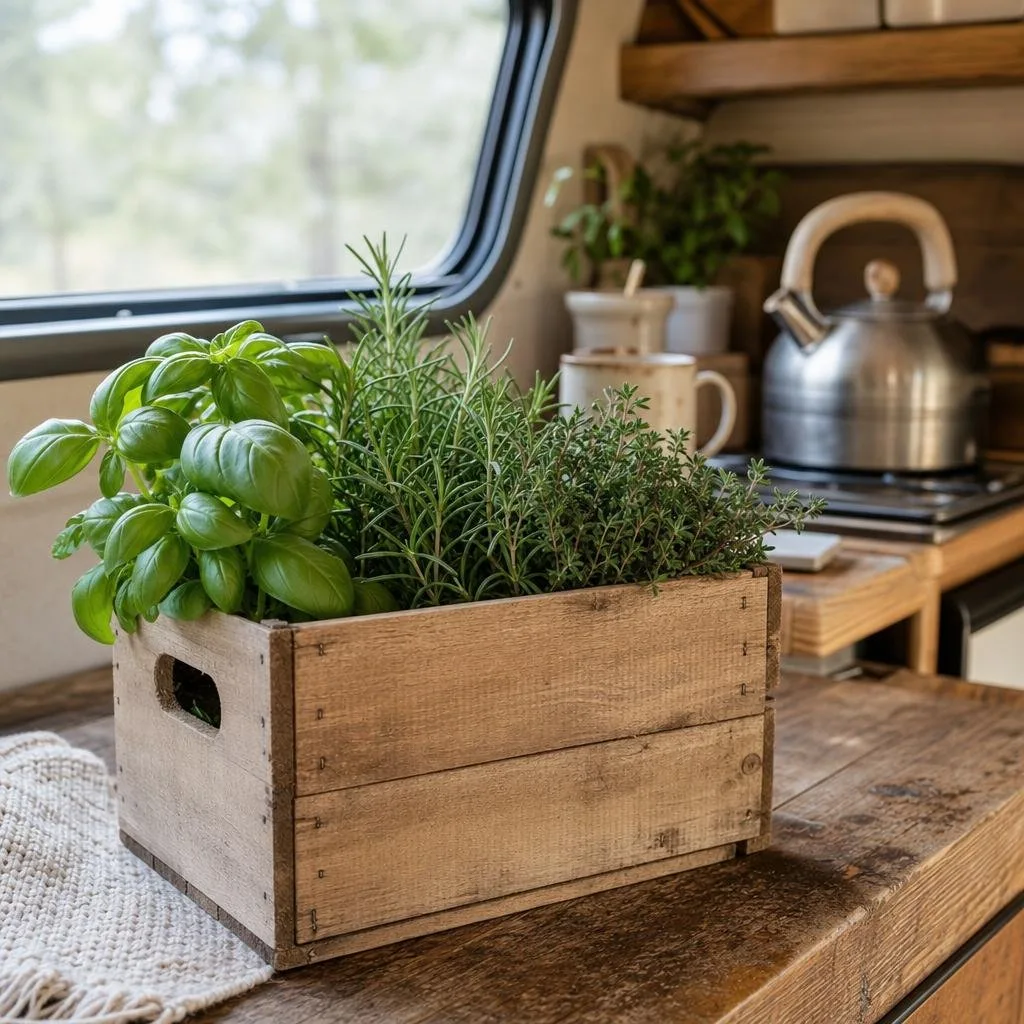
A tiny wooden crate filled with herb pots is one of my favorite little touches for a farmhouse camper kitchen. It’s practical, cute, and brings a breath of fresh air into the space.
Pick up a mini crate from a craft store for $3 to $5 and fill it with two or three small pots of herbs – rosemary, basil, thyme, whatever you like. If keeping plants alive on the road is too much, fake herb bundles look just as nice for the vibe.
Placement ideas:
- On the kitchen counter near the window for sunlight.
- On a shelf above the sink.
- As a centerpiece on the fold-down dining table.
Line the inside of the crate with plastic or a cut-down freezer bag to keep water from soaking the wood. Wrap a little burlap ribbon around the outside if you want more texture.
It’s a tiny detail, but it really pulls the whole kitchen together and makes the space feel lived-in.
21) Printable Farmhouse Wall Art In Thrifted Frames
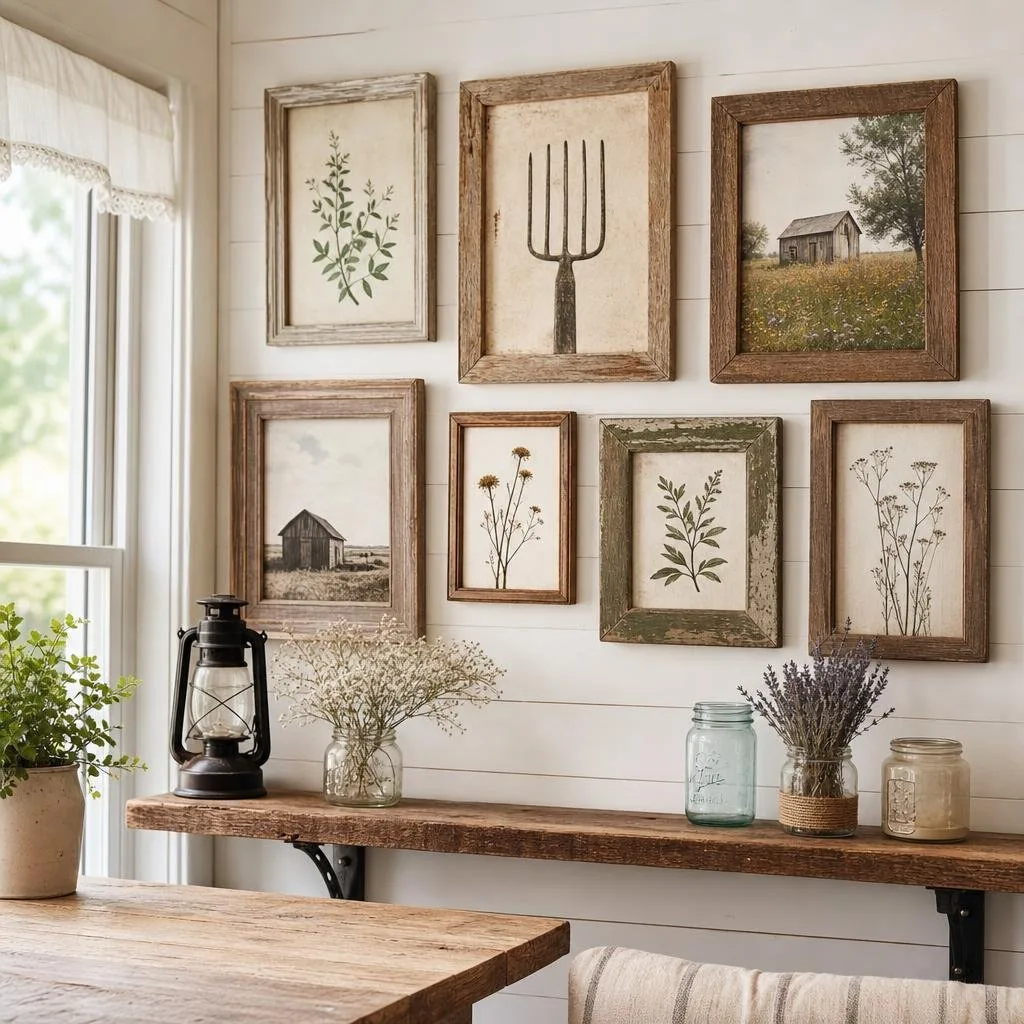
Wall art personalizes a space faster than almost anything. You don’t have to spend $40 a print, either. Printable farmhouse art is everywhere on Etsy for $3 to $8 per file – download, print at home or a local shop, and pop it in a frame.
Pair these prints with thrifted wood frames for a look that feels curated but not expensive. I’ve found great rustic frames at Goodwill for $1 to $3.
Popular printable farmhouse themes:
- Botanical sketches – lavender, olive branches, ferns.
- Simple quotes (“Gather,” “Home Sweet Camper,” and so on).
- Vintage-style farm animal illustrations.
- Black-and-white landscape photos.
Tip: Print on matte cardstock instead of glossy paper for a more authentic farmhouse look. Go small – 5×7 or 8×10 prints are plenty for a camper. Try a gallery wall of three or four little frames in a cluster – it looks intentional but doesn’t overwhelm the space.
Use command strips to secure frames so they don’t fall off the wall during travel.
How To Pick Budget-Friendly Farmhouse Decor
With so many options, it helps to have a way to make smart decisions. Not every cute farmhouse thing belongs in a camper, right? Here’s how I decide what’s worth it before spending a dime.
Start With Paint And Hardware First
If you’re on a tight budget, paint and hardware give you the biggest transformation for your buck. A quart of chalk paint and some matte black pulls can make a camper feel totally different for under $50.
I always say start with these basics before buying any decor. Once the “bones” look good, you don’t need much extra stuff to finish the space.
Choose Lightweight RV-Safe Materials
Weight really matters in a camper. Every pound affects fuel economy, towing, and how the rig handles. That’s why peel-and-stick materials, contact paper, and lightweight faux wood are popular in camper makeovers.
Skip real stone, heavy ceramic tile, and solid hardwood. Look for things labeled RV-safe or renter-friendly – they’re usually removable and light.
Mix Texture Before Buying More Decor
Before adding anything else, look at what you already have and ask: “Do I have a mix of textures?” Farmhouse style feels warm because of layering – metal, wood, linen, jute.
If you’ve got three smooth surfaces in a row, a woven basket or burlap curtain will do more for the space than another picture frame.
Prioritize Multi-Use Pieces In Small Spaces
In a camper, everything has to earn its spot. A wooden crate for herbs also works as a shelf organizer. Throw pillows from the dinette can move to the bed at night.
Wall hooks double as decor and storage. Before buying anything just for looks, ask if it can do at least two jobs. That’s what keeps a small space functional and uncluttered.
Common Mistakes To Avoid In A Farmhouse Camper Makeover

Even with the best intentions and a Pinterest board full of inspiration, it’s easy to make some missteps.
I’ve made most of these myself, so maybe this will save you some headaches.
Using Heavy Real Wood Everywhere
I get the appeal. Real reclaimed barn wood looks incredible.
But in a camper, weight is everything. One solid wood accent wall or headboard is fine.
Covering every surface in thick planks just weighs your rig down and might even mess with how safely it handles on the highway. Stick to one or two real wood focal points.
Try peel-and-stick or lighter alternatives for the rest. It really makes a difference.
Overcrowding Open Shelves
Open shelving looks best when it has room to breathe. A common mistake is filling every inch of shelf space with knick-knacks, mugs, plants, and jars until it looks more cluttered than curated.
My rule: leave about 30% of the shelf space empty. Group items in odd numbers – three small objects usually look better than four.
Vary the heights of what you display. Less is more here, even if it’s tempting to show off everything you love.
Ignoring Travel-Safe Storage
A beautiful farmhouse kitchen display is only charming when the camper is parked. Once you hit the road, anything unsecured becomes a projectile.
Every item on an open shelf needs to be anchored, contained, or light enough that it won’t cause damage if it falls. Museum putty, non-slip shelf liner, and bungee cords hidden behind baskets are your best friends.
Build your decor plan with travel days in mind, not just photo-op days. That extra step saves a lot of cleanup and worry later.
Choosing Decor That Shows Dirt Too Fast
Pure white decor looks gorgeous in a staged photo. But in a camper, where trail dust sneaks in, you’re cooking in tight spaces, and pets join the chaos, all-white turns into a real maintenance headache.
I’d pick cream, oatmeal, or linen tones for textiles over bright white any day. Matte finishes on hardware and fixtures do a much better job at hiding fingerprints than polished ones.
A little dirt tolerance really helps when most of your life happens outdoors.