
DIY Dog Zip Line For Camping And Campgrounds
Giving your dog room to roam at a campsite without chasing them into the next site over is one of those problems every camping dog owner hits eventually. A standard stake-and-leash setup keeps your dog in one spot, but a DIY dog zip line lets them move back and forth along a cable or rope stretched between two anchor points. It is a simple, affordable project you can put together with basic hardware store supplies, and it works whether you are at a developed campground, an RV park, or boondocking on public land.
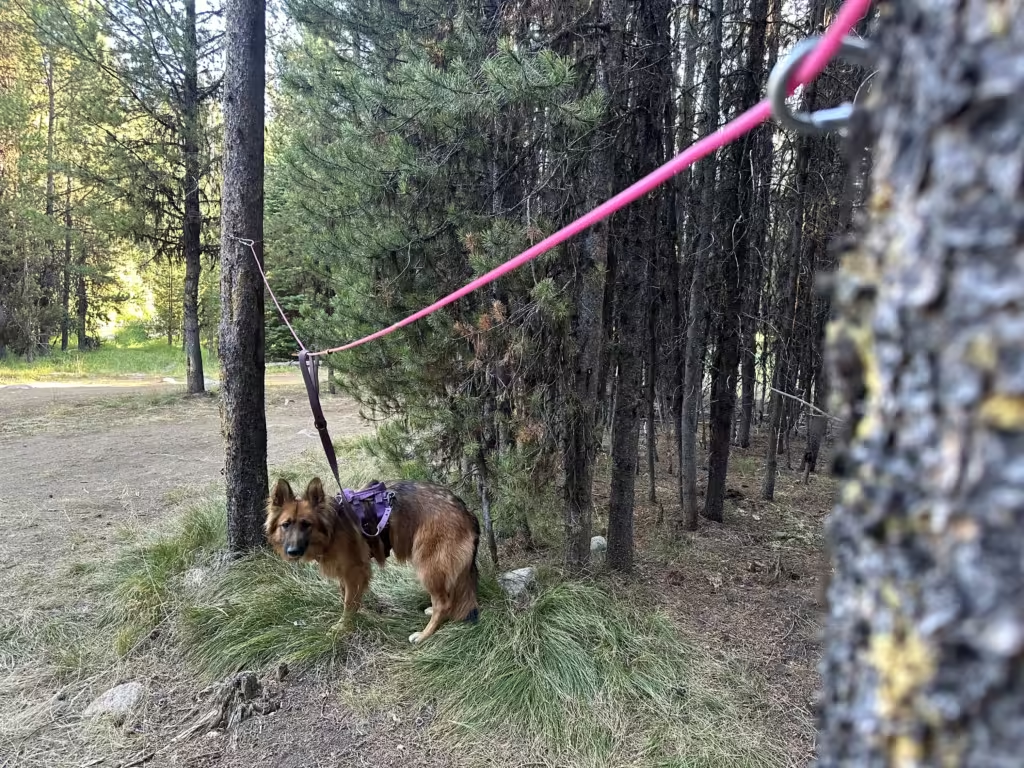
The whole setup can cost under $30 and fits in a small bag, making it one of the most practical pieces of dog gear you can carry on any camping trip. You need a length of cable or rope, a couple of carabiners or clips, a short lead, and two solid things to tie it to. That is it. The real trick is knowing what materials match your dog’s size and strength, how to anchor everything safely, and how to avoid the common mistakes that lead to tangles or safety problems.
Whether you have a mellow retriever or a high-energy shepherd, this guide walks you through every step, from choosing materials to setting up camp-ready in minutes. If you are looking for more firsthand camping-with-dogs advice and trail-tested ideas, Wanderland Xperience is a great place to follow along and subscribe for regular inspiration from the road.
When A Zip Line Makes Sense At Camp
A zip line for dogs is not always the right call, but in the right situation, it gives your dog far more freedom than a fixed stake while still keeping them safely contained. Knowing when to use one and when to skip it saves you frustration and keeps your dog comfortable.
Zip Line Vs. Standard Tie-Out
A standard dog tie-out uses a single stake in the ground with a tie-out cable attached. Your dog can only move in a circle around that stake. It works fine for short breaks, but dogs tend to wrap themselves around chairs, table legs, and coolers pretty quickly.
A dog trolley system, sometimes called a zip line for dogs, stretches a cable or rope between two fixed points. Your dog clips to a runner that slides along the main line. This gives them a long, linear range of motion instead of a circle. They can trot back and forth without wrapping around obstacles.
The practical difference is significant. A trolley-style setup covers more ground and causes fewer tangles. If your campsite has two trees or posts 20 to 50 feet apart, a zip line is almost always a better choice than a ground stake.
Best Use Cases For Campgrounds, RV Sites, And Boondocking
Developed campgrounds with assigned sites and spaced trees are ideal for a zip line setup. Most sites have two trees the right distance apart, and a zip line keeps your dog within your site boundaries.
At RV sites, you can anchor one end to your vehicle’s frame or hitch and the other to a nearby tree or post. Just make sure the vehicle is not going anywhere (obviously).
Boondocking on public land is where this setup really shines. Out in the open with no fences or boundaries, a zip line gives your dog room to explore while you cook, set up camp, or just sit and enjoy the quiet. As a simple campsite hack, a DIY tether system like this is one of the most popular solutions among camping dog owners.
Limits And Risks To Understand First
A zip line is not a substitute for supervision. Dogs can still lunge at wildlife, get spooked by noises, or tangle themselves if the setup is not right. As outdoor camping communities have noted, dogs can get wrapped around objects quickly if the leash length is too generous.
Aggressive chewers can damage rope lines. Very large or powerful dogs need heavier hardware than a casual setup provides. And no zip line is safe to leave your dog on unattended for long stretches, especially in the heat.
If your dog has never been on a tether of any kind, expect a training period. Some dogs take to it in minutes. Others need a few sessions before they stop pulling or panicking.
Choosing A Simple Budget Setup

Material choices depend on your dog’s size, your budget, and how often you plan to set this up. A basic rope system works for lighter dogs, while a steel zipline cable handles bigger, stronger pullers without risk of snapping.
Rope Vs. Cable For Different Dog Sizes
Nylon rope is the cheapest option and perfectly fine for dogs under about 30 pounds. It is lightweight, easy to tie, and packs down small. The downside is that it stretches under tension and wears out faster, especially if your dog is a steady puller.
For dogs over 30 pounds, vinyl-coated aircraft cable is the better pick. It is stronger, resists chewing, and holds tension without sagging. A 50-foot length of coated cable runs about $10 to $15 at most hardware stores. It is heavier than rope, but the trade-off in durability is worth it for medium and large breeds.
If your dog is in the 50-plus-pound range, cable is not optional. It is necessary.
Must-Have Hardware And Nice-To-Have Upgrades
At minimum, you need:
- A heavy-duty carabiner or spring clasp to attach the runner lead to the main line
- A second carabiner to clip the lead to your dog’s harness
- Cable clamps or strong knots to secure each end of the main line
Nice upgrades include a small pulley or ring that slides more smoothly along the cable, rubber stoppers at each end to prevent your dog from hitting the anchor points, and a short bungee section on the lead to absorb shock from sudden lunges.
Pre-made kits like the Four Paws Walk-About or a dog tie-out trolley system kit bundle these parts together and can save time, though they often cost more than sourcing parts individually.
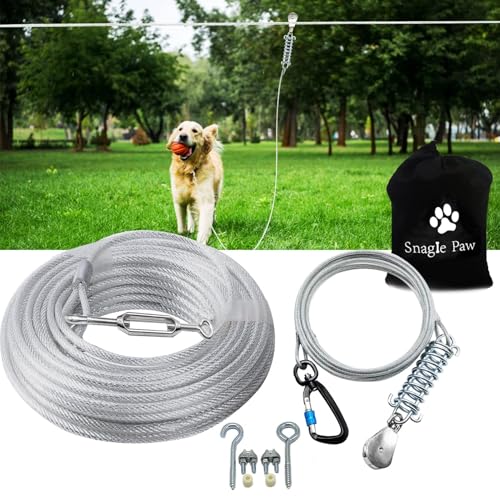
The Snagle Paw Dog Runner is a portable trolley system designed to give your dog the freedom to roam safely while camping. Featuring a 100-foot cable, a 10-foot pulley runner line, and a shock-absorbing spring, it allows dogs up to 250 lbs to move comfortably without becoming tangled. It's an excellent alternative to tying your dog to a fixed leash, helping keep them secure around the campsite while giving them plenty of space to explore and relax. Its durable hardware and straightforward setup make it a practical solution for campers traveling with dogs.
Harness Choices And Why Collars Are Riskier
Always use a harness instead of a collar on a zip line. A collar concentrates all the force on your dog’s neck when they hit the end of the lead. Over time, or with one hard lunge, that can cause real injury.
A well-fitted harness from brands like Ruffwear distributes force across the chest and shoulders. Look for one with a back-mounted clip, which works best with overhead trolley systems. A front-clip harness can twist your dog sideways on a zip line, which is uncomfortable and defeats the purpose.

The Ruffwear Front Range Dog Harness is a well-padded, adjustable harness that provides a secure and comfortable attachment point for dogs using a zip line at camp. Its dual leash attachment points, durable construction, and reflective trim make it ideal for outdoor adventures, while the lightweight design allows dogs to move freely without the pressure or strain that can come from attaching a trolley system directly to a collar. For camping, pairing a quality harness like this with a dog zip line helps keep your dog safe, comfortable, and under control while they enjoy the campsite.
How To Measure And Plan The Run
Getting the measurements right before you tie anything off prevents most of the common problems: sagging lines, tangled dogs, and unhappy campground hosts. A few minutes of planning with a measuring tape saves a lot of re-doing later.
Picking Safe Anchor Points
Look for two anchor points that are solid and will not move. Live trees with trunks at least six inches in diameter are ideal. Dead trees, thin saplings, and fence posts that wobble are not safe choices.
If you are at an RV site with no trees, you can use your vehicle’s frame or hitch on one end and a heavy picnic table or permanent post on the other. Just confirm the second anchor is genuinely fixed in place.
Keep the line away from fire pits, sharp objects, and areas where other campers walk frequently. A dog trolley system works best when the path underneath is clear and open.
Deciding On Height, Length, And Slack
String the main line about five to six feet off the ground. This keeps it high enough for people to walk underneath without ducking. As noted in several setup guides, the line should be taut enough to prevent significant sag but not so tight that there is zero give.
For the runner lead (the shorter line that connects your dog to the main cable), keep it around 8 to 10 feet. Longer runner leads cause more tangling. Shorter leads limit movement too much.
Total main line length of 30 to 50 feet covers most campsites comfortably. Measure the distance between your anchor points with a tape measure, and add about four extra feet for wrapping and securing each end.
Protecting Trees And Respecting Campground Rules
Wrapping bare cable or rope directly around a tree can damage bark, especially on softer species. Slip a piece of wide nylon webbing, an old towel, or a tree-saver strap between the line and the trunk. This spreads the pressure and protects the tree.
Many developed campgrounds have rules about attaching things to trees. Some ban it outright. Check the posted regulations or ask the camp host before you set up. On public land and dispersed camping sites, tree protection is your own responsibility, but the same principle applies.
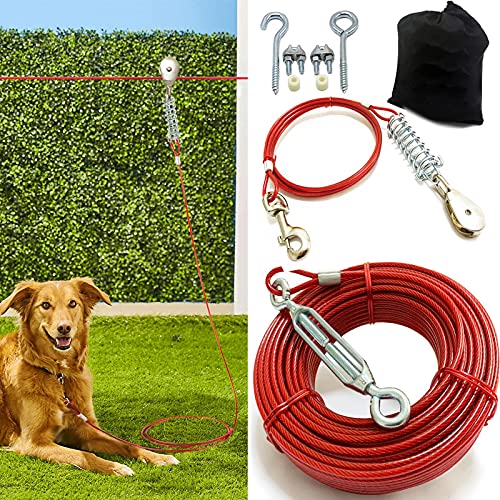
Heavy Duty for Small to Large Dogs - 100ft Run Cable Zipline with 10ft Runner Cable
Step-By-Step Assembly And Setup
Building a basic homemade zipline for your dog takes about 15 to 20 minutes once you have your materials ready. The process is the same whether you use rope or cable, with small differences in how you secure the ends.
Building A Basic Homemade System
Start by laying out your cable or rope on the ground between the two anchor points. Thread one end around the first tree (with tree protection in place) and secure it.
If you are using rope, tie a bowline knot. This knot holds under load but is easy to untie when you break camp. If you are using cable, loop the end around the tree and clamp it with two cable clamps, spaced about three inches apart.
Slide your runner attachment (carabiner, pulley, or ring) onto the main line before securing the second end. This is the step people forget most often. Once both ends are tied off, you cannot add the runner without taking one end down.
Pull the line to the second anchor point, wrap it around (again with bark protection), and secure it with the same method. Tension it as tight as you can by hand.
Securing Knots, Clips, And Clamps
For rope systems, a bowline knot at each end is reliable and does not slip under load. Avoid simple overhand knots, which can jam under pressure and become nearly impossible to untie.
For cable systems, use cable clamps (also called wire rope clips). Position the U-bolt of the clamp on the dead end of the cable, not the live side. Tighten each clamp firmly with a wrench.
Give the main line several strong tugs from different angles. If anything shifts, re-tighten before proceeding.
Attaching Your Dog The Safe Way
Clip the runner lead to the sliding attachment on the main line with a heavy-duty carabiner. Clip the other end of the runner to your dog’s harness, not the collar.
Walk your dog along the full length of the line before letting them loose. Check that the runner slides freely, the lead does not drag on the ground, and your dog cannot reach any hazards at either end.
Once everything checks out, let your dog explore at their own pace. Stay nearby for the first few sessions so you can spot any problems early.
Using It Safely Once Your Dog Is On The Line
A well-built dog trolley system still requires active attention from you. Safety is not just about the build. It is about how you manage the setup while your dog is on it.
Supervision, Water, Shade, And Velocity Control
Never leave your dog on a zip line unattended for more than a few minutes. Things can go wrong quickly, from tangled leads to a spooked dog pulling too hard.
Place a water bowl within easy reach of the line’s path. On warm days, make sure part of the zip line run is shaded. If the entire run is in direct sun, move the setup or add a tarp for cover.
Some dogs build up speed and hit the end of the line hard. Rubber stoppers at each anchor point help absorb that impact. A short bungee section on the runner lead also cushions sudden stops.
Preventing Tangling, Lunging, And Trip Hazards
Keep the runner lead short enough that it does not reach the ground when your dog is standing. A lead that drags creates loops your dog can step through and get twisted up in.
Clear the path beneath the line of chairs, coolers, and firewood. Dogs will run the full length, and anything in the way becomes a tripping hazard for both of you.
If your dog is a lunger, especially toward squirrels or other dogs passing by, consider shortening the runner lead or repositioning the zip line away from high-traffic areas. Redirecting their attention with a chew toy can also help.
What To Watch For With Multiple Dogs
Running two dogs on the same line usually ends in a tangle. Their leads wrap around each other, and untangling two excited dogs is not fun.
If you need to manage multiple dogs, set up separate parallel lines with enough spacing that the dogs cannot reach each other’s lines. Five to six feet between the lines is a good minimum.
Alternatively, stagger their time on the line. One dog gets zip line time while the other relaxes on a mat or in the camper. This keeps things calm and avoids conflicts.
Easy Upgrades, Troubleshooting, And Packing Tips
Even a basic setup benefits from a few smart additions and regular maintenance. Small upgrades improve daily use, and knowing what to fix in the field keeps your system reliable trip after trip.
Common Problems And Quick Fixes
Sagging line: If the main cable or rope sags after a few hours, re-tension it. Rope stretches more than cable, so check it a couple of times per day. With cable, tightening the clamps usually solves it.
Stuck runner: A carabiner that does not slide smoothly usually has grit or bark debris in the gate. Wipe it clean and apply a drop of lubricant if you have any. A small pulley wheel eliminates this problem entirely.
Dog chewing the lead: Switch from a rope runner to a short vinyl-coated tie-out cable. Most dogs lose interest once they cannot make progress chewing through it.
Portable Add-Ons For Frequent Campers
If you camp often, a few upgrades make setup faster:
- A pre-assembled zipline cable with loops already crimped on each end
- A small stuff sack to keep all the hardware organized
- Tree-saver straps with D-rings that wrap and secure in seconds
- A lightweight ratchet strap to tension the main line quickly
All of this fits in a bag the size of a rolled-up towel. Keeping it packed and ready means you can have the zip line up within five minutes of arriving at your site.
When To Replace Worn Parts
Check the main line for fraying, kinks, or rust spots before each trip. Frayed rope or kinked cable can snap under load.
Inspect every spring clasp and heavy-duty carabiner for cracks or gates that do not close fully. Cheap carabiners wear out fastest, so keep a spare or two in your kit.
A tie-out cable that has been kinked repeatedly should be replaced, not straightened. Kinks weaken the cable at that exact point. Replace worn components before they fail, not after.

Dog Hitching System, Portable Hitch for Campsites, Parks, and Yards
Frequently Asked Questions
What materials and hardware do I need to build a cable run for a dog?
You need a main line (vinyl-coated aircraft cable for dogs over 30 pounds, or nylon rope for smaller dogs), two heavy-duty carabiners or spring clasps, cable clamps or strong knots, a runner lead of 8 to 10 feet, and tree protection material like webbing or old towels. A basic dog run cable setup can be assembled from hardware store supplies for under $30.
How do I safely anchor a cable run between two trees without damaging them?
Wrap a wide nylon strap, towel, or tree-saver around the trunk before attaching your cable or rope. This distributes pressure and prevents bark damage. Avoid using thin wire or bare cable directly against the tree, as it can cut into the bark and harm the tree over time.
How can I set up a cable run when I don’t have trees or solid anchor points?
Use your vehicle’s frame or hitch as one anchor and a heavy, fixed object like a concrete picnic table or permanent post as the other. Some campers carry ground anchors or heavy-duty screw-in stakes for open terrain. Just make sure both anchor points can handle the full force of your dog pulling at a run.
What’s the safest way to install a ground-level run so the line doesn’t sag or tangle?
String the main line at about five to six feet off the ground and keep it as taut as possible. Use a ratchet strap or retighten rope connections after the first hour, since materials stretch under load. Keep the runner lead short enough that it does not touch the ground when your dog is standing, which prevents loops and tangles.
How do I size the cable length, line height, and leash length for my dog’s weight and yard?
Measure the distance between anchor points and add about four feet for wrapping and securing. A main line of 30 to 50 feet works for most campsites. Set the height at five to six feet, and use a runner lead of 8 to 10 feet. For dogs over 50 pounds, always use cable rated for their weight rather than rope.
Can two dogs use the same run, and what setup prevents tangling or collisions?
Two dogs on a single line almost always leads to tangled leads and frustration. Set up two separate parallel lines with at least five to six feet of spacing between them so the dogs cannot reach each other’s cables. If that is not possible, alternate their time on the line to keep things safe and stress-free.