Campfire Nachos: The Ultimate Outdoor Cheesy Nacho Guide
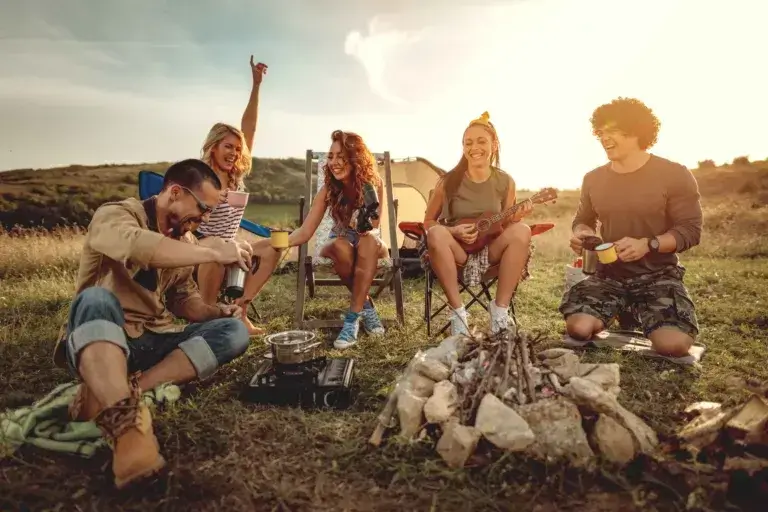
Nothing quite matches the vibe of hanging out around a campfire with your favorite people. A big pan of cheesy, loaded nachos is always a hit at camp and keeps everybody happy.
I’ve been making campfire nachos on camping trips for years – nachos are an easy, crowd-pleasing camping meal that never disappoints.
You can whip up delicious campfire nachos with a Dutch oven, a cast-iron skillet, or even foil packets right over the fire or on a camp stove. The secret is in the layers – chips, cheese, toppings – so every bite is loaded. I’ll break down what you need, from gear to toppings, and how to get perfect melty nachos.
One of the best things about making campfire grilled nachos is how you can make them your own. Use whatever you’ve got – fresh stuff or canned, meat or just beans. I’ll show you how to pull off crispy, gooey nachos every single time, no matter what you’re working with.
Key Takeaways
- Build nachos in layers – chips, cheese, toppings – in a Dutch oven or foil packet for best results.
- Mix it up with fresh or canned ingredients, and go meaty or vegetarian as you like.
- Trap heat with a lid to melt the cheese evenly over the fire or camp stove.
What Are Campfire Nachos?
Campfire nachos are basically tortilla chips stacked with cheese, meat, beans, and toppings, all cooked over an open fire until everything’s hot and melty. They take a simple snack and turn it into a legit camping meal you can pass around the fire.
Why Campfire Nachos Are a Camp Favorite
I keep coming back to campfire nachos because they’re dead simple. No fancy gadgets or chef skills needed. Just layer chips and toppings in a cast-iron skillet or aluminum pan, set it over the coals, and let the cheese do its thing.
They’re also super interactive. Everyone gets to pile on whatever toppings they want – sour cream, salsa, jalapeños, avocado, you name it. Kids love building their own, and adults appreciate a satisfying meal that barely leaves any dishes behind.
This campfire nachos recipe fits all kinds of camping moments:
- Quick lunch after a hike
- Easy dinner when you’re wiped out
- Late-night snack by the fire
- Feeds a group (4-10 people) from one pan
How Campfire Nachos Differ From Traditional Nachos
Regular nachos usually go in the oven or microwave, where the heat’s always the same. Campfire cooking is a little wild – you’re dealing with flames and coals that change as the fire burns down.
I go with a cast-iron skillet or a heavy foil pan for campfire nachos, not a baking sheet. Thicker pans help prevent burning and spread the heat better. You’ll need to cover them with foil or a lid so the cheese melts properly.
Camping nachos are usually more stripped down. I cook any meat at home, bring pre-shredded cheese, and save the fresh toppings for after they come off the fire.
Some key outdoor cooking differences:
- Heat source: Hot coals, not an oven
- Cooking time: 8-12 minutes at camp, a bit longer than indoors
- Equipment: Heavy pans that can handle fire
- Flavor: That smoky kick you only get from a real campfire
Prep matters more with easy camping recipes since campsite space and tools are always limited. It’s a little less predictable, but that’s part of the fun.
Essential Ingredients for Campfire Nachos
Building killer campfire nachos starts with picking ingredients that can handle the heat. I stick to sturdy chips, cheese that melts easily, protein options for everyone, and fresh toppings that bring the flavor and color.
Tortilla Chips: The Crunchy Foundation
Thick, restaurant-style tortilla chips are a must for campfire nachos. Thin chips just go soggy under all the toppings, and they break when you try to scoop. The chips need to survive layers of cheese and beans without falling apart.
I hunt for bags labeled “restaurant-style” or “extra thick.” These hold up to heavier toppings like black beans or meat. Round chips layer better in a skillet or foil pan than triangles, but there’s no rules, use what you like.
Lightly salted chips are my go-to – they don’t overpower the toppings.
Cheese Choices for Maximum Meltiness
Shredded Mexican cheese blend is my default – it melts smoothly and brings a mix of cheddar, Monterey Jack, and sometimes queso. Cojita is good too for a little extra flavor. I usually pack 2-3 cups per batch.
Here’s what I’ve found works best for melting over a campfire:
- Shredded cheddar: Sharp or mild, both melt great and taste classic
- Monterey Jack: Makes everything gooey
- Pepper Jack: Adds a little heat
- Queso fresco or Donita: Crumble it on after cooking for extra flavor
I like to shred cheese from a block before the trip. Pre-shredded cheese has a coating that keeps it from clumping, but it also keeps it from melting as well. Freshly shredded cheese gives you better gooey layers.
Protein Options: Meaty and Meatless
I always cook proteins at home and pack them in sealed containers. Cooking raw meat over a campfire is more hassle than it’s worth. Ground beef with taco seasoning is classic, but I mix it up with turkey or chorizo, too.
For vegetarian nachos, beans are my main move. Black beans are my favorite – they’re sturdy and flavorful. Pinto beans work, and refried beans make a creamy base that helps everything stick together.
When I camp with a group, I bring a few options:
- Pre-cooked ground beef or turkey (about a pound for 4-6 people)
- Black beans (one 15 oz can, drained and rinsed)
- Pinto beans for variety
- Pulled pork or shredded chicken if I want to mix it up
Canned beans don’t need refrigeration, which helps save space. I warm everything up over the fire before layering it on the chips.
Must-Have Toppings and Fresh Add-Ons
Fresh toppings take campfire nachos to the next level. I chop all the veggies at home, so assembly’s fast and easy at camp.
Here are my essentials:
| Topping | Why I Use It |
|---|---|
| Diced tomatoes | Adds freshness and acidity |
| Red onion | Sharp, crunchy bite |
| Jalapeños | Heat—pickled or fresh |
| Cilantro | Bright, herbal flavor |
| Avocados | Creamy richness |
| Green onions | Mild onion flavor and color |
I always wait to cut avocados until right before serving, so they don’t go brown. If I make guac at camp, I add a squeeze of lime to keep it fresh.
Sour cream, salsa, and pico de gallo are my must-have sauces. I pack them in small containers and add them after the nachos come off the fire. Corn (canned or fresh) brings a little sweetness, and black olives add a salty bite.
Diced bell peppers bring crunch and color without overpowering anything. I always bring a baggie of lime wedges to squeeze over the top. Hot sauce is optional, but I never leave home without it.
Green chiles from a can add a mild smoky heat. Some people are into them, others skip.

Gear Up: Equipment and Setup
The right gear makes or breaks your nachos. A cast iron dutch oven gives you the most control. Foil packets and skillets work too, depending on what you’ve got and how you like to cook outdoors.
Choosing the Right Pan: Dutch Oven vs. Cast Iron Skillet
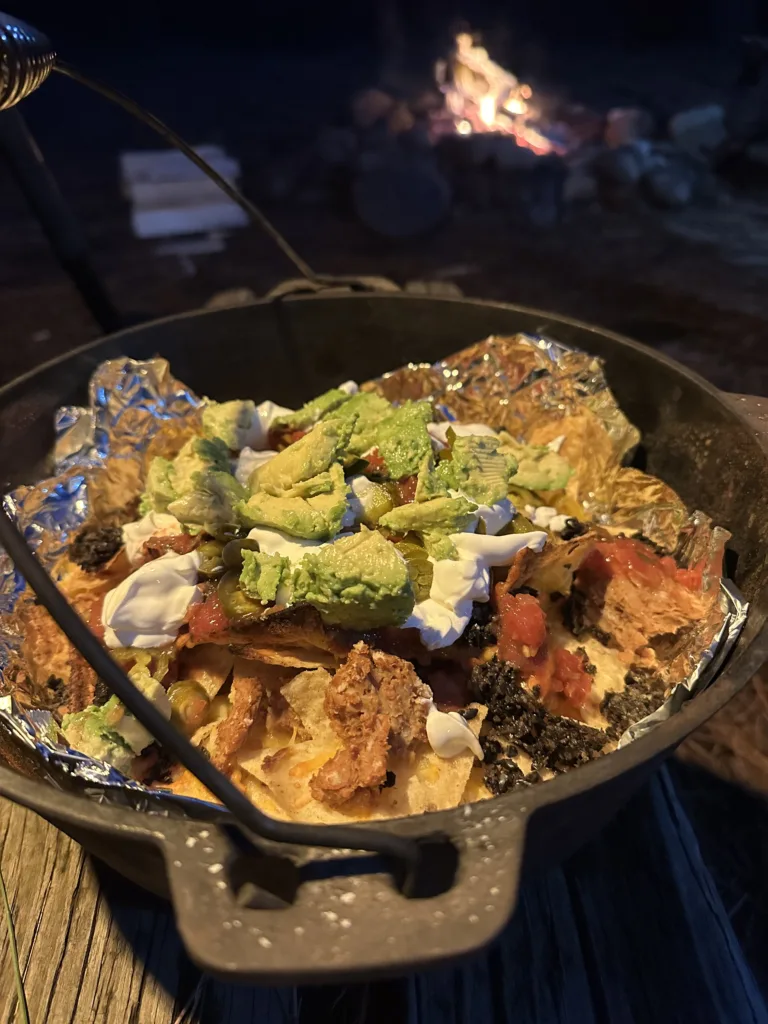
I always grab my cast iron dutch oven when making campfire nachos because, in my opinion, it just works better. The deep sides let me pile up lots of chips and cheese, so nobody misses out. For two to four people, I’d say go with at least a 4-quart size.
A camp dutch oven comes with a flat lid and a rim to hold coals on top. That means you get heat from above and below, and the cheese melts evenly through all the layers.
Cast-iron skillets can do the job if you’re in a pinch, but they have their downsides. The shallow sides limit how many layers you can build, so you end up with less cheese per bite.
Without a real lid, you can’t put coals on top, so all the heat comes from underneath. I’ve burned the bottom plenty of times waiting for the top to finally melt.
If a cast iron skillet is all you’ve got, cover it tightly with heavy-duty aluminum foil and keep it up on a grill grate. Go low and slow with the heat, and be patient – it’s worth it.
Lining and Prepping: Aluminum Foil, Parchment, and More
Parchment paper or tin foil is my go-to for easy cleanup. I line my Dutch oven before adding any chips, and when we’re done, I just lift out the paper and toss it.
Definitely use parchment, not wax paper. Wax paper melts and ruins your nachos – ask me how I know. I usually tear off the corners of the parchment so they don’t stick out and catch fire.
Aluminum foil opens up some other options. You can make individual foil packet nachos by layering chips, cheese, and toppings in heavy-duty foil, then sealing the edges.
Just toss the packets right on the coals or grill grate. No pan needed.
A disposable aluminum pan is another easy route if you don’t want to lug around cast iron. Cover it with foil, set it on your camp grill, and you’re set. Just be careful, thin aluminum pans can heat unevenly and sometimes develop hot spots.
Campfire, Grill, or Home Oven: Heat Sources Explained
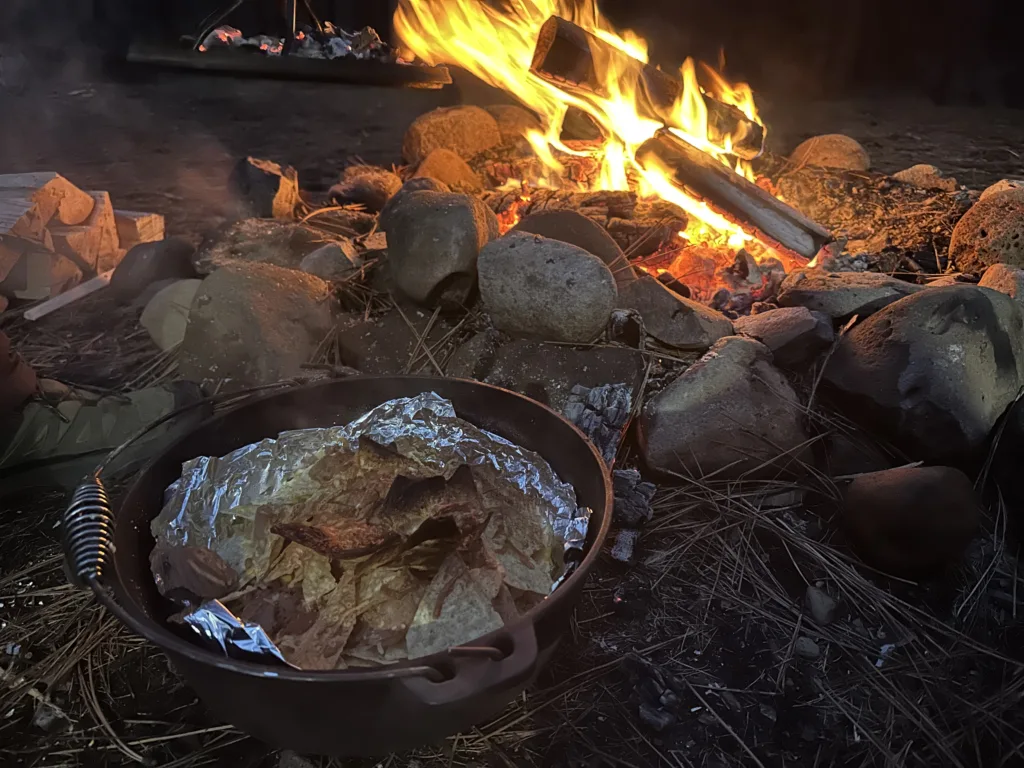
Campfire cooking gives you a classic smoky flavor, but it takes a little practice. Let your fire burn down to glowing coals, not flames.
I put a few coals under my Dutch oven and pile some on the lid for that oven effect. It melts everything nicely and evenly.
Use metal tongs to move hot coals, and wear gloves – you’ll be glad you did. I rotate the Dutch oven every few minutes so one side doesn’t get too hot.
A campfire grill grate makes life easier. Just set your pan on the grate over medium heat, cover it with a lid or foil, and relax. The extra distance from the coals helps prevent burning.
At home, I preheat my oven to 350°F and bake nachos in my cast-iron for 10 to 15 minutes. A regular baking sheet works, too. Really, the key is layering your ingredients, keeping the heat steady, and watching for the perfect cheese melt.
Step-By-Step: How to Make Campfire Nachos
Making campfire nachos comes down to three things: solid layering so every chip gets cheesy, picking the right cooking method, and customizing the recipe with creative twists like foil packets or vegetarian versions.
Layering: The Secret to Cheesy, Crunchy Success
The biggest mistake I see with easy campfire nachos is piling everything on top and hoping for the best. That just leads to soggy chips on the bottom and dry ones up top.
Here’s my go-to layering method:
First Layer:
- Spread tortilla chips across the bottom of your cast iron skillet or aluminum pan.
- Cover with half your shredded cheese.
- Add cooked protein and black beans.
- Sprinkle on corn, jalapeños, or bell peppers.
Second Layer:
- Add another layer of chips.
- Top with the rest of your cheese.
- Toss on a few more toppings if you want.
Putting cheese under and over the main ingredients makes all the difference. The cheese melts together and holds everything to the chips, so you don’t lose toppings with every bite.
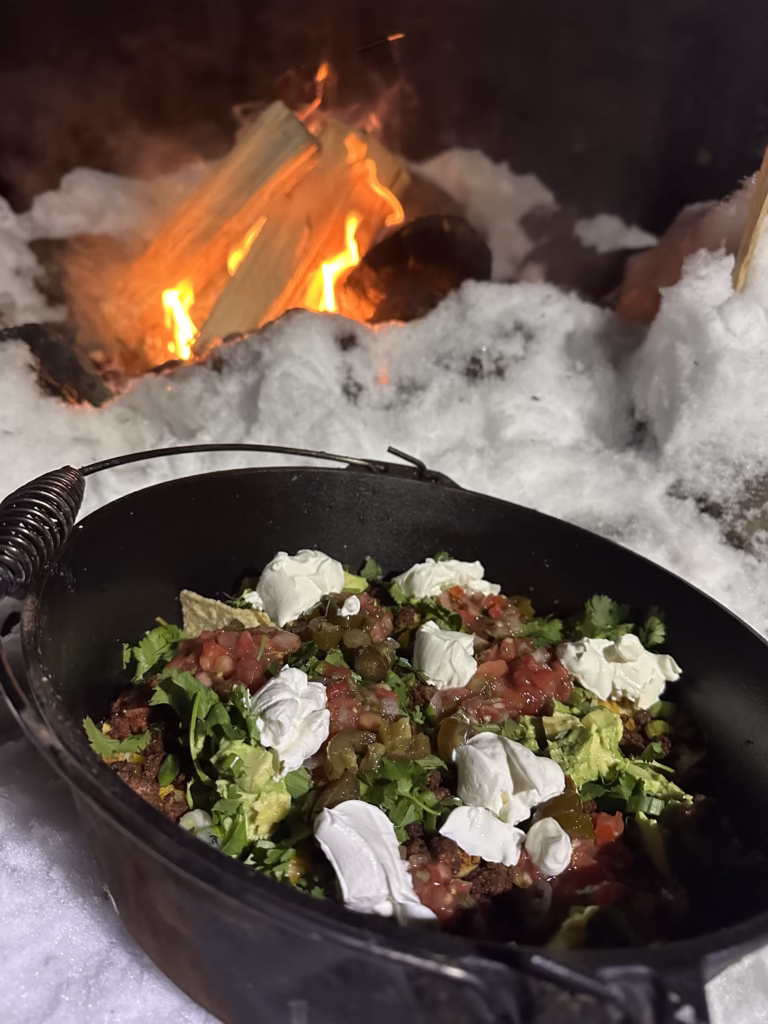
I always save fresh stuff like diced tomatoes, cilantro, sour cream, and avocado for after cooking. They stay crisp and bright if you add them at the end.
Cooking Techniques: Over the Fire, Grill, or Oven
I’ve made campfire nachos using different cooking methods and each one has its own perks.
Over the Campfire: Build your fire, let it burn down to hot coals, and set your cast-iron skillet or aluminum pan on a camp grate about 6 inches above the coals. Cover with foil and cook for 8–12 minutes until the cheese is melted. Rotate the pan if you spot hot spots.
On the Grill: Preheat your grill to medium (around 350–375°F). Set up your nachos in a cast-iron skillet or on heavy-duty foil. Close the lid and cook for 10–15 minutes. This gives you more control than an open fire.
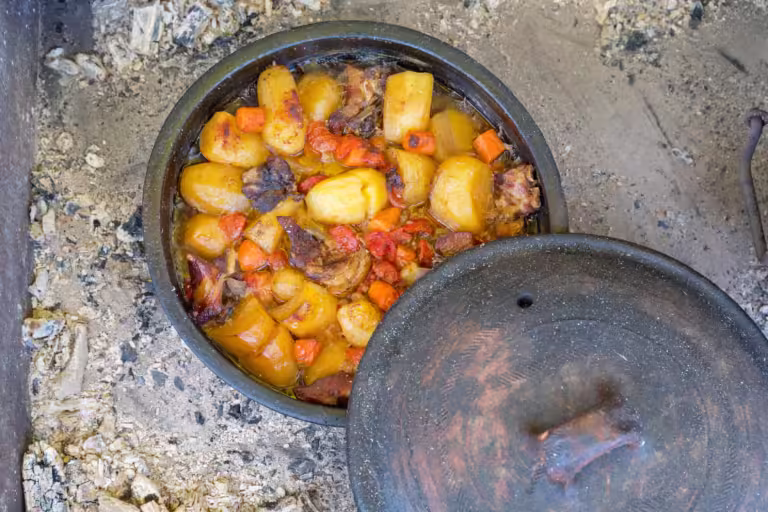
Dutch Oven Nachos: If I’m feeding a crowd, I use a Dutch oven right in the coals. Put hot coals underneath and on top of the lid. Cook for 12–15 minutes, checking halfway through.
Oven Nachos at Home: Practicing at home? Bake at 375°F for 10–12 minutes. It’s a good way to get your layering down before you head out to camp.
Creative Variations: Foil Packets, Vegetarian, and More
I really like making individual foil packet nachos , so everyone gets to build their own. Tear off a big piece of heavy-duty foil, layer chips, cheese, and toppings in the middle, then fold up the edges to seal it.
Just set the packets right on the grill or coals for 8–10 minutes.
Vegetarian Options: Skip the meat and pile on black beans, pinto beans, grilled veggies, corn, and extra cheese. I like adding sautéed mushrooms and bell peppers for a heartier feel. Three types of beans make vegetarian nachos more filling than you’d expect.
Breakfast Nachos: Swap the ground beef for scrambled eggs and breakfast sausage. Top with hash browns, cheese, and salsa for some morning grilled nachos that’ll actually keep you full.
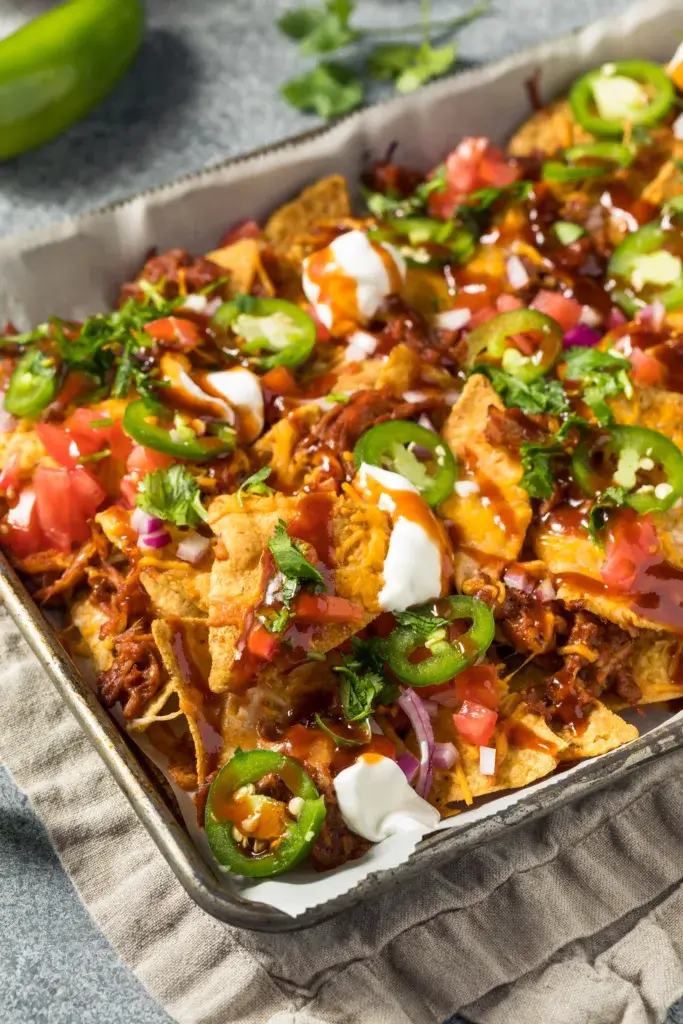
BBQ Pulled Pork Version: Use leftover pulled pork, add BBQ sauce, top with coleslaw, and finish with pickled jalapeños. The sweet and tangy combo just works over a campfire.
Buffalo Chicken Nachos: Toss cooked chicken in buffalo sauce, sprinkle blue cheese crumbles, and add diced celery for crunch. This one always disappears fast at my campsite.
Best Toppings and Flavor Boosters
The right toppings turn basic chips and cheese into something you’ll remember. I usually focus on three groups: timeless classics, fresh stuff that adds brightness, and spicy options for anyone who wants a little kick.
Classic Crowd-Pleasers
I start with shredded cheese – cheddar melts great, but Monterey Jack or pepper jack brings more flavor. For protein, seasoned ground beef is a classic that just works with nachos.
Ground turkey is a good swap if you want something lighter. I brown my meat with taco seasoning at home and just reheat it at camp.
Sour cream gives a cool, creamy finish. I always add it after cooking so it stays fresh. Refried or black beans add some heft, which is great after a long day outside.
Queso fresco crumbles on hot nachos and adds a mild, salty bite. Some people prefer liquid queso for a more gooey texture – you can warm it in a small pot over the fire if that’s your thing.
Fresh & Zesty Options
Salsa and pico de gallo bring some brightness to all that cheese. I pack fresh pico in a container since the tomatoes, onions, and cilantro add crunch and tang.
Guacamole is a must for me. I mash avocados with lime and salt right at camp. If you press plastic wrap onto the surface, it stays green longer.
Diced tomatoes, sliced jalapeños, and chopped green onions add color and zip. I cut these up at camp and stash them in separate containers so everyone can make their own plate.
Fresh cilantro and a squeeze of lime juice make everything pop. Corn kernels add sweet bursts that go really well with savory toppings.
For the Heat Seekers: Spicy Add-Ins
Sliced jalapeños are my go-to for customizable heat. Remove the seeds for mild, leave them in for more burn.
I bring a few hot sauce options so everyone can dial up the spice. Some like it mild, some want to sweat.
Diced serrano or habanero peppers take things up a notch. Pickled jalapeños from a jar are easy and add tangy heat with zero prep.
Mixing crushed red pepper flakes or cayenne into your taco meat spreads the heat around. Chipotle peppers in adobo sauce give a smoky, spicy punch that’s awesome on campfire nachos.
Spicy salsa verde or habanero salsa is great if you want bold flavor with your heat.
Cooking Techniques Over an Open Fire
Getting campfire nachos right takes a few smart moves. Whether you’re dodging soggy chips or trying to feed a hungry crew, there are tricks that make the difference.
I’ve picked up some go-to hacks over the years. They turn okay nachos into the best nachos ever.
How to Avoid Soggy Chips
The biggest nacho killer? Moisture.
Drain everything ruthlessly. Canned beans, jalapeños, and tomatoes all come loaded with extra liquid. I drain them at home, then pat everything dry with paper towels before packing.
This tiny step keeps your chips crispy instead of a sad, wet mess.
Layer strategically. Cheese goes right on the chips first to act as a barrier. Melted cheese is like waterproofing between your chips and anything wetter.
I always do a cheese layer, then proteins and veggies, then another cheese layer on top.
Use aluminum foil as a liner in your cast-iron skillet or Dutch oven. It keeps steam from getting trapped underneath and soaking the bottom layer.
Parchment paper works too, just be careful because it can burn over open flames. Foil’s a safer option if you have it.
Add wet toppings after cooking. Salsa, sour cream, and guac go on each plate – not in the pan. That way, your chips stay crisp, and everyone customizes their own.
Serving for a Crowd or Solo Camping
Campfire nachos scale up or down more easily than most camping food. But the approach definitely changes based on group size.
For big groups, I make multiple smaller batches instead of one giant pan. A 12-inch skillet feeds about 4-6 as a main dish.
Cooking two or three rounds keeps nachos hot and fresh for everyone. No one’s stuck with cold, soggy leftovers.
Individual foil packets work great for crowds with different tastes. I shape heavy-duty foil into bowls, layer what each person likes, and cook them all at once over the coals.
Everyone gets their own style, and cleanup is basically nothing.
Solo camping calls for downsizing. A small 8-inch skillet or foil packet is perfect. I just bring enough for one or two servings to avoid waste.
Leftovers and Storage Tips
Leftover campfire nachos aren’t ideal, but hey, it happens.
Don’t store assembled nachos. The chips will get soggy no matter what. If you end up with leftover toppings, stash them separately in sealed containers or bags.
Cooked meat and beans keep for 2-3 days in a cooler if you’ve got plenty of ice. I just reheat them over the fire in a small pan for the next meal.
Cheese lasts a few days too, as long as your cooler stays cold. No one likes a mushy cheese situation.
Repurpose extras creatively. Leftover taco meat makes killer breakfast burritos. Extra cheese? Toss it in scrambled eggs.
I never let good camping food go to waste. There’s always a way to use it up.
Creative Twists and Special Diet Variations
Campfire nachos are super flexible. Whether you’re plant-based, gluten-free, or just in the mood for something different, there’s a version for everyone. I’ve seen some wild combos around the campfire, and that’s half the fun.
Vegetarian and Vegan Campfire Nachos
Vegetarian nachos can be just as filling as the meaty kind. Refried beans and black beans make a hearty base that keeps everyone full. I like to mix different beans for texture and flavor, plus, it stretches the meal further.
Black beans go great with roasted bell peppers and corn. The campfire gives veggies a smoky edge you can’t get at home. I usually prep my bean mix at home, seasoning it with cumin and chili powder for a little kick.
Vegan options are easier than you’d think. Nutritional yeast gives a cheesy vibe, and cashew cream adds a rich texture. To make a homemade vegan cheese sauce, just blend soaked cashews, garlic, and lemon juice.
Fresh avocado on top is always a hit once the nachos have cooled a bit. Diced tomatoes, cilantro, and jalapeños add crunch and color.
Low-Carb and Gluten-Free Options
Gluten-free nachos are easy if you pick the right chips. Most corn tortilla chips are naturally gluten-free, but check the bag to be sure. You’ll find plenty of certified options in stores now.
For low-carb nachos, try bell pepper boats. Just halve the peppers, take out the seeds, and fill them up. They get sweet and tender over the fire and taste great.
Zucchini rounds work too. Slice them thick enough to hold toppings, but not so thick that they stay raw. A little salt before cooking helps draw out extra water.
Portobello mushroom caps make sturdy, meaty bases for single-serve nachos. Brush with oil and a sprinkle of garlic powder before loading them up.
Cauliflower florets are another fun base. Steam them lightly, then top with cheese and whatever else you like. They soak up flavor and are filling.
Family-Friendly and Kid-Approved Toppings
Kids usually like things to be simple. Mild cheddar melts well and isn’t too strong for picky eaters. Ground turkey or chicken works great for protein; it feels familiar and easy.
Sweet corn adds a little pop that balances out any heat. I’ve noticed kids will try new veggies if they’re mixed with cheese and corn.
Refried beans help glue toppings to the chips, which means less mess. Kid-friendly versions keep the spice low but still taste good.
Individual foil packets are a lifesaver for families. Let kids pick their toppings and watch them cook their own mini nachos. Fewer arguments, more happy campers.
Diced tomatoes, shredded lettuce, and sour cream add freshness. Keep them cold until serving so they stay crisp and cool. A little taste of home at the campsite.
Wild Nacho Mash-Ups to Try
I’ve tested some unique campfire nachos variations that turned out amazing. My breakfast version uses scrambled eggs, crumbled sausage, and hash browns on top.
For seafood fans, I grill shrimp with garlic butter and pile them on with corn and lime.
My favorite combinations:
- Korean BBQ Style: Bulgogi beef, kimchi, green onions, and sriracha mayo
- Taco Tuesday: Ground beef with taco seasoning, lettuce, and crunchy taco shells mixed in
- Pizza Nachos: Pepperoni, mozzarella, Italian sausage, and marinara drizzled on top
- Southern Comfort: Pulled pork, coleslaw, pickled jalapeños, and BBQ sauce
I use my cast-iron for all these. The veggie option with three beans and grilled veggies always vanishes first, too.
Let people build their own combos after the base layer melts. A topping bar is the way to go.
Frequently Asked Questions
The best campfire nachos happen when you choose smart ingredients and use cooking techniques that work with real campfire conditions. I’ve found layering, picking the right skillet, and knowing when to add fresh toppings makes all the difference.
What’s the secret ingredient for mouth-watering nachos around the campfire?
My secret weapon is pickled jalapeño juice. I drizzle just a little over the cheese layer before cooking – it adds this tangy kick you can’t get from fresh peppers.
Another game-changer: freshly grated cheese. Pre-shredded cheese has anti-caking powder that messes with melting. Grating your own at home is extra work, but it’s worth it.
A pinch of cumin in your protein brings out smoky flavors that fit the whole campfire vibe.
Got any killer recipes for making nachos in a cast iron skillet under the stars?
I love making cast iron skillet nachos because the bottom gets crispy while the cheese melts perfectly on top. I start by warming my empty skillet over hot embers for about two minutes.
Layer half your thick tortilla chips in first, then half your cooked ground beef, black beans, diced onions, and shredded cheese. Add the rest of your ingredients in a second layer, making sure the cheese goes all the way to the edges.
Cook for 5-8 minutes over glowing embers, rotating the skillet halfway through. When the cheese bubbles and the bottom chips are golden, you’re done.
Pull it off the heat and top with cold salsa, sour cream, and fresh cilantro right away.
How do you make vegetarian nachos that even meat-lovers would crave on a camping trip?
I make vegetarian nachos using seasoned black beans and grilled veggies that are so hearty, nobody misses the meat. Before the trip, I sauté bell peppers, onions, and mushrooms with cumin, chili powder, and garlic powder.
Add corn for sweetness and texture – it chars a little over the fire, which is awesome. Layer these with refried beans, black beans, and plenty of cheese.
Season your beans well. I add smoked paprika for a meaty, smoky taste. Top with pickled jalapeños while cooking, then finish with guac, pico, and lime.
Can you give me the lowdown on making campfire nachos without any beef but still full of flavor?
Pulled pork or shredded chicken is a great beef alternative for campfire nachos. I pre-cook the meat at home with taco seasoning and keep it in a sealed container in my cooler.
Chorizo is another fantastic swap that brings tons of flavor. You don’t need much since it’s so rich.
For a plant-based twist, try seasoned lentils or crumbled tempeh. Cook them with taco spices – they soak up all the flavor. Add a splash of liquid smoke if you’ve got it for that campfire taste.
What are some must-have toppings for the ultimate campfire nachos experience?
I never skip sharp cheddar, pickled jalapeños, and black beans for the cooked layer. These three just work together.
For fresh toppings after cooking, salsa and sour cream are non-negotiable. I always bring cilantro – it brightens everything up.
Diced avocado or guac adds creaminess that balances the crunch. Sliced black olives and tomatoes are good too.
A squeeze of lime before serving takes things up a notch. Some people love hot sauce, so I always pack a small bottle for anyone who wants extra heat.
Looking for the scoop on using a Dutch oven for making nachos – any tips?
Dutch ovens are the best when you’re feeding a big group at the campsite. The heavy lid traps heat, so the cheese melts from the top down. Plus, the thick bottom keeps things from burning, which is always a win.
Set your Dutch oven on a grill grate over hot embers. Build your nacho layers just like you would in a skillet, but here’s the fun part – you can stack three or even four layers since the pot’s so deep.
Pop the lid on and toss a few hot coals right on top. This basically turns the whole thing into a mini oven and melts everything evenly.
Give it about 8–10 minutes, then carefully lift the lid with heat-resistant gloves to check on things.
The hardest part? Getting the temp right. Too many coals on top will burn the cheese, so start with three or four. If it seems slow, add another coal or two and keep an eye on it.