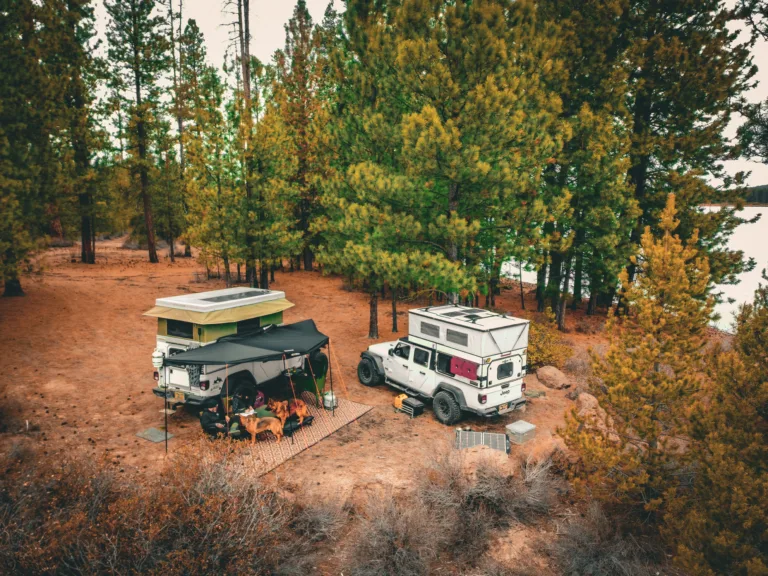

How I Power My Truck Camper Office: The Full Solar, Battery & Backup Breakdown
Everyone told me the internet would be the hardest part of working from a truck camper. The internet turned out to be solvable. Power is the thing that had me constantly doing math in my head at 4 p.m. on a cloudy Tuesday.
Here is why: a casual camping trip forgives a dead battery. A workday does not. If my laptop dies during a client call or halfway through the day, that is not an inconvenience; that is my job.
The core problem is that your laptop, monitor (if you use one), Starlink, camera gear, fridge, and lights all pull from the same finite pile of stored energy, and a real 8-hour workday burns through it faster than you’d expect.
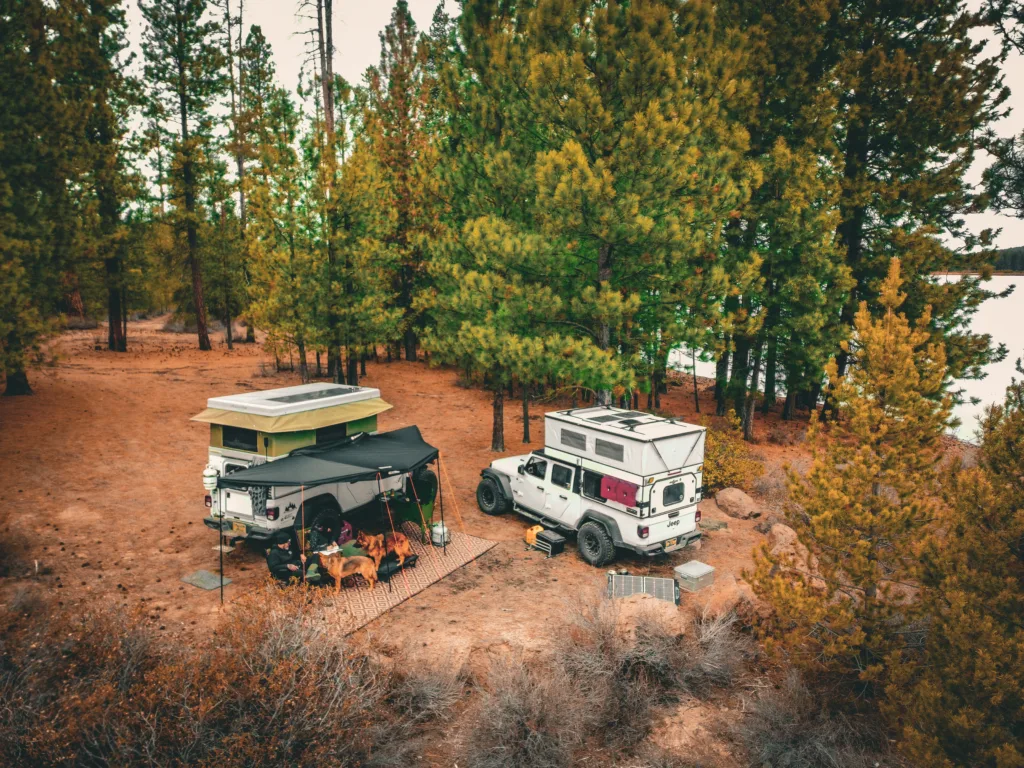
So I built my system in layers: a house battery that came with my camper, a separate Bluetti power station reserved for work, two solar panels feeding those two banks, and a generator sitting on standby. In this breakdown, I’ll walk through what each piece runs, how long it actually lasts, what it all costs, and what I would buy differently today.
If you are still in the “I have no idea what a watt-hour is” phase, that is fine. I started there too. And sometimes I do mental gymnastics to figure it out. But start with the load math below, and by the end, you will know whether a simple power station or a full hardwired build fits how you want to camp.
Calculate the Workday Load Before Buying Gear
Before I bought a single panel, I sat down and added up what my workday actually eats. That one afternoon of math saved me from overbuying and from underbuying, which are both expensive mistakes in the end.
Separate Office Loads From Camper Essentials
When you’re working remotely, your camper has two very different jobs: keeping you alive and comfortable, and keeping you employed. I list them separately because they fail differently.
These are my camper essentials that run all day and night whether I work or not:
- 12V compressor fridge (mine is a Travoca)
- LED lights
- Fans or climate control
- Phone/camera charging
Office loads only run during my 9-5:
- Work laptop
- External monitor (I started out with one, now I use a laptop screen extender.)
- Starlink
The fridge is the sneaky one. It sips power in small amounts around the clock and can quietly out-consume your laptop over 24 hours. Especially if it’s hot.
Turn Watts and Hours Into Watt-Hours
A watt-hour is just one watt used for one hour. Multiply how many watts a device pulls by how many hours it runs, and you get watt-hours, which is the honest unit for planning. Hopefully this chart helps.
| Device | Watts (approx) | Hours/day | Watt-hours |
|---|---|---|---|
| Work laptop | 45 W | 8 | 360 Wh |
| External monitor | 15 W | 8 | 120 Wh |
| Starlink | 40 W avg | 9 | 360 Wh |
| 12V fridge | 40 W (cycling) | ~8 running | 360 Wh |
| Lights, fans | 20 W | 5 | 100 Wh |
| Phone, camera, misc | 20 W | 4 | 80 Wh |
That lands me near 1,380 watt-hours a day. Amp-hours are the same idea in a different jacket: on a 12V system, divide watt-hours by 12. So 1,380 Wh is roughly 115 amp-hours of battery capacity per day.
Your numbers will differ. Run the table with your own gear before you shop.
Plan for Cloudy Days and Work-Critical Reserve
I never plan to use my full battery capacity in a day. I plan to use about half, so a gray day does not turn into a panic-induced scramble.
My rule: keep at least one full workday of reserve at all times. For me, that means roughly 1,400 Wh set aside that I will not touch for movie night or the electric kettle. No matter how cold it is or how badly I want hot tea.
That reserve is why my work laptop lives on its own power station instead of sharing the house battery. More on that in a minute.
Choose a Battery System That Can Carry a Workday
Battery capacity is the foundation everything else sits on. Solar just refills the tank; the tank size decides how many bad-weather days you can absorb.
LiFePO4 Versus AGM for a Truck Camper
AGM batteries are the older, cheaper option. The catch is that you can only safely use about half of what is written on the label, so a 100Ah AGM really gives you about 50Ah.
LiFePO4 batteries (a type of lithium battery – this is what I use) let you use roughly 80 to 100 percent of the rating, weigh about half as much, and last many more charge cycles. In a truck camper, where every pound counts against your payload, that weight difference matters.
My take: if you plan to work from the rig regularly, lithium is worth the money. If you camp four weekends a year, AGM will do.
One caution: most LiFePO4 batteries do not like charging below freezing unless they have built-in heating. If you camp in winter, buy a model with a heater in the battery management system.
Size Usable Capacity Instead of Chasing Amp-Hours
Do not compare batteries by the sticker number. Compare by usable capacity.
- 100Ah AGM = about 600 usable watt-hours
- 100Ah LiFePO4 = about 1,100 usable watt-hours
Using my 1,380 Wh daily number, a single 100Ah lithium battery covers most of one day, not two. That is exactly why I split my loads across a house battery and a separate power station.
Use a Battery Monitor to Avoid Voltage Guesswork
Reading voltage off a panel is like judging a gas tank by how the engine sounds. Lithium batteries hold a flat voltage almost all the way down, then drop fast.
A shunt-based battery monitor like the Victron BMV-712 counts energy in and out, so you see a real percentage. It also shows you which appliance is quietly draining you.
Clean, tight battery terminals and correctly sized cable matter too. Undersized wire causes voltage drop, which means wasted power and warm connections you do not want.
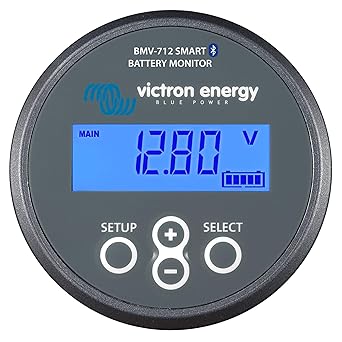
For remote work from a camper, keeping tabs on your battery bank is essential, and the Victron Energy BMV-712 Smart Battery Monitor makes that easier. It tracks voltage, current, state of charge, energy use, and estimated time remaining, with the information available on its built-in display or through Bluetooth on your phone. An additional input can monitor battery temperature, midpoint voltage, or a second battery, while the included shunt provides detailed insight into power flowing in and out of the system. For campers working off-grid, it offers a convenient way to understand power consumption and manage energy so your laptop, internet gear, and other essentials stay running longer.
Recharge From Solar, Driving, and Hookups
I use three inputs, and I lean on different ones depending on the season.
Match Solar Array Size to the Season and Parking Conditions
I have two solar sources feeding two banks:
- 160W roof panel wired to the house battery through a solar charge controller
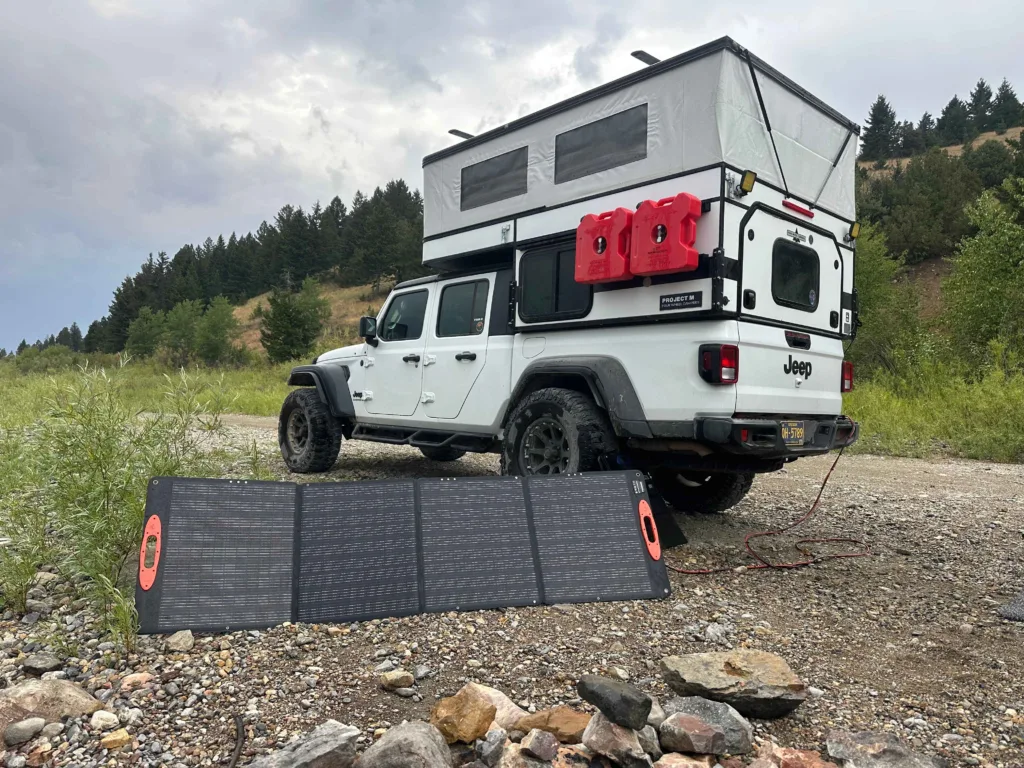
- 220W portable panel from Amazon that I set on the ground and aim at the sun, feeding the Bluetti
Here is my systems math. A 160W panel does not make 160 watts all day. In good summer sun with the camper parked in the open, I see roughly 700 to 900 watt-hours a day from it. On an overcast day, that can fall to 150 to 250 watt-hours.
That gap is the whole reason I got a portable panel. The portable 220W panel is the single best power purchase I have made, because I can park in the shade for comfort and still put the panel in a sunny spot 25 feet away with an extension cable and MC4 connectors.
Rough planning rule for boondocking on BLM land or in national forest: assume each 100W of panel gives you about 350 to 450 watt-hours a day in summer, and half that in winter.
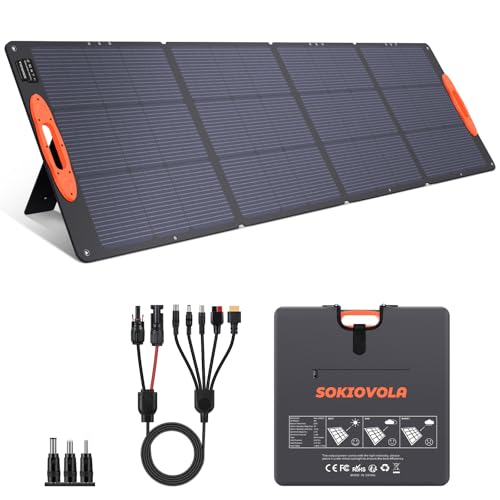
The SOKIOVOLA 220W Portable Foldable Solar Panel is a convenient option for keeping a portable power station charged while boondocking. It folds for easy transport, includes adjustable kickstands, and comes with multiple adapters for compatibility with popular power stations like EcoFlow, Jackery, Bluetti, and Anker. Its IP68 waterproof design makes it well suited for outdoor use, while real-world output will vary depending on sunlight and your power station's input limits.
Add DC-DC Charging From the Truck Alternator
A DC-DC charger pulls power from your truck’s alternator while you drive and safely charges the camper’s house battery. Brands like Renogy and REDARC make common units.
A 30-amp DC-DC charger puts back roughly 350 watt-hours per hour of driving. Two hours of moving between campsites is close to a full day of laptop and Starlink use.
If you plan to work from a rig with lithium batteries, I would call this near-mandatory. It turns travel days into charging days automatically.
I use the Bluetti Charger 2 along with my Bluetti power station.

The BLUETTI Charger 2 is a 1,200W alternator and DC-DC charger designed to quickly recharge a portable power station while you're driving. It can also accept solar input, making it a useful addition to a boondocking setup when you need reliable power for a remote workstation. The system monitors your vehicle's battery to help prevent drain when the engine is off and includes battery-maintenance features for added peace of mind.
Keep Shore Power and Generator Charging as Backup
Shore power at a campground is the easiest recharge there is. Plug in, let the converter or inverter-charger top everything off, and start your week full. I prefer to camp on public land but sometimes it’s just easer to go to a campground and plug in.
I also keep a generator for the stretch of winter when solar isn’t a thing. I consider it my insurance policy and I will cover it in detail below.
Build a Safe 12V and AC Distribution System
Wiring is where beginners get nervous, and I understand why. The good news is that the safety rules are simple and non-negotiable, and following them is mostly about buying the right parts.
Run Efficient 12V DC Loads Wherever Possible
Every time you convert battery power to household AC, you lose about 10 to 15 percent to the inverter. Running things directly on 12V DC power skips that tax.
Things I keep on 12V: LED lights, the 12V compressor fridge, roof fan, and USB charging ports for phones. I also run Starlink on a DC adapter, which saves watt-hours over a full workday.
Put USB outlets where you actually sit and work, not where the wiring was easiest.
Select a Pure Sine Wave Inverter for AC Equipment
An inverter turns 12V battery power into the AC power your laptop brick or monitor expects. Buy a pure sine wave inverter, not a modified sine wave one. This is very important!
Cheap modified sine wave units can make laptop chargers buzz, run hot, or fail early. A 1,000W to 1,500W pure sine unit covers a laptop, monitor, and a small appliance without strain.
Turn the inverter off when you are done working. Most draw idle power just sitting there, and that adds up overnight.

The Renogy Inverter P2 is a 1,000W pure sine wave inverter that converts 12V battery power into 120V AC power, making it a useful component for an off-grid or boondocking workstation. It can run common AC electronics such as laptops, monitors, small appliances, and other equipment, with a 2,000W surge capacity for startup loads. It also includes a USB port, hardwire AC connection, and remote controller for convenient operation in an RV or camper.
Protect Every Circuit With Correct Wire and Overcurrent Devices
This is the part I refuse to shortcut. A fuse or circuit breaker exists to protect the wire, not the appliance.
Basic rules I follow:
- Fuse every positive wire as close to the battery as possible
- Match wire gauge to both the current and the length of the run
- Use a proper main breaker between the battery and the distribution panel
- Ground everything to a common point with a solid connection
- Use crimped, sealed lugs on battery terminals, not twisted wire
If any of that feels beyond you, that is a completely reasonable reason to start with a portable power station instead. Nobody has to build a hardwired system to work from a camper.
Create a Productive Connected Camper Office
Power keeps the lights on. The rest of the office decides whether you can actually sit there for eight hours without your back and your nerves giving out.
Choose Cellular, Satellite, and Signal-Boosting Options
I run Starlink as my primary internet and keep a cell hotspot as the fallback. (Starlink has not failed me yet; I’m a big fan.)
A cell signal booster helps in areas with not-so-great coverage. Low-profile antennas help in campgrounds; off-road-style boosters do better on forest roads.
Budget for the power cost. Satellite internet is often the second-biggest load in my camper after the fridge.
Make the Desk Comfortable Enough for a Full Shift
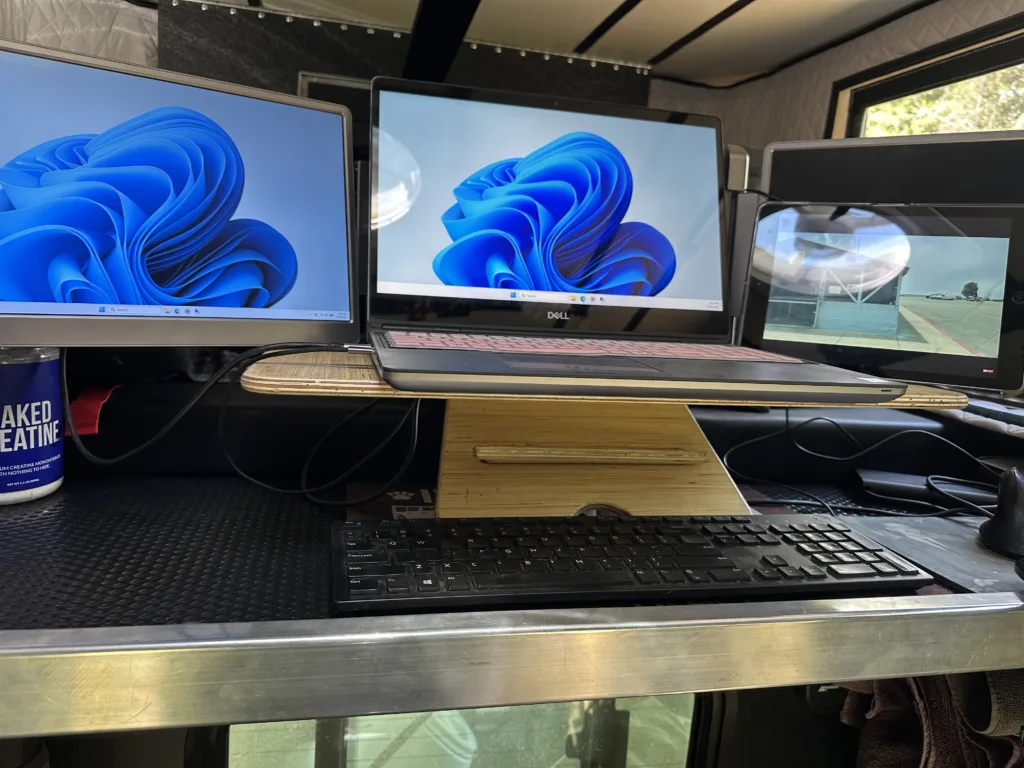
An ergonomic laptop stand that lifts the screen to eye level has fixed more neck pain than any chair swap ever did. Pair it with a small external keyboard so your hands stay in a natural spot. I also got a little arm rest from Amazon that’s made a big difference.

This clamp-on ergonomic arm rest is a simple way to make a compact remote-work setup more comfortable, especially in the limited space of a truck camper. It extends the usable surface of a desk or workstation, providing support for your elbow and forearm while also incorporating a wrist rest for mouse use. The arm swivels up to 180 degrees, making it easy to position out of the way when you need more workspace. For long work sessions on the road, I find it useful for reducing strain on my wrists, shoulders, and arms without taking up much room.
A portable external monitor doubles your screen space for maybe 12 to 15 watts. I use a laptop screen extender, and it works great. I started with a large monitor but got tired of hauling it around.
I also keep a lap desk for the days I work outside.

The DZVW 15.6-inch laptop screen extender is a portable dual-display solution designed for people who work on the go. It connects via USB-C or HDMI with a simple plug-and-play setup, giving you extra screen space for multitasking without carrying a full-size monitor. Its slim, travel-friendly design, Full HD IPS display, and broad compatibility make it a practical companion for remote workers who want a more productive workspace from hotels, coffee shops, airports, or anywhere the road takes you.
Control Cables, Charging, and Video-Call Lighting
Cable management is sanity in a small space. A cord organizer and a few short cables keep the desk from becoming chaos. I can’t stand cords and cables everywhere.
A small ring light makes a huge difference on video calls and pulls almost nothing.
Pick the Right Build Path and Maintain It
There is no single correct system. There is a system that matches your trips, your budget, and your comfort with tools.
Start Simple With a Portable Power Station
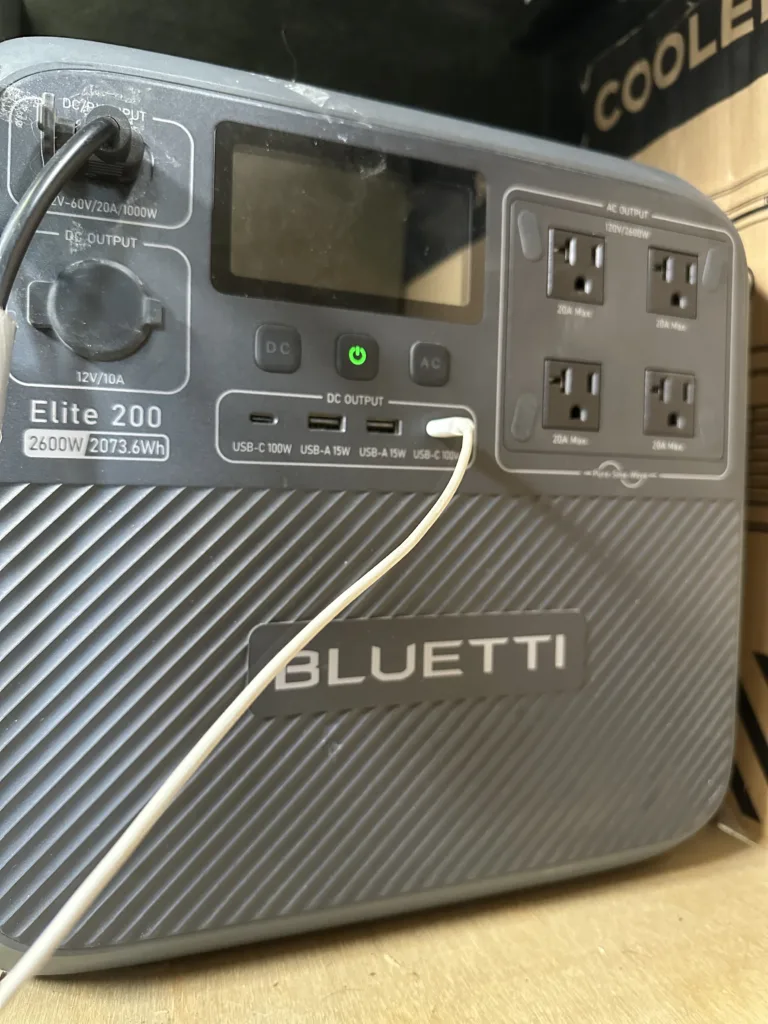
If you are new to this, buy a portable power station first. It is a battery, inverter, charge controller, and outlets in one box, with no wiring required. That’s what I did and I still use it to this day.
My Bluetti Elite 200 (2,073Wh, 2,500W output) is my dedicated work bank, and that separation is the practical tip I push hardest. My work laptop never shares a battery with the fridge, the lights, or my partner charging a drone.
On a normal day, my laptop and desk gear pull about 500 to 600 watt-hours over eight hours. The AC180 covers a full workday and still has roughly 45 to 50 percent left. If the house battery has a bad night, my job is untouched.

Know When a Hardwired System Is Worth the Effort
Move to a hardwired LiFePO4 system when you are boondocking for more than a few days at a time, running a fridge full-time, or tired of shuffling a heavy box around.
A hardwired build adds a bigger battery bank, roof solar, a DC-DC charger for alternator charging, and shore power. It costs more, but you can build it to the specs you need.
Plenty of people run both, like I do. The house battery handles camper life and Starlink; the power station handles work.
Monitor Usage and Test Your Backup Plan Before Departure
Watch your battery monitor for the first two weeks and write down what a real day costs you.
Then test your backup before you need it. Run the generator, confirm your charger cables fit, and make sure your portable panel reaches a sunny patch.
Why Power Is the Hardest Part of Working Remotely from a Camper
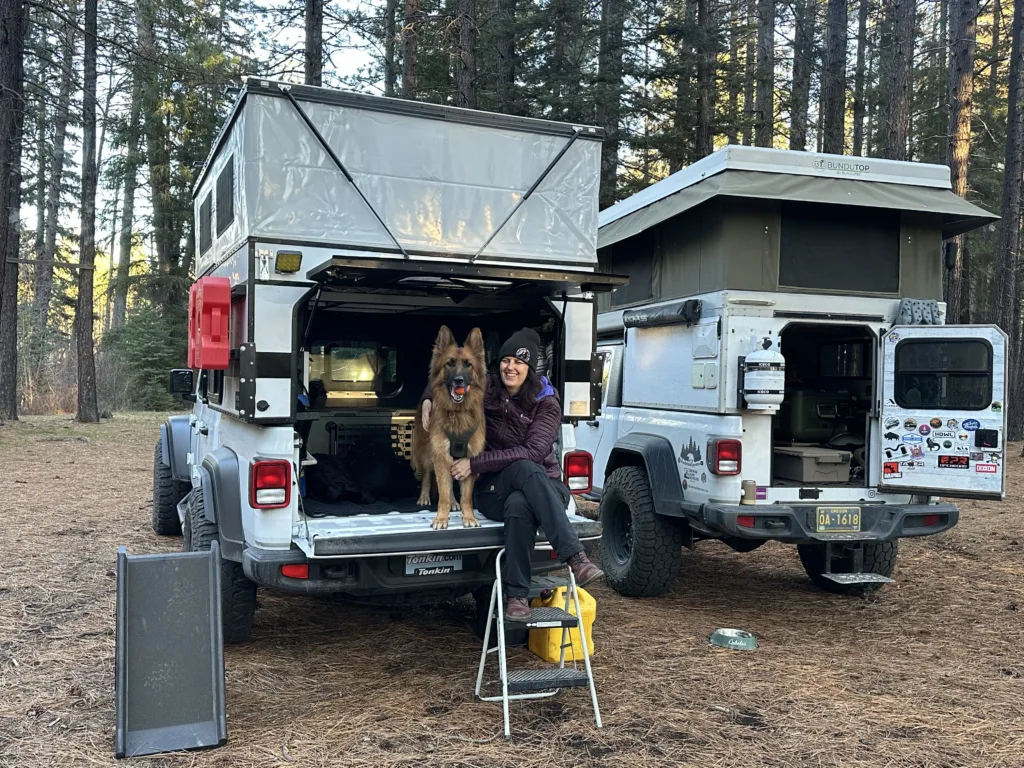
Casual camping and working from a camper are totally different sports. Casual campers can let the battery run low and go to bed early. I cannot tell my job that my availability depends on cloud cover.
Everything I need pulls from the same finite bank: laptop, Starlink, camera gear, plus the fridge that runs whether I am working or not. There is no wall outlet to bail me out.
The other thing nobody warns you about: power problems always show up at the worst hour. Batteries are at their lowest in the late afternoon, right when the work stacks up and solar production is fading.
That is why redundancy beats raw capacity for me. Two separate banks and three ways to charge them.
My Base Power Layer, the House Battery
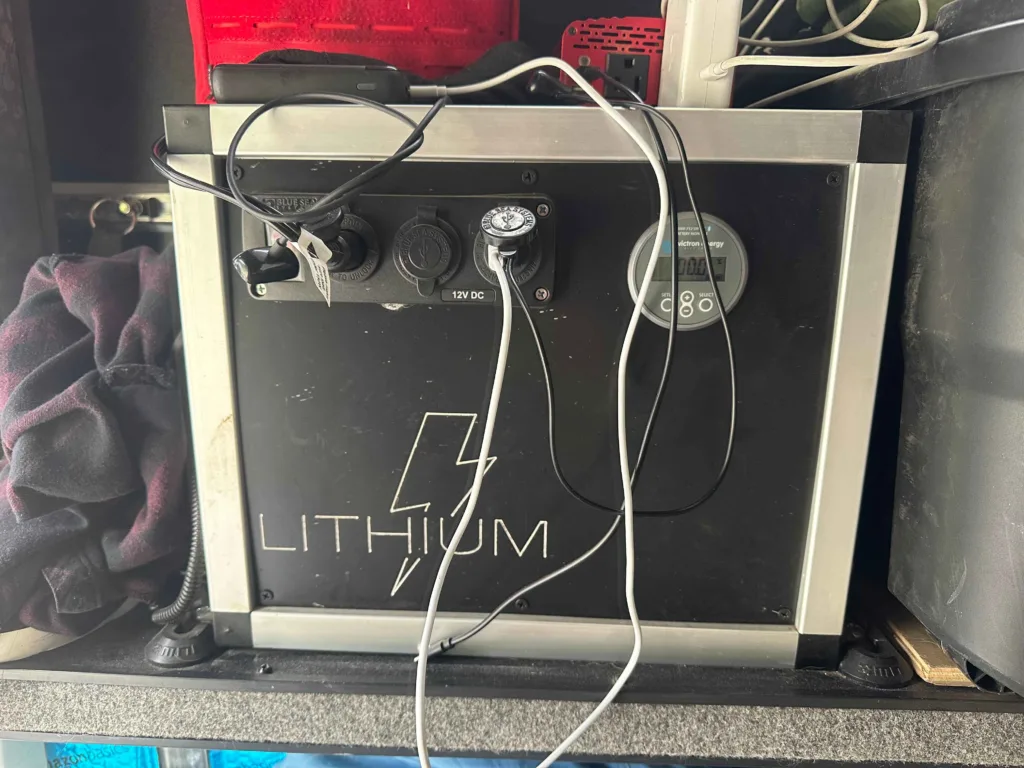
The house battery came standard with my Project M camper, and it handles everyday life. I did not choose it so much as inherit it, but it has done its job and done it well.
It runs:
- Starlink
- Camera gear and phone charging
- My personal laptop
- LED lights, and the roof fan
Notice what is missing from that list: my work laptop. That is on purpose.
The house battery is the layer that keeps me comfortable and connected. If I drain it watching movies, I lose comfort, not income or my job.
Solar: Keeping the Batteries Topped Off
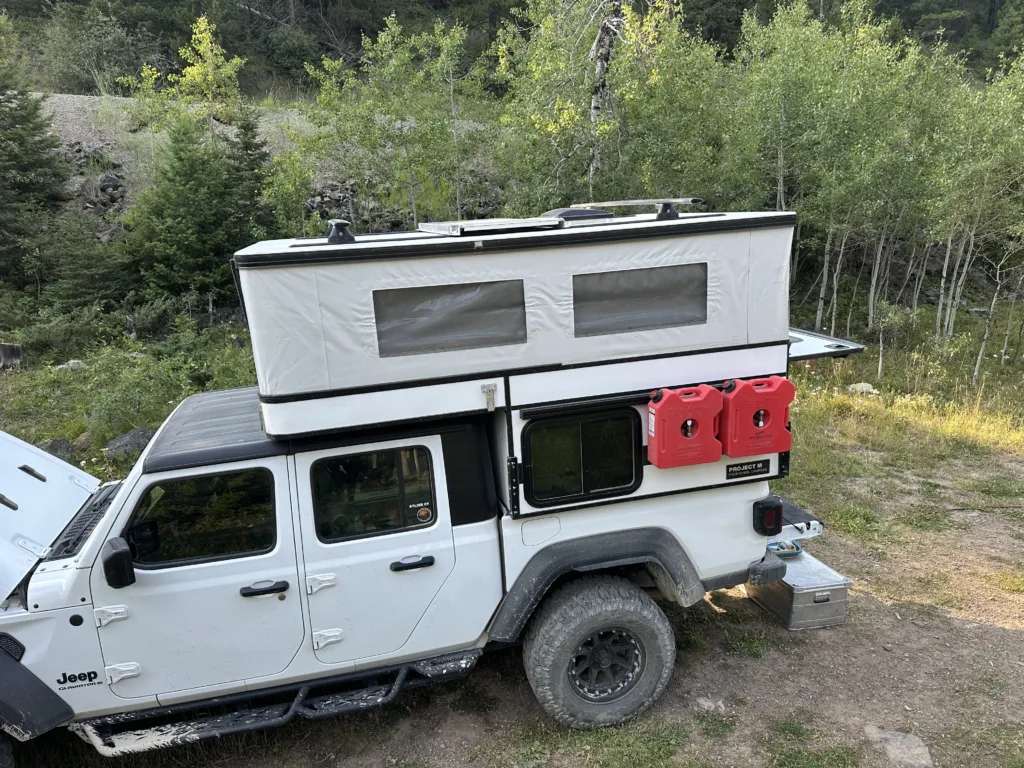
Two panels, two banks, two very different jobs.
160W roof panel to house battery. This is the set-and-forget layer. It keeps Starlink, lights, and the fridge covered on any decent summer day without me thinking about it. (Pictured above, best I could get at the moment!)
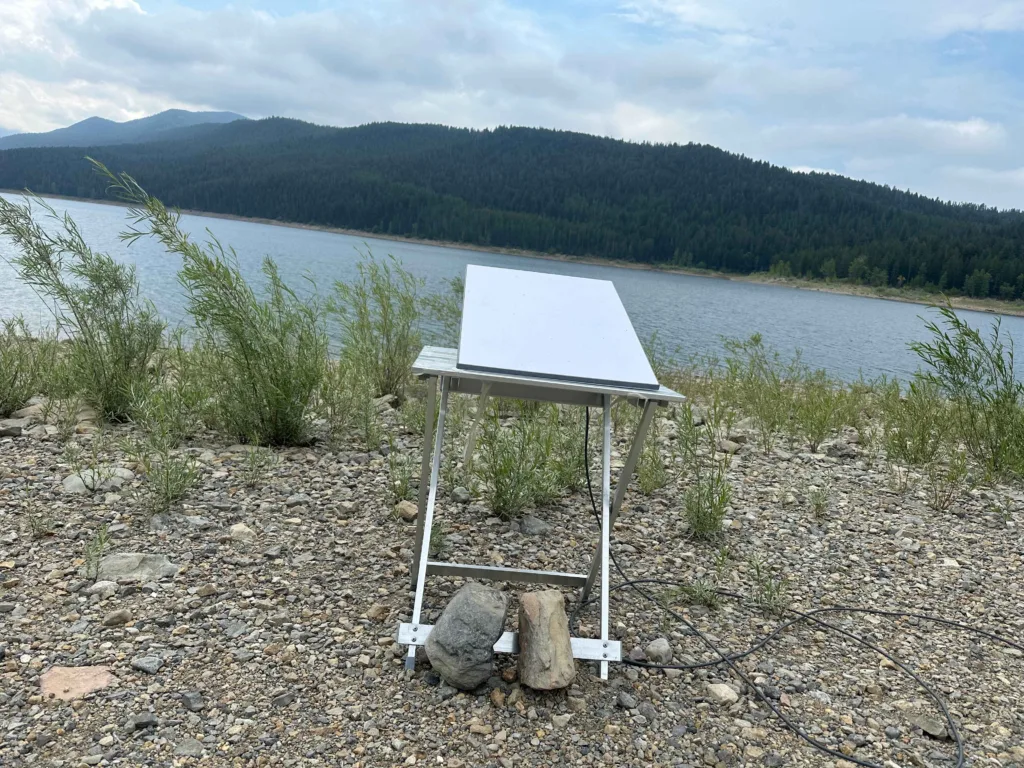
220W portable panel to the Bluetti. This is the one I move around. I set it out in the morning, aim it East, and reposition it once around midday.
Real-world production I have logged:
| Conditions | 160W roof | 220W portable |
|---|---|---|
| Clear summer day, open sky | 700-900 Wh | 1,000-1,300 Wh |
| Partly cloudy | 350-500 Wh | 500-750 Wh |
| Heavy overcast | 100-250 Wh | 150-350 Wh |
| Short winter day, low sun | 200-350 Wh | 300-500 Wh |
Two honest observations from my time on the road. First, shade is worse than clouds. A single tree branch across a panel can cut output way more than a gray sky. So keep an eye on your panel!
Second, the portable panel matters more than the roof panel for work. Being able to park comfortably and still chase the sun with the panel is what makes summer boondocking possible. I can park in the shade and put my panel out in the sun.
Rough rule: in June, that combined 400W handles my full daily load with margin. In December, it does not come close.
The Backup Plan: Generator for Winter and Low Sun
I carry a Harbor Freight Predator 2500 inverter generator.
When I actually need it:
- Late November through February, when short days and low sun angles gut solar output
- Three or more overcast days in a row
- Deep forest camping where sun never reaches the panels
- A heavy render or upload day that blows past my normal draw
When solar handles everything: roughly March through October in open country. The generator just rides along.
The trade-offs are real. It is loud enough that I will not run it near neighbors, and I limit it to mid-morning hours out of respect. It takes up space, needs fresh fuel, and needs to be exercised so it always starts. It’s quite frankly a pain to haul around but I’m grateful for it during those winter months.
A 90-minute run puts about 1,000 watt-hours back into the Bluetti. That is my whole workday restored.
Safety note that is not optional: run any generator outside, well away from doors and vents; never under an awning or in a truck bed with a canopy. Carbon monoxide is invisible, and it kills.
What This Setup Actually Costs
Approximate US prices for what I run, as of mid-2026:
| Component | Cost |
|---|---|
| House battery (came with camper) | ~$400 value |
| Bluetti Elite 200 V2 power station + Charger 2 (DC/DC Charger) | ~$1,300 |
| 160W roof panel + charge controller (factory) | ~$500 value |
| 220W portable solar panel | ~$200 |
| Extension cables, MC4 connectors, adapters | ~$50 |
| Harbor Freight Predator 2500 generator | ~$600 |
| Battery monitor and small parts | ~$150 |
| Total | ~$2,940 |
If I had bought every piece myself rather than inheriting the factory battery and roof panel, I would be closer to $3,100.
What I would change buying today:
- Go bigger on the roof panel. 160W is thin. I would install 300W to 400W if the roof allowed it.
- Add a DC-DC charger from day one. I underestimated how much free charging I was leaving on the table during travel days.
- Skip the generator initially if you only camp March through October, then add it before your first winter.
You can build a working version of this for around $1,200: one 1,000Wh power station, one 200W portable panel, cables, and a battery monitor. That covers a laptop, monitor, and hotspot in decent sun.
Lessons Learned and What I’d Do Differently
I overestimated solar and underestimated charging from the truck. I spent months chasing sun when two hours of driving would have solved it. A DC-DC charger is now the top of my upgrade list.
I learned that shade planning beats panel size. I now scout campsites for morning sun first, comfort second. A 20-foot extension cable for the portable panel changed how many sites work for me.
I would separate work and camper power sooner. I ran everything off one bank for the first few months, and it gave me major anxiety. The day I moved the work laptop to its own power station, the stress went away.
The larger lesson is that power planning is not a one-time purchase. Write down what you actually use for two weeks, then buy for that reality instead of for the worst day you can imagine.
If you want the other half of this picture- the desk, the monitor, the internet stack, and the daily routine that makes eight hours in a small camper sustainable- my full remote work setup post walks through all of it. And if you would like the next breakdown, plus the cost sheets and real-world numbers I keep logging, join the newsletter, and I will send them your way.