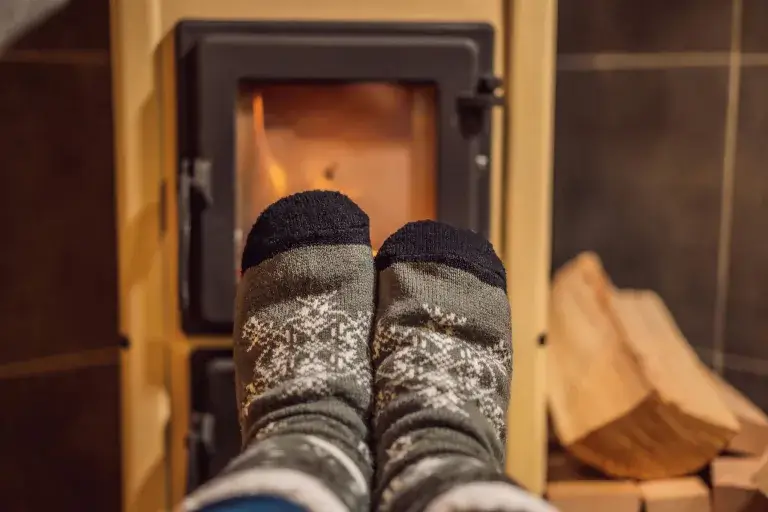
25 Camper Remodel Ideas That Will Transform Your Home on Wheels Into a Dream Adventure Base
Transforming your camper into a cozy home on wheels doesn’t have to drain your savings or require a pro. Some of the best changes come from simple DIY projects you can finish in a weekend.
Outdated fixtures, cramped spaces, bland interiors? The right remodel ideas can turn your camper into a place you actually want to hang out.
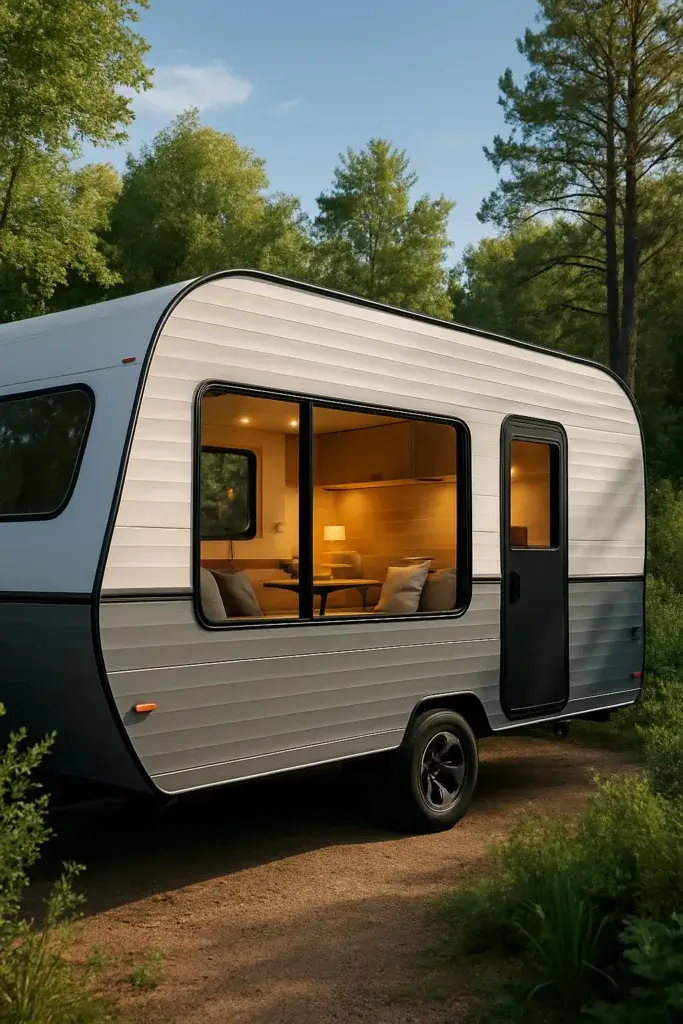
Small upgrades like peel-and-stick wallpaper, better lighting, and clever storage solutions can totally change your camper’s look and functionality without blowing your budget.
Want a cozy reading nook? Or maybe a space-saving Murphy bed? These projects help you use every inch, and you can add your own style too.
Let’s jump into practical fixes for common camper headaches. I’ll throw in some planning tips and ways to dodge the mistakes that can make a fun project a total pain.
1) Create a cozy reading nook with built-in shelves and soft cushions by the window
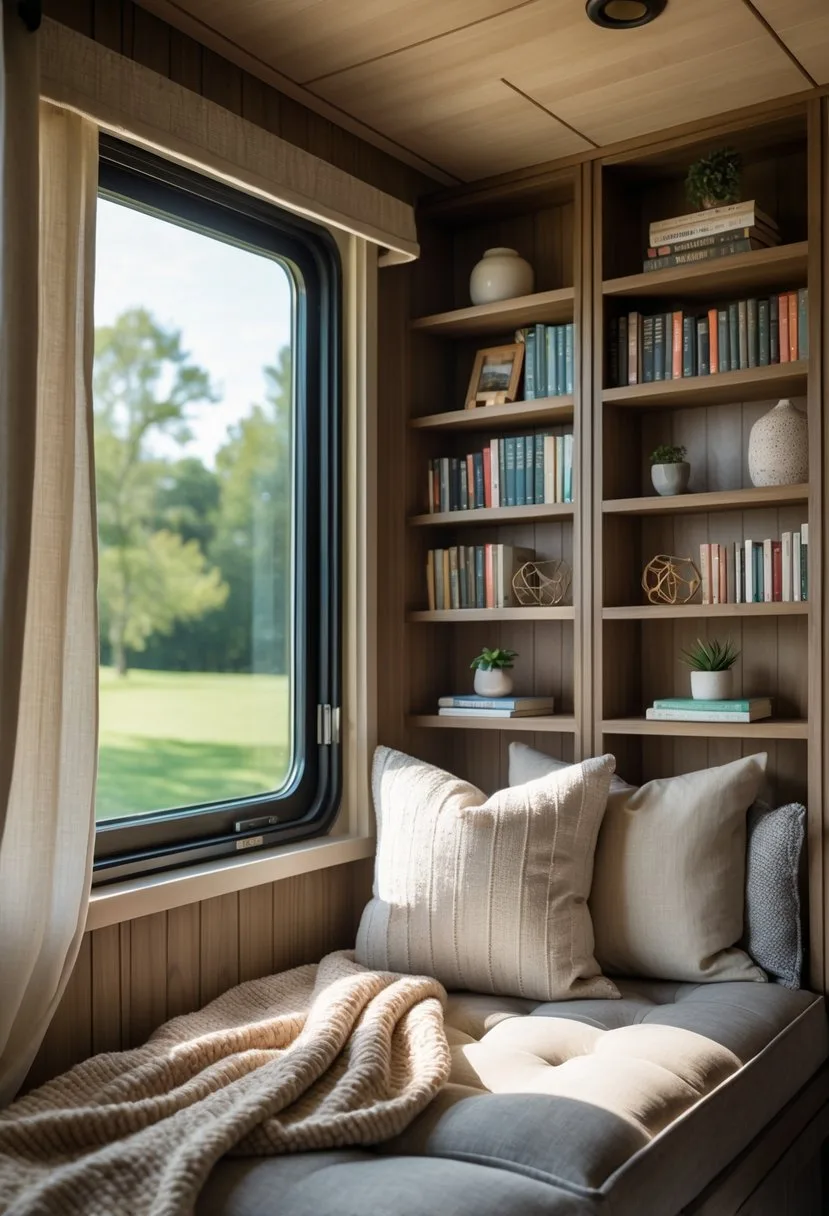
Campers are actually perfect for little reading spaces. Those awkward window corners? They can become magical retreats if you let them.
I made some floating shelves from lightweight pine boards. They hold my favorite books and barely add any weight. Just make sure to screw them into the wall studs for safety.
Window seats are a game-changer. I grabbed a thin foam cushion and covered it with outdoor fabric that wipes clean. Toss on some throw pillows and you’re set.
Natural light from the window makes daytime reading a treat. For evenings, I installed a small LED reading light. Battery-powered ones are awesome for boondocking.
Storage is gold in a camper. I stash blankets and extra pillows under the seat so everything’s tidy but close by.
Plush cushions and soft throws make the space cozy for long reading sessions. Mixing up textures helps the nook feel extra inviting.
Now, my camper reading nook is my favorite spot, especially on quiet mornings or rainy afternoons. Travel days feel like book adventures, too.
2) Install peel-and-stick wallpaper to add personality without a big commitment
Peel-and-stick wallpaper totally changed how I decorate my camper. It’s way easier than traditional wallpaper and doesn’t mess up your walls.
I used it for an accent wall behind my dinette. The geometric pattern I picked made our bland beige interior feel like home in a snap.
If you’re new to this, start small. Try the space above your bed first. This stuff comes off clean when you want a new look, so there’s no stress.
The options are wild – wood grain, bold florals, you name it. I’ve seen so many styles work, and it’s fun to play around.
3) Spray paint old cabinet handles for a quick modern upgrade
I tried this trick during my first camper renovation, and it made my kitchen look brand new for less than twenty bucks. Those old brass handles were so outdated, but new hardware was too expensive.
Spray painting cabinet hardware is way easier than you’d think. I took off all the handles and scrubbed them with degreasing soap.
Primer is the secret sauce here. My first try chipped fast because I skipped it, so now I always use primer, especially on shiny metal.
I went with matte black, and suddenly my camper had a modern farmhouse vibe. The whole thing took me one afternoon, including drying time.
Light sanding helps the paint stick better. It’s a small step, but it makes a big difference in how long the finish lasts.
If you paint your cabinet doors too, the matching hardware really pulls the look together. Suddenly, the kitchen feels fresh and intentional.
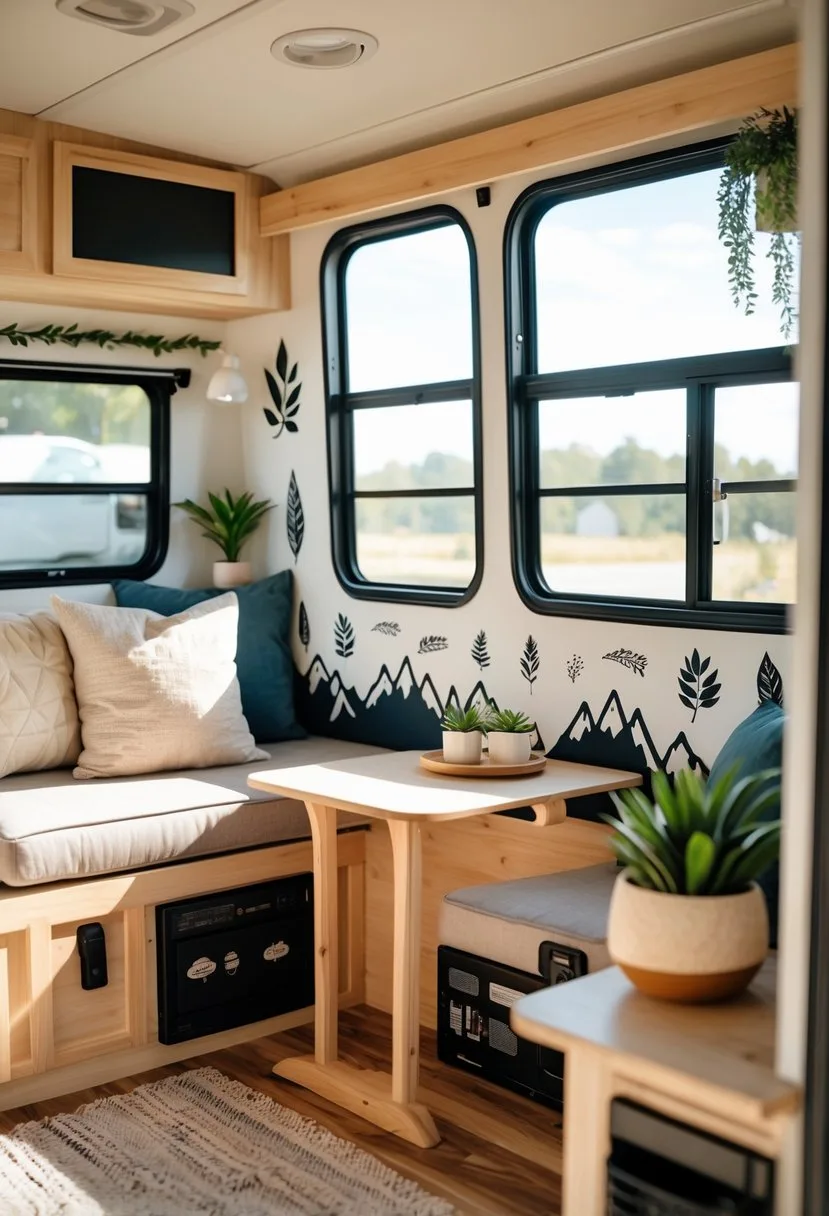
4) Build a fold-down table to save space during meals and work
This trick totally changed how I use my camper space. A fold-down table gives you a workspace when you want it, and more floor space when you don’t.
Building one isn’t as tough as it sounds. I used plywood and basic hinges for my first one. The big thing is making sure it’s mounted securely so it can handle laptops, dinner plates, whatever.
Mine does double duty as a dining table and a spot for planning hikes. When it’s folded down, I have enough space for yoga or rainy day stretching. DIY folding table plans are super helpful if you want to try it.
I painted mine with chalkboard paint, so now it’s also a message board. You can customize the size to fit your camper, which is pretty cool.
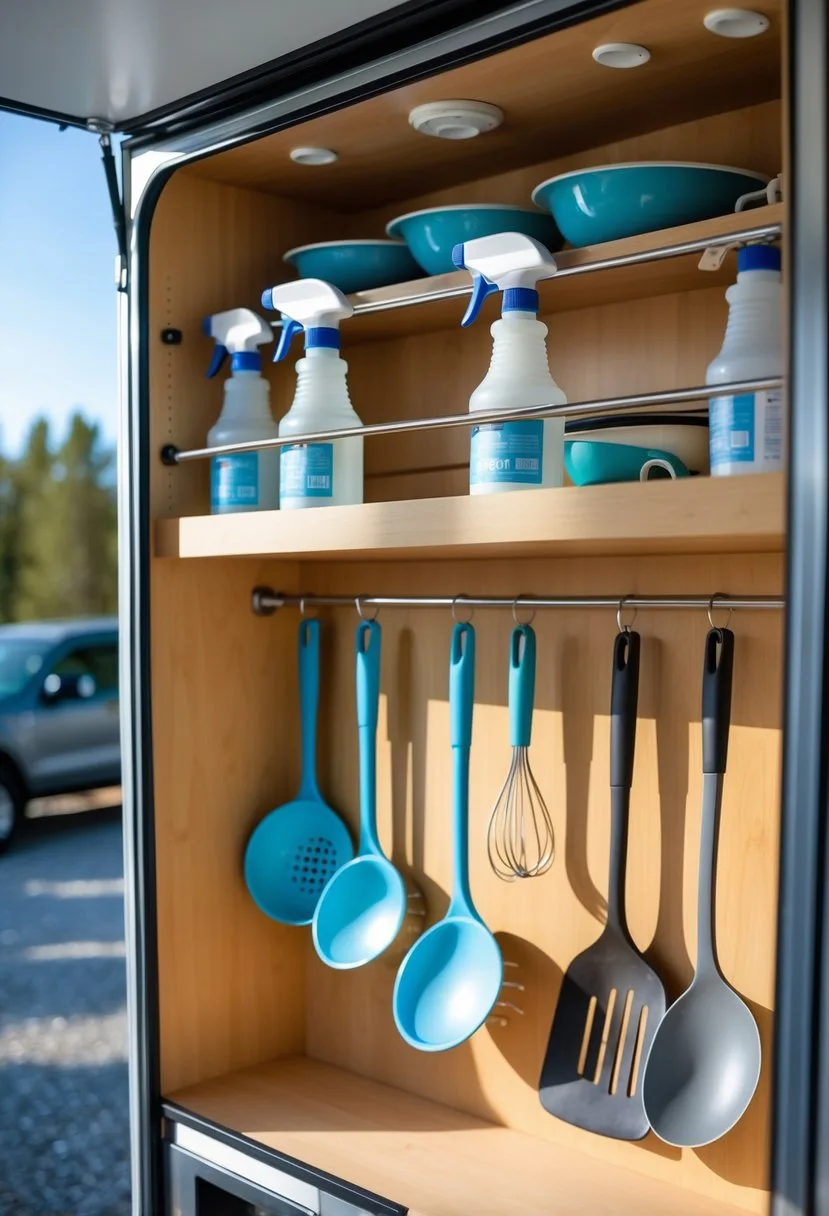
5) Add magnetic strips to hold knives and tools in the kitchen area
This hack saved my sanity. My chef’s knives kept sliding everywhere until I discovered magnetic strips in the kitchen.
Installation is easy. I stuck mine next to the stove, and suddenly my knives were off the counter and easy to grab.
These strips aren’t just for knives. I hang spatulas, ladles, and even metal spice jars. Scissors and can openers fit too, which is handy.
If you don’t want to drill, adhesive options work well for lighter tools. No need to put holes in your camper walls if you don’t want to.
Little tip: Always remove knives by the spine so you don’t wreck the blade. My knives have stayed sharp even after lots of road trips.

Multi-Purpose Magnet Bar for Knives, Heavy Duty Strip Holds Up to 6 lbs, Kitchen Organizer, Drilling Required, 10 Inch
6) Use command hooks for hanging mugs and lightweight kitchen utensils
I picked up this trick a few years ago. My kitchen was tiny, and I was tired of searching for stuff.
Command hooks made organizing so much easier. I stuck them inside cabinet doors and along the backsplash, and suddenly my coffee mugs were right where I wanted them.
Lightweight kitchen utensils like measuring spoons, whisks, and spatulas all got their own hook. No more digging through drawers.
I like using command hooks for utensils because they don’t damage walls. Need to move things around? They come off clean with no fuss.
It freed up so much cabinet space. Now I can actually stack my plates and bowls instead of cramming mugs in with them.
Just make sure to use the right size hook. Mugs need medium ones, but basic hooks are fine for lighter utensils.
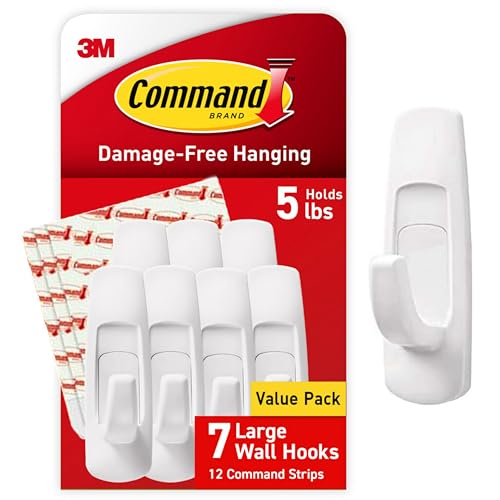
7 Wall Hooks, and 12 Command Strips, Damage-Free Hanging with Adhesive Strips, No Tools for Hanging
7) Install a Murphy bed to maximize floor space at night
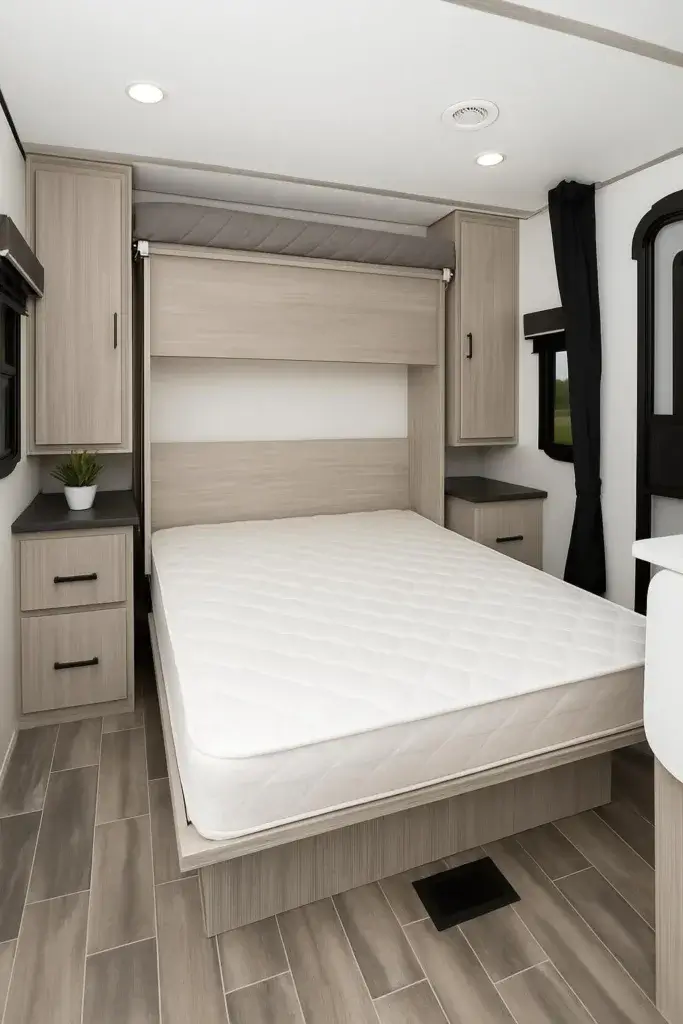
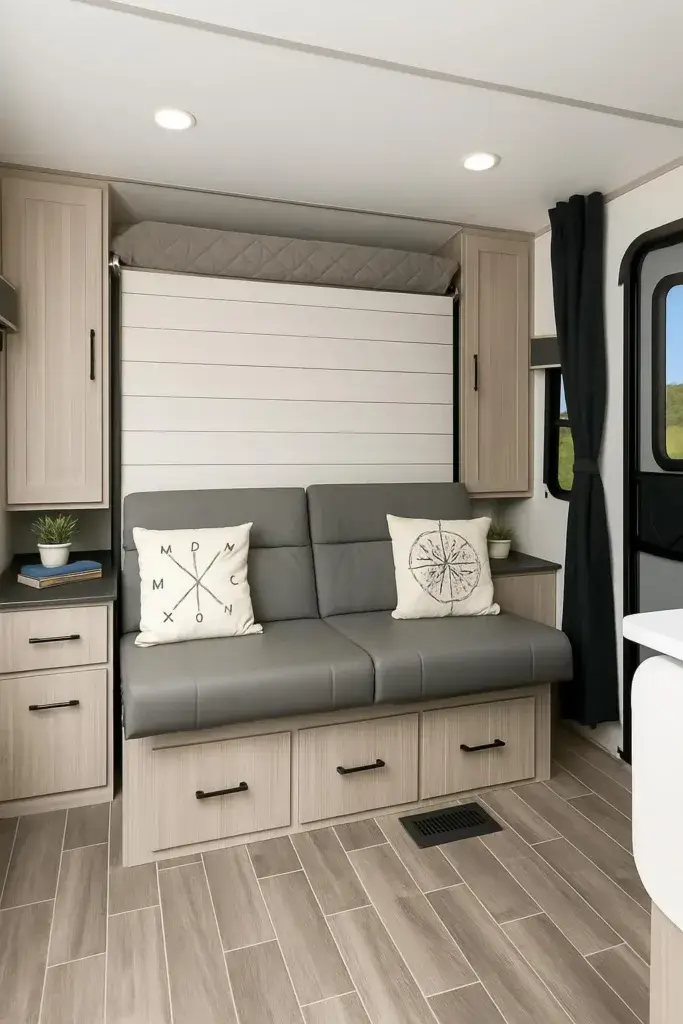
I recently stumbled upon Murphy beds, and wow, they totally changed my view on tiny spaces. These beds fold right up into the wall when you’re not sleeping, so you suddenly have all this extra room to move around and actually live.
You can get Murphy beds in different sizes, like twin or queen. I went with a queen since my partner and I both like to sprawl out at night.
Installing a Murphy bed takes careful planning because RVs are weirdly shaped and always short on space. I spent weeks measuring and re-measuring before I even started the project.
During the day, I use the extra floor space for yoga, meal prep, or just hanging out. At night, I pull the bed down and, boom, my sleeping spot is ready.

Vertical
8) Create DIY curtains from colorful fabric to brighten the interior
Bright fabric curtains can completely change the feel of a camper. Dark, sad curtains can make the space feel like a cave.
Picking bold colors can make a huge difference. I went for lightweight cotton in happy yellows and blues that made the whole place feel bigger and way more cheerful.
The process was easier than I expected. I just measured my windows and added a few inches on each side so the curtains would drape nicely. Lightweight, durable, and easy-to-clean fabrics are definitely the way to go in a camper.
I skipped sewing rod pockets and just used basic curtain clips. This saved a ton of time and made it super easy to swap out curtains when I wanted a new look.
Sheer panels behind the main curtains are a great move. You get privacy, but the light still comes in, so it never feels gloomy inside. Adding sheers really helps brighten up a dim RV without sacrificing privacy.
Mixing patterns is my favorite part. I paired striped curtains with solid tie-backs, and suddenly it looked like I’d paid a designer, but it cost me less than twenty bucks per window. Designer look on a tight budget? Yes, please.
And if you’re picky or just broke, DIY curtains are a lifesaver. You get exactly what you want, and there’s no guilt if you want to switch things up next season.
9) Add LED strip lighting under cabinets for ambiance and practicality
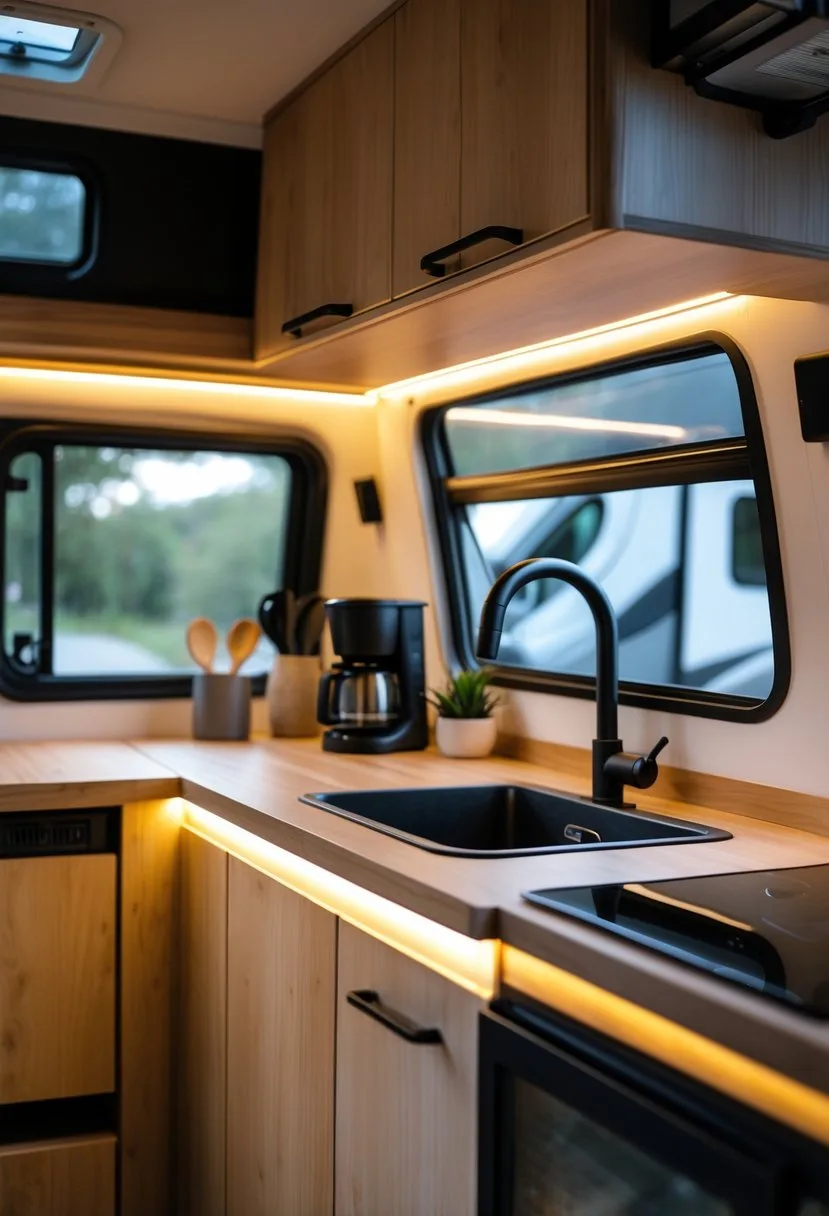
I tried out LED strip lights, and what a difference. My tiny kitchen suddenly felt cozy and welcoming instead of dark and gloomy.
LED strip lights under cabinets give off a soft, even glow that makes cooking so much easier. No more chopping veggies in the shadows or squinting at recipe labels.
Installation is a breeze. Most LED strips have adhesive backs, so you just peel and stick them. I finished mine in under an hour, and I’m not exactly a pro.
I always recommend warm white LEDs for a cozy evening vibe. They’re perfect for date night dinners or quiet, early morning coffees before you head out.
The energy savings are real. These lights barely touch my battery compared to old-fashioned bulbs, and they last forever.
One thing I love: I added a dimmer switch so I can set the mood or just keep things bright when I need to.

With Remote, 16.4ft 3000K Dimmable Ultra Bright Warm White COB Light Strip, Adhesive
10) Use removable vinyl decals to personalize walls without damage
I found removable vinyl decals and now I’m hooked. These giant stickers are the easiest way to add some personality without making a big commitment.
My go-to move? I’ll put mountain silhouettes above the dinette or a forest scene in the bedroom. You just have to make sure you’re using removable adhesive vinyl – not permanent.
Removable wall decals come off clean when you want to redecorate.
Putting them up is pretty easy. Clean the wall, then smooth the decal from the center outward to avoid bubbles. I always keep a little plastic scraper around for this part.
There’s so much variety online. You’ll find everything from inspiring quotes to beautiful nature scenes. These decals work on walls, furniture, and even appliances, so you can get creative and put your stamp on your little home on wheels.

Peel & Stick Wall Decorations
11) Incorporate a vertical herb garden for fresh flavors and greenery

I am now officially hooked on vertical herb gardens. Fresh basil on pizza or mint in morning tea? Can’t beat it.
These gardens are perfect for campers. For the outside, I just leaned a wooden ladder against my RV’s exterior and hung little planters from each rung.
Wall-mounted herb gardens turn cramped spaces into green pockets of happiness. You can use pocket planters, shoe organizers, or even mason jars screwed to a board.
I love my pegboard system inside the camper. I move the herb containers around depending on what I’m cooking that week.
Start with easy herbs like rosemary, thyme, and oregano. They handle temperature swings and don’t need babying.
Hanging herb gardens near windows or under the awning works great. The herbs soak up the sun but stay out of the worst weather.
I think vertical gardens grow better than pots. The drainage is better, and each plant gets plenty of air.
Your camping meals will get a serious upgrade with fresh herbs right by your camp kitchen.
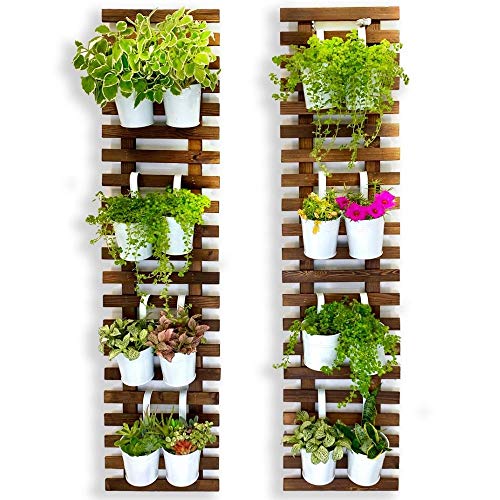
2 Pack, Wooden Hanging Large Planters for Indoor Outdoor Plants, 47.2" (120cm)
12) Upgrade your RV’s mattress for a better night’s sleep on the road
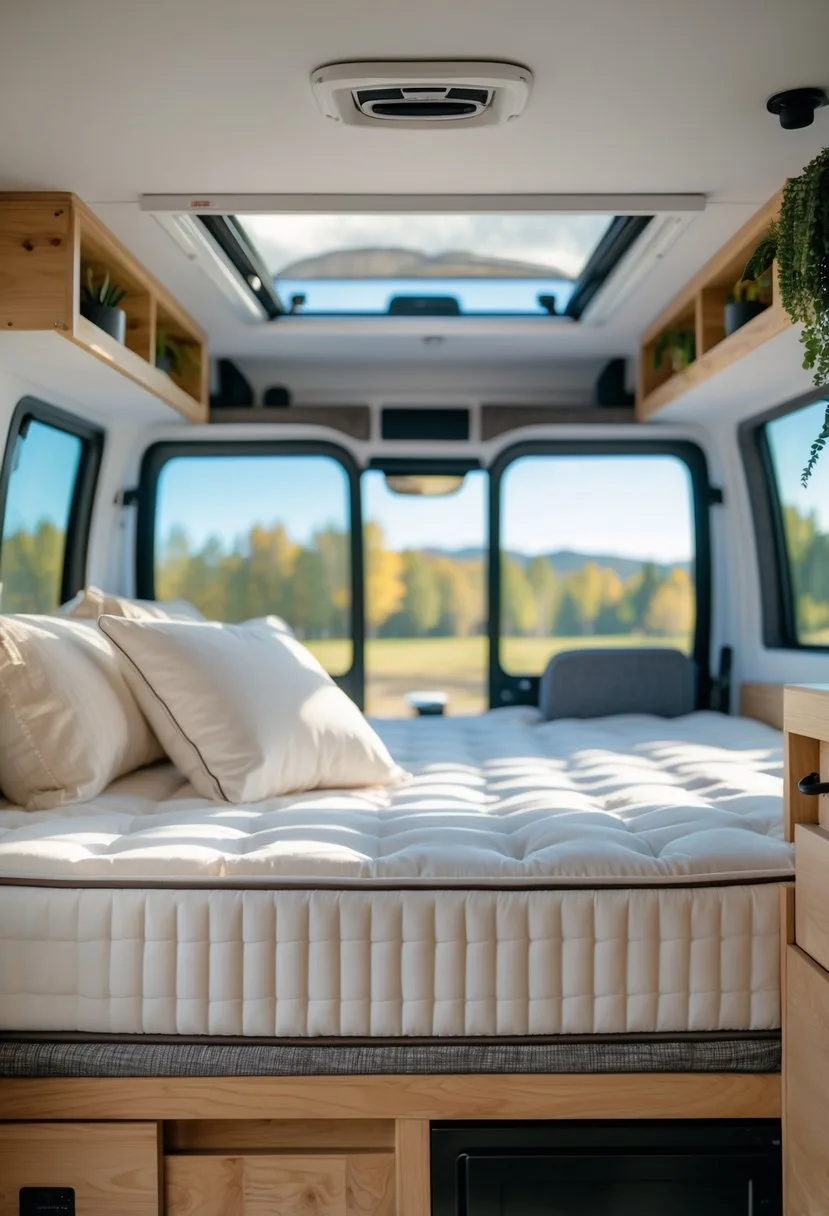
A good night’s sleep is everything when you’re traveling. After too many sleepless nights on a lumpy, thin mattress, I knew I couldn’t do it anymore.
Most RV mattresses are nothing special. They’re thinner and cheaper than what you’d have at home, and my back noticed every morning. Not fun.
The bright side? Upgrading your RV mattress is easier than you might think. I started with a memory foam topper, and my sleep quality improved right away.
If you want to go all in, replace the whole mattress with one made for RVs. They come in all the weird sizes and usually compress so you can get them through the door.
I’ve found that mattresses with extra comfort layers make a world of difference. Waking up rested means you’re ready for whatever adventure the day brings.
Seriously, your body will thank you after a night of real sleep.
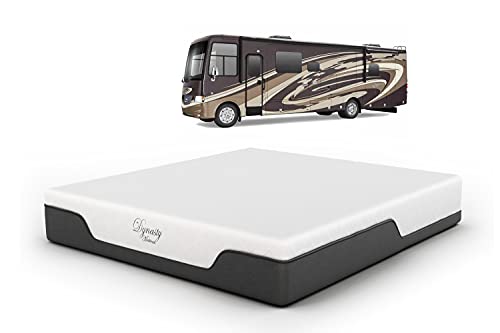
DynastyMattress, 10-Inch CoolBreeze Medium-Firm Gel Memory-Foam Mattress for RV Bed, Camper, Pop Up, and Trailer
13) Install solar-powered fans to keep air fresh and reduce electric use
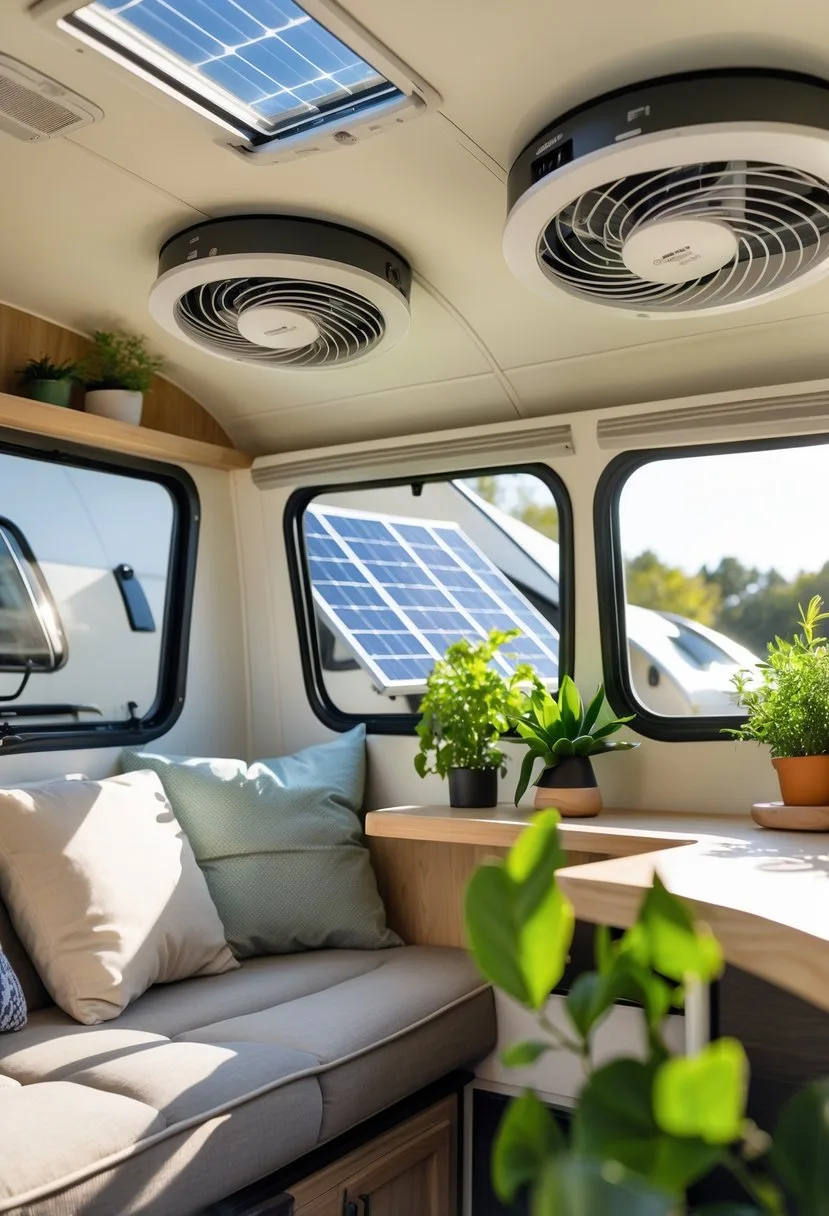
Solar-powered fans are amazing. My camper would get stuffy on hot afternoons, even with the windows open.
Solar attic fans use the sun’s energy to move air around without draining your battery. I put mine on the roof, and it made a difference right away.
The setup took me about three hours. Most solar fans are easy enough for a DIY project, and you can get it done in half a day. I just cut a hole in the roof, sealed it up well, and hooked up the wires.
After installing, my electric bills dropped. These fans really help cool things off so you don’t have to run the air conditioner all day.
They’re smart, too. On the sunniest, hottest days, they work the hardest. And since they run automatically, I never have to remember to flip a switch.
Good airflow keeps the camper dry and comfy, even on humid trips. It’s one of those upgrades I wish I’d tried sooner.
ECO-WORTHY - 25W with 30W Foldable Panel - Fans for RV
14) Add reflective window covers to keep the camper cool in summer
I picked up this trick during a blazing summer camping in Arizona. My van felt like a toaster oven until I discovered reflective window covers.
These covers act like magic mirrors, bouncing heat away before it sneaks inside. I slapped them on my windshield and side windows and noticed the difference right away.
You can grab ready-made covers or make your own. I started with reflective bubble wrap insulation on my windshield because it was the path of least resistance.
Reflectix makes popular DIY RV window shades that give you shade, privacy, and help with temperature. I cut mine to fit each window, and they worked great..
The covers fit any window. I even put one over the skylight above my bed, and now the bedroom stays a lot cooler.
Installation takes just a few minutes. Most covers use magnets or suction cups, so I can pop them up fast when I pull into camp.
My air conditioner doesn’t have to work as hard, and I sleep better on sweltering nights.

Double-Side Aluminum Foil Bubble Shield, Aluminum Foil Thermal Insulation Radiant Barrier for Windows, RV, Roof - (23.6IN X 10FT)
15) Put in a slide-out kitchen to expand your cooking space outdoors
I first saw slide-out kitchens at an overlanding event, and it kinda blew my mind. They will completely change your cooking game on the road.
These clever setups pull right out from your camper’s exterior, doubling your prep space in seconds. The beauty of slide-out camp kitchens is their space-saving design.
When you’re parked, you just pull out the drawer and suddenly have a full cooking station. When it’s time to roll, everything slides back in and disappears.
I built mine with heavy-duty drawer slides rated for at least 100 pounds. You have to mount them to the camper’s frame, not just the outside paneling.
Inside my slide-out, I squeezed in a small sink, a cutting board, and a spot for my camp stove. Camper van slide out kitchens are awesome if you want to keep your indoor space open.
Some setups even have mini fridges or tiny grills. I spent a weekend installing mine, and now I’ve got restaurant-style prep space anywhere I park.
It’s like a secret weapon for outdoor cooking adventures.
16) Use wicker baskets to organize pantry items in a rustic way
Wicker baskets saved my sanity. My tiny pantry was a chaotic mess of scattered snacks and cans that rolled everywhere.
Wicker baskets turned my cluttered shelves into an organized kitchen. I found a bunch of different sizes at a thrift store for less than twenty bucks.
The big baskets fit cereal boxes and chips. I use smaller ones for tea bags, seasonings, and granola bars that always seemed to disappear.
Pull-out wicker baskets for kitchen cabinets make everything easier to reach. I installed basic drawer slides under my shelves for this.
The natural texture gives my camper a warm, homey vibe. Wicker breathes, so it prevents moisture from ruining dry goods.
I label each basket with little chalkboard tags. This system keeps my meals organized and makes cooking less stressful on the road.
The rustic look just fits my camper’s cozy style and actually solves real storage problems.

Set of 4 - 9x12in Woven Organizers w/Chalkboard Label, Chalk Marker
17) DIY a chalkboard wall for notes, to-dos, or doodles
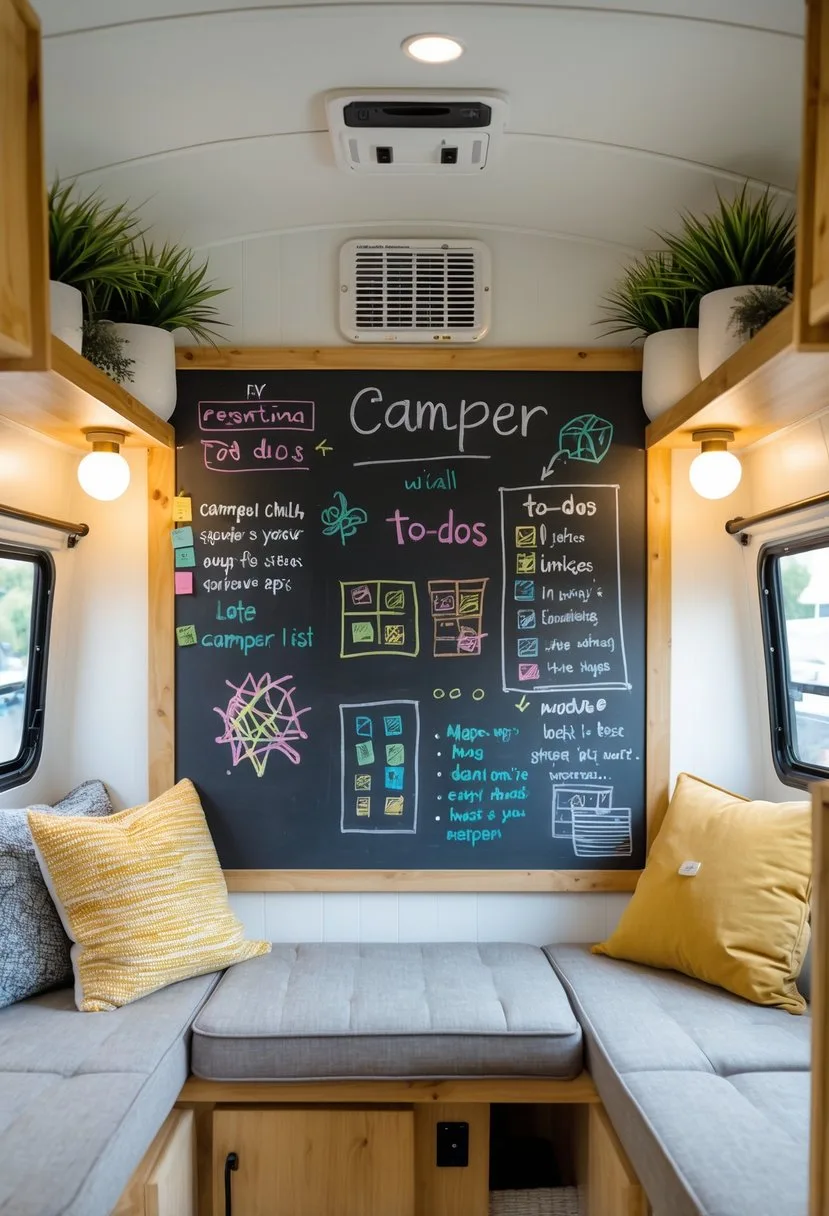
I stumbled upon chalkboard wall ideas late one night while scrolling, and wow, it was perfect for my tiny camper.
To make my own chalkboard wall, I grabbed chalkboard paint from the hardware store. I picked a spot near my dinette so I could jot down hiking plans and grocery lists.
The prep was simple. I cleaned the wall, taped the edges, and rolled on two coats of paint, letting each dry for about four hours.
Now I use my DIY chalkboard wall for everything from meal planning to sketching out campground maps. It’s fun to doodle on, especially on rainy days.
It keeps me organized without hogging counter space. I jot down campfire recipes, check off hiking trails, and leave silly messages for my family.
One thing I wish I’d known sooner: season your chalkboard first by rubbing chalk all over, then erasing. It stops those annoying permanent marks from appearing.
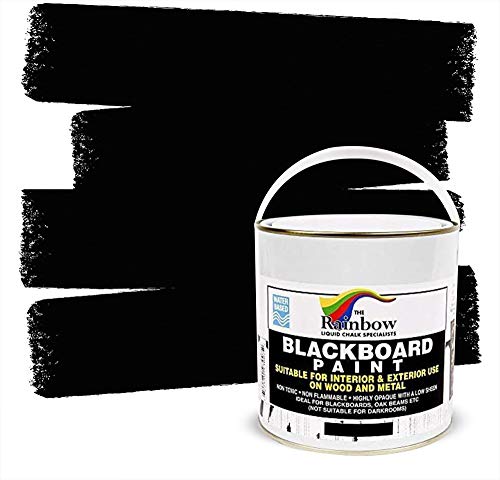
Brush on Wood, Metal, Glass, Wall, Plaster Boards, Sign, Frame, or Any Surface. Use with Chalk Pen Wet Erase, Non-Toxic - Matte Finish (33.8oz Cover 129 sf)
18) Replace dated faucets with sleek, modern fixtures
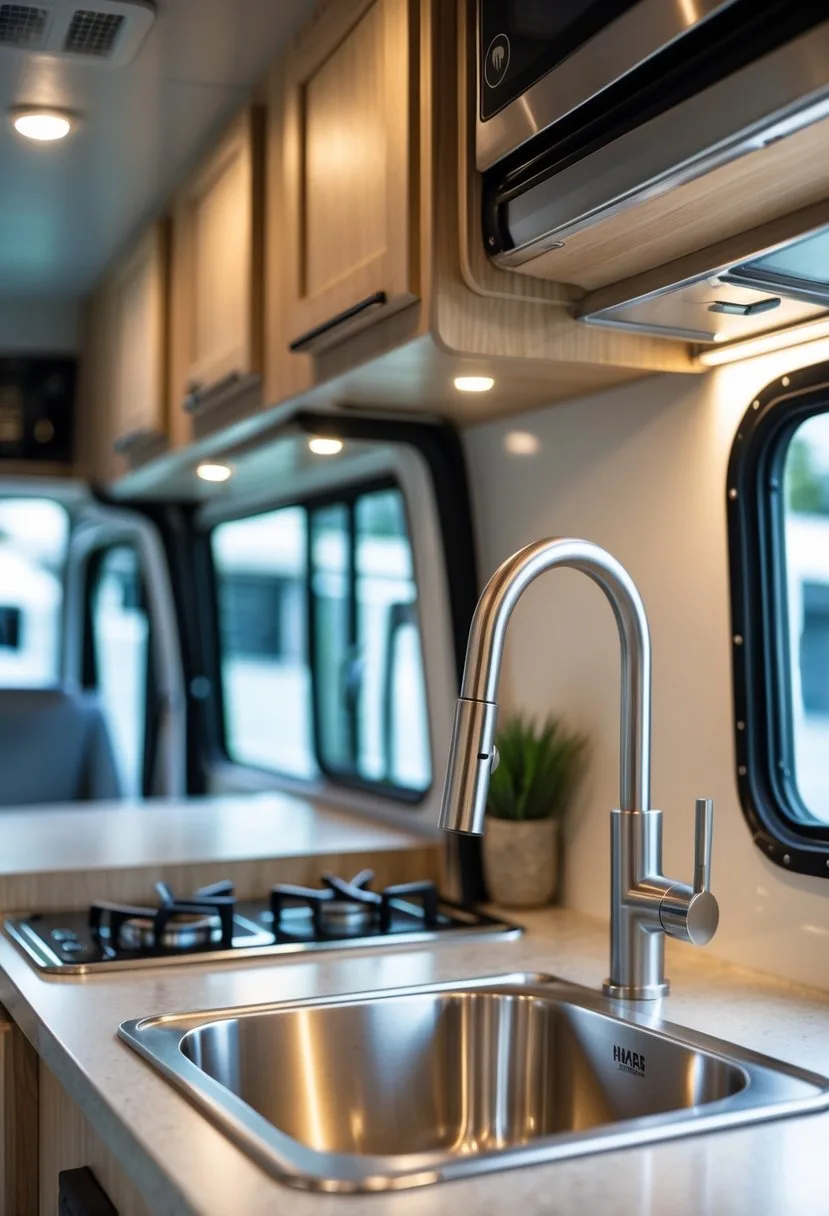
My old brass faucets screamed 1990s louder than my favorite grunge playlist.
Swapping out dated fixtures instantly changes the vibe. Modern faucets have clean lines and streamlined shapes that make everything feel fresh.
I prefer matte black or brushed nickel. These metals look sleek and modern and work with almost any color scheme.
This upgrade takes just an afternoon and can make it feel like you have a whole new camper.
Modern fixtures often save water too, cutting consumption by 20-30%. That makes a difference on long summer trips.
Don’t forget about shower fixtures. Replacing that old showerhead makes daily routines feel a lot nicer.
For such a simple change, the impact is huge. It’s the fastest way to make your space look updated without breaking the bank.

Single Handle, High Arc, Sink Faucet with Pull Down Sprayer, Suitable for RV
19) Create a pull-out pantry using shallow drawers for spices and snacks
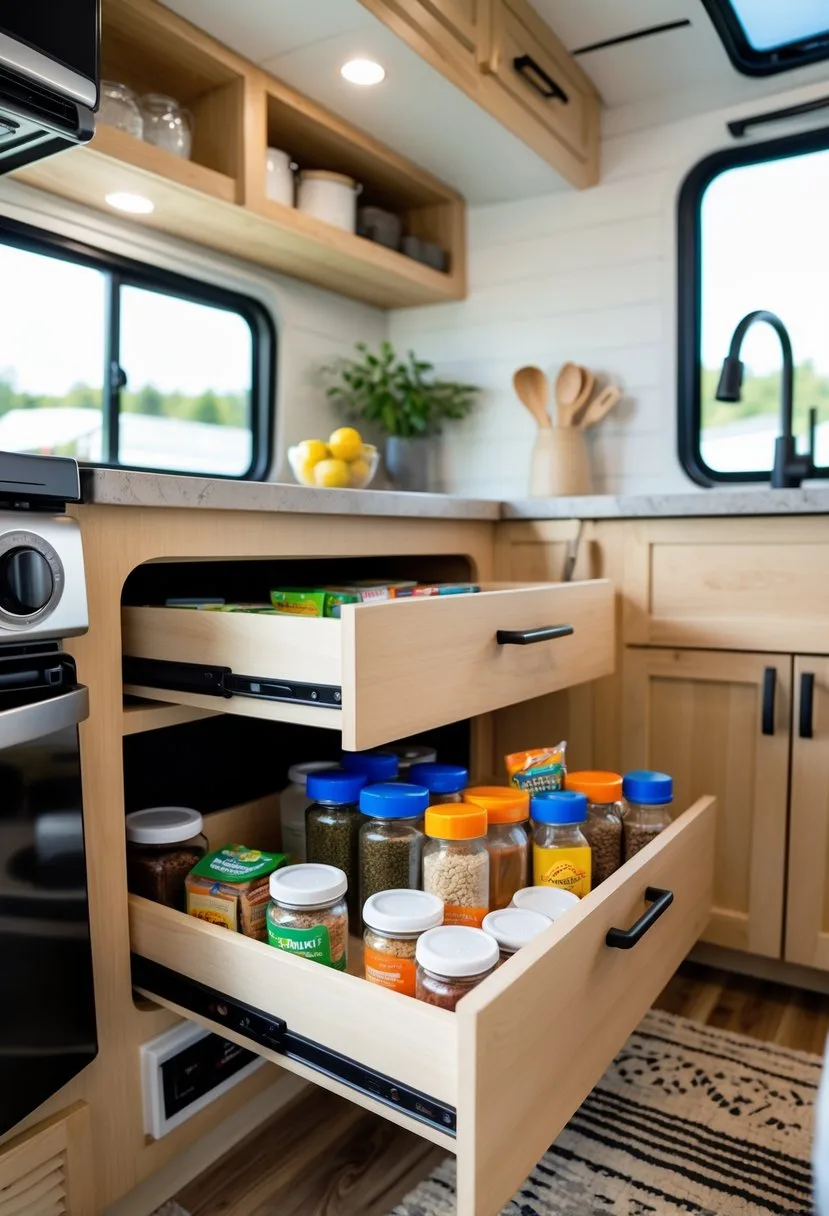
This space-saving trick totally changed my food storage game. Pull-out pantries work so well in RVs because they use every inch of space.
I love shallow drawers that slide out all the way. I can see everything at once instead of digging through deep, dark cabinets.
For spices, I built narrow compartments to keep bottles upright and visible. DIY pull-out drawers aren’t as hard as they sound with the right supplies.
I use one drawer for snacks and another for cooking essentials. Because they’re shallow, nothing gets lost or forgotten, which actually saves money in the long run.
Measure your cabinet opening first. Most camper cabinets work well with drawers 4-6 inches deep, which fit spice jars and snack packages perfectly.
I started with cardboard dividers and upgraded to wood later. The pull-out motion makes grabbing stuff way easier than reaching into dark corners.

Expandable(12"-20") Heavy Duty Slide out Drawers
20) Add a fold-down shoe rack by the entry to keep dirt out

I finally installed a fold-down shoe rack near the entryway after tracking mud through my freshly cleaned camper one too many times.
These racks mount flat against the wall while you travel. When you park, they fold out to make shoe storage right by the door.
I keep mine just outside or in the entry area. The best part is how much dirt this simple thing keeps out.
Instead of dragging muddy boots through your whole living space, you can kick them off right at the door. Your floors will stay so much cleaner.
Weekend camping trips are way more relaxing when you’re not constantly cleaning up dirt. I can actually chill instead of worrying about dirty floors.
Installation is easy with basic tools. Look for models that fold completely flat for travel, and some even have extra tiers for bigger families.
The convenience surprised me. Now, shoes have a home, and my space feels less chaotic.
This upgrade costs less than fifty bucks and makes camping feel a little more civilized.

Aluminum Camper Shoe Organizer, Wall-Mounted Shelf, Efficient Holder and Storage Rack for Various Shoes, Essential Travel Trailer Organization Accessories- 2 Packs
21) Paint the ceiling a light color to open up the space visually
This simple thing makes a big difference. Painting the ceiling can turn a space that feels like a cave into a space that feels bigger and brighter.
Light colors reflect more light and push the walls outward visually. Light colors will make your camper seem twice as tall.
Soft whites and pale grays work best for an open, airy vibe. Crisp white is good for a minimalist style.
Here’s a tip: paint the walls and ceiling the same shade. When you do that, the boundaries blur, and the space feels bigger. This cuts down on contrast and really opens things up.
Don’t forget the primer. Camper ceilings get stains and weird colors that can bleed through. I skipped primer once and had to use extra coats – not worth it.
The change is almost instant.
22) Use tension rods inside cabinets to hang spray bottles or cooking utensils
This hack will totally transform your tiny kitchen storage. Tension rods are kind of magic for small spaces.
Pop a tension rod near the top of your under-sink cabinet and hang spray bottles by their triggers. Suddenly, I had floor space for my cleaning bins that never fit before.
I can see all my supplies at a glance now, instead of digging through chaos. For cooking stuff, I put tension rods inside kitchen cabinets and hang dish towels or oven mitts. Lightweight utensils dangle from hooks, too.
This works great in RVs because tension rods keep bottles and containers from sliding around while you drive. No more cabinet avalanches at the next stop.
Installation takes maybe five minutes, and the rods are super cheap. If I’d known about this trick sooner, I could’ve saved myself a lot of cabinet headaches.

Short Tension Rod (Wood, 16" to 28"-2Pcs, Optimum Scope of Application 16 to 24 inch)
23) Upgrade your RV flooring with peel-and-stick wood-look vinyl planks
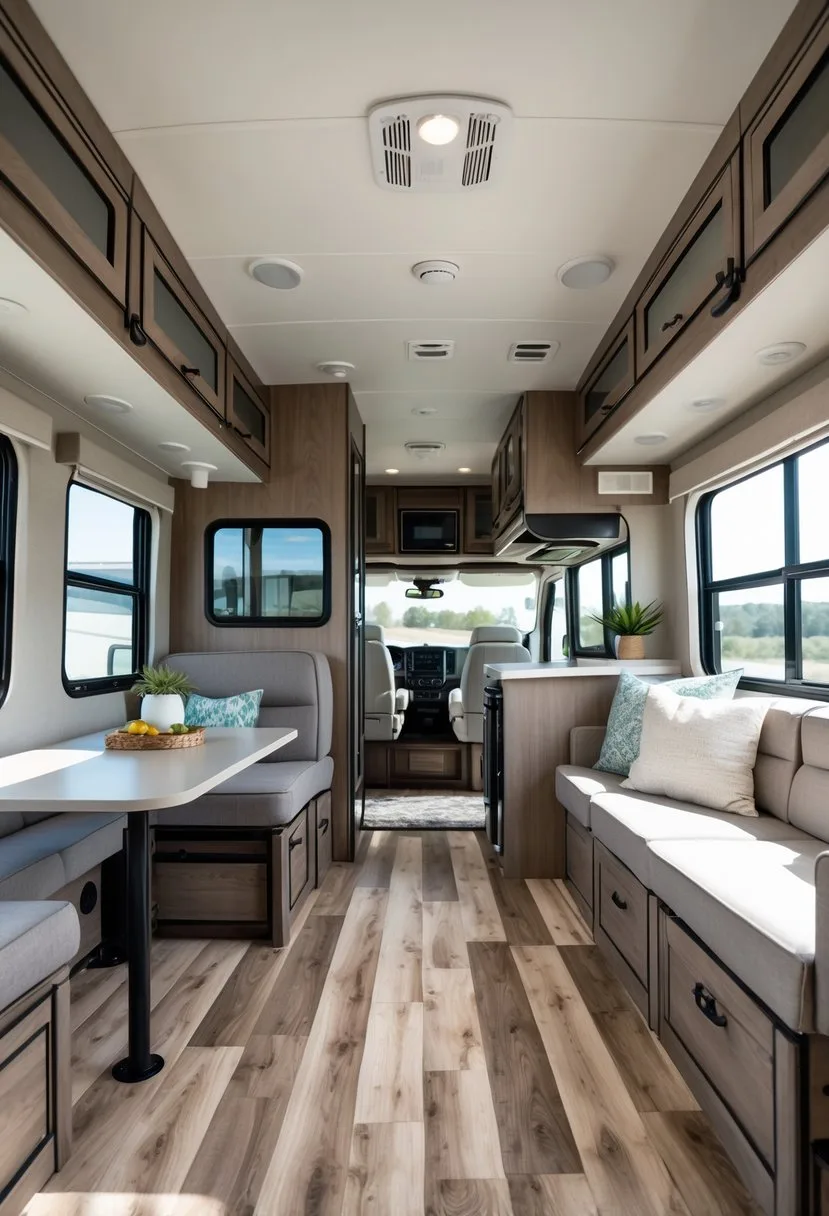
This is another one that makes a huge impact. Old, sad carpet will drag down the space and make everything look tired.
Peel-and-stick vinyl planks are a game-changer for RVs. They’re light, waterproof, and don’t mind temperature swings like real wood. I love the cozy cabin look without the heavy boards.
Installation is about as easy as it gets. I started in a corner, peeled off the backing, and pressed each plank into place. I had the whole floor done in a weekend.
Cleaning the subfloor first is key. Even tiny bits of dirt or bumps will show through. I trimmed planks around obstacles with a utility knife, which cuts vinyl like butter.
The new wood-look patterns are pretty convincing. I picked a weathered oak that hides dirt and scuffs from muddy boots. After two years of adventures, my floor still looks great and only needs a damp mop to clean up.
Floor Tile for DIY Installation, 36 Wood-Look Planks, Honey-BaseCore-54 Sq. Feet
24) Create a cozy window seat with storage underneath for blankets
Window seats are awesome. The empty space under our main window just collected dust and random junk.
Building a simple bench turned it into my favorite spot to read. I used plywood and hinges for a seat that lifts up to reveal storage underneath.
The hidden compartment is perfect for extra blankets, pillows, or camping gear. Window seats with storage make use of those weird, unused areas in campers.
I added a foam cushion on top and covered it with outdoor fabric. The sunlight makes it the best place for coffee in the morning or journaling at night.
For extra comfort, I keep throw pillows and a soft blanket stashed right underneath. It’s a cozy nook that uses every inch of space.
The storage keeps bedding organized and easy to grab. It’s kind of wild how one little addition made our small camper feel way more like home.
25) Install blackout curtains for better sleep and privacy
Learned this one the hard way on my first summer camping trip. The sun came blazing in at 5:30 AM – so much for sleeping in. Blackout curtains turn your camper into a cozy cave so you can actually rest.
My old sheer curtains let neighbors peek in while I changed. Now, I get real privacy and can relax any time of day.
These curtains are great for hot days, too. Blocking sunlight helps the A/C keep things cooler, and I noticed my energy usage went down after I put them up.
You don’t need to sew anything. DIY no-sew options are everywhere. I used fabric glue and Velcro.
The thick fabric also blocks cold drafts in winter. My camper feels way more comfortable, no matter the season. Go for dark colors or blackout lining for best results.
After this upgrade, I finally got a good sleep on the road. No more sunrise wake-up calls.

118 x 57 Inch, No Drill, Cut Any Size/Shape, Portable Black Out Shades Curtains for Rv with Magnetic Closure
Planning Your Camper Remodel Adventure

Planning makes all the difference between a dream reno and a total headache. A clear budget, some solid inspiration, and a timeline you can actually stick to will keep you sane from start to finish.
Setting a Realistic Budget
I learned this the hard way on my first camper reno. My $3,000 budget ballooned to $7,500 because I didn’t plan for surprises hiding behind the walls.
Start with the 70/30 rule. Put 70% of your budget toward planned upgrades and keep 30% for stuff you didn’t expect. Trust me, something weird always pops up.
Here’s how I split my renovation costs:
| Category | Percentage of Budget | Examples |
|---|---|---|
| Structural repairs | 30-40% | Flooring, walls, roof leaks |
| Interior updates | 25-35% | Paint, fabric, lighting |
| Kitchen/bathroom | 20-25% | Fixtures, appliances, plumbing |
| Emergency fund | 15-20% | Unexpected repairs |
Track every purchase. I use a basic spreadsheet and snap photos of receipts. It’s the only way I can spot where my money disappears.
Try working in phases. My friends did their camper remodel on a budget over two seasons. First, they focused on safety, then made it comfy later.
Finding Inspiration for Your Design
Pinterest is fun, but real campers have the best ideas. I spent hours looking at amazing RV remodels to see what actually works in tight spaces.
Check out RV shows and campgrounds. Seeing finished projects in person is way better than scrolling online. I found my favorite cabinet hardware at a local show.
Join Facebook groups. Remodel communities share real before-and-after photos, so you see what actually works – no filters needed.
Measure twice, buy once. I fell for a farmhouse sink, then realized it wouldn’t fit. Measure everything before you commit.
Pick multi-functional furniture. My fold-down table doubles as a desk, and storage ottomans hide all my camping gear.
Think about how you camp. Boondockers need different setups than folks at RV parks. Plan around how you actually use the space, not just how it looks on Instagram.
Creating a Remodel Timeline That Works
My biggest mistake? I started renovations just two weeks before a camping trip I couldn’t cancel. I ended up sleeping on the floor, picking sawdust out of my coffee every morning.
Plan major work during your off-season. Most people I know tackle renovations in the winter months when camping slows down, which gives you a solid 3-4 months to get things done.
Start with structural issues first. Water damage, electrical hiccups, and floor repairs need your attention before anything else. These jobs have a sneaky way of revealing more problems that can mess with your timeline.
Break projects into weekends. I try to focus on one room or system each weekend. It keeps the momentum up, and I don’t end up feeling completely overwhelmed.
Order materials early. Custom cushions can take 6-8 weeks, and appliances sometimes get stuck in shipping limbo. I’ve learned to order everything before I even start demo work.
Build in buffer time. That “quick” flooring project? It usually takes twice as long as I think. YouTube makes it look easy, but real life loves throwing curveballs.
Avoiding Common Remodel Headaches
Smart material picks and creative space planning save you from so many headaches. When every surface in your camper doubles as storage or workspace, staying organized is everything.
Choosing the Right Materials for Durability
My first RV renovation taught me a tough lesson. I picked gorgeous laminate flooring that looked great in my apartment, but it warped after three months on the road.
Temperature swings can destroy regular home materials. RVs deal with wild heat, cold, and humidity swings that houses never see.
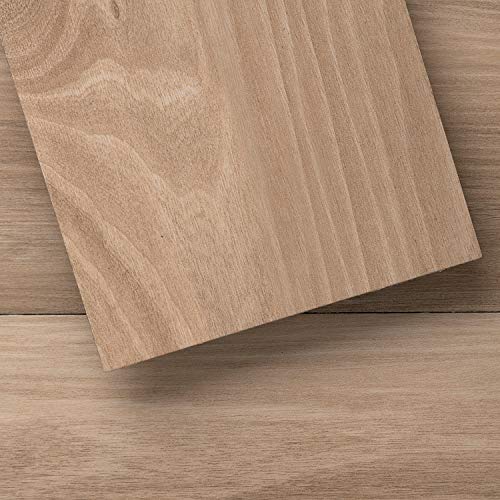
Now, I always go for marine-grade plywood. It’s pricier, but it shrugs off moisture. I use it for countertops, shelves, and cabinet repairs.
| Material Type | Best Choice | Why It Works |
|---|---|---|
| Flooring | Luxury vinyl plank | Expands and contracts well |
| Fabric | Outdoor/marine grade | Resists fading and mildew |
| Paint | Boat paint or RV-specific | Flexible with temperature changes |
| Adhesives | 3M VHB tape | Bonds permanently, flexes with movement |
Lightweight options matter more than you’d think. Every pound affects towing and gas mileage. I swapped steel for aluminum brackets in my kitchen and saved 15 pounds just like that.
Skip particle board. It falls apart the second moisture hits it. I learned that the hard way when my dinette table crumbled after a rainy week in Oregon.
Tips for Making the Most of a Small Space
My 200-square-foot RV really drove home that every inch matters. I had to stop thinking like someone with unlimited space and get creative.
Wall-mounted everything changed the game for me. I mounted my coffee maker, spice rack, and even my cutting board on swing-arms. Suddenly, I had counter space for actual cooking.
Murphy beds are magic. I put one in my rear bedroom, and now I have a living area during the day. Visitors are always wowed by the transformation.
Multi-purpose furniture is a lifesaver. My ottoman opens for storage, the dining table folds into the wall, and couch cushions double as a guest bed.
Hidden storage spots are everywhere if you look:
- Under stair treads
- Inside hollow furniture legs
- Behind false wall panels
- Under raised flooring sections
I realized maximizing small RV spaces means thinking in three dimensions. Look up, down, and behind everything.
Sliding doors are way better than hinged. I swapped out three cabinet doors for sliders and got two extra feet of walkway. My shins are grateful, especially during midnight bathroom trips.
Staying Organized (Even When Everything Is Covered in Sawdust)
Renovating while living in a tiny space can really test your patience. I got through my remodel by treating organization like a survival skill.
Daily cleanup rituals kept me from losing my mind. Every night, I’d sweep up sawdust, stash my tools, and clear off my bed. Trying to sleep in chaos just makes the next day harder.
I learned to work in sections, not tear everything apart at once. This budget-friendly renovation approach keeps your RV livable while you’re working.
My go-to organization tools:
- Rolling tool cart for tight spaces
- Magnetic strips for small metal tools
- Clear storage bins for hardware
- Shop vacuum for constant cleanup
Label everything right away. I scribble on tape and stick it on bins as I fill them. Mystery screws three weeks later are the worst.
Set up a staging area outside if you can. I used a folding table next to my RV for cutting and painting, which kept most of the mess outdoors.
Take daily photos of your progress. It keeps you motivated when things feel slow and helps you remember how everything fit together when it’s time to rebuild.
Frequently Asked Questions
These questions pop up all the time when I chat with fellow camper owners about their renovation dreams. Here’s what I’ve learned about smart storage, budget updates, and protecting your investment.
What are some creative yet affordable ways to remodel my small camper?
Some of the best small camper remodel ideas don’t cost a fortune. My favorite trick is building a cozy reading nook with shelves and soft cushions by the window. Dead space turns into my favorite spot in the rig.
Peel-and-stick wallpaper is the best. It adds personality, is easy to change when I get bored, and peels off clean when it’s time for a new look.
Magnetic strips in my kitchen changed everything. I use them for knives and small tools, and suddenly my tiny galley feels organized and spacious.
Can you suggest ways to update an older camper’s interior on a tight budget?
Spray painting old cabinet handles was my first renovation win. For less than twenty bucks, I turned dated hardware into something modern and fresh.
Budget-friendly RV renovation ideas usually focus on small changes with big impact. New throw pillows, LED lights, and contact paper on countertops can totally change the vibe.
The fold-down table I built saves space during meals and doubles as my work station. It cost about forty dollars in materials and took a weekend to put together.
How do I add a touch of glamour to my camper without compromising on practicality?
I look for pieces that look great but can handle daily life. Metallic cabinet handles catch the light but feel sturdy enough for constant use.
Glam doesn’t have to be fragile. I chose elegant but washable fabric for my dinette cushions and added battery-powered fairy lights for ambiance that doesn’t drain my battery.
The materials you pick need to handle the road. I found out the hard way when my first decorative mirror cracked after a bumpy drive through Colorado.
What should I consider before starting a DIY renovation on my RV to ensure it’s worth the investment?
Weight is always my top concern. I weigh everything before I install it because those pounds add up fast, and I don’t want to push my RV past its limit.
I always start with a realistic budget and timeline. My first renovation took three times longer than I expected, so now I plan for delays and surprise expenses.
Think about how you actually camp. I nearly installed a fancy coffee station before realizing I like making coffee outside by the fire every morning.
Could renovating my RV potentially affect its future resale value, and how can I minimize that risk?
I keep all original parts if I can. My cabinet doors are stored in the garage, ready to go back on if needed.
Neutral colors and classic styles tend to hold value better than trendy choices. I saw it firsthand, shopping for my current rig – the one with bright orange walls sat unsold way longer than the others.
Quality matters more than price for resale. Buyers want to see that mods were done well, not necessarily with the most expensive stuff.
What are some unique small RV remodeling ideas that combine style with functionality?
Multi-purpose furniture has become my specialty. I built ottoman storage that doubles as extra seating and holds my outdoor gear just right.
My Murphy-style bed folds up to reveal a comfortable office space underneath. It took some engineering, but now I’ve got a real workspace that disappears when friends drop by.
I put in a sliding barn door to separate my bedroom from the main living area. It looks rustic and charming, and it gives me privacy in my tiny space without needing the swing room of a regular door.