Pie Iron Apple Pie: Campfire Treat That’ll Make You the S’more Star
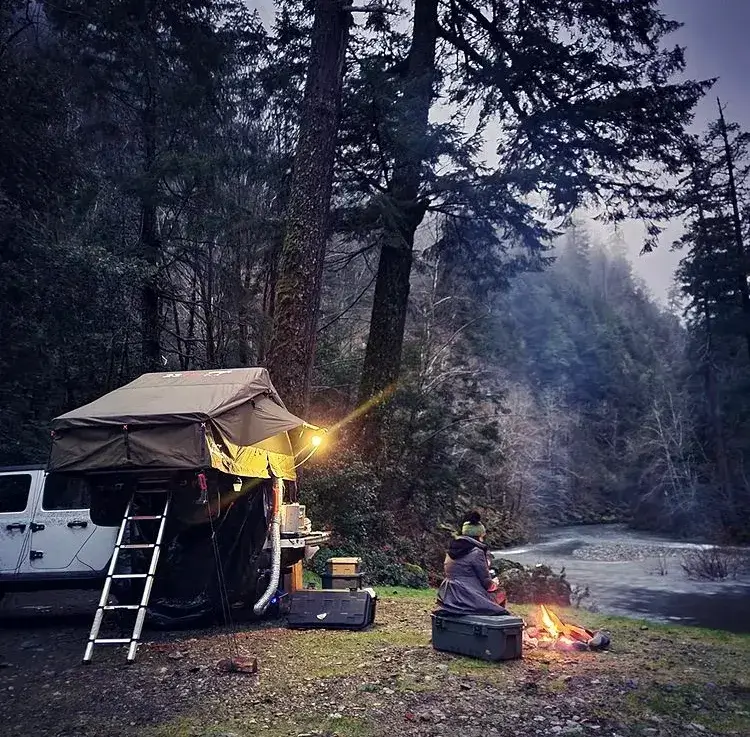
Who doesn’t love the smell of warm apple pie? Now imagine that heavenly aroma wafting through the crisp air of a campsite. That’s the magic of pie iron apple pie! We gave it a try this weekend, and it was so good that we have to share!
Pie iron apple pies are buttery, sweet treats with a crispy crust and gooey apple filling that’ll make your camping trip extra special.
Making these pies is easier than you might think. With just a few simple ingredients and a trusty pie iron, you’ll be enjoying homemade apple pie under the stars in no time.
It’s a fun activity for the whole family and a great way to end a day of outdoor adventures.
Get ready to impress your fellow campers and create sweet memories around the fire!
Getting to Know Your Pie Iron
We love pie irons for making tasty campfire treats! These handy tools are perfect for creating delicious apple pies while soaking up the outdoors.
Let’s explore the world of pie irons together.
Types of Pie Irons
Pie irons come in different shapes and sizes to suit our camping needs. The most common types are:
- Square: Great for sandwiches and pies
- Round: Perfect for circular treats
- Double: Ideal for bigger portions or group cooking
We can find pie irons made from cast iron or aluminum. Cast iron pie irons are our go-to choice.
They’re durable and distribute heat evenly, so you get that golden, crispy crust every time.
Aluminum pie irons are lighter, which is great if you’re backpacking. But they might not cook as evenly as cast iron, so keep an eye on them.
Best Pie Iron for Making Apple Pies
For apple pies, we use a square cast-iron pie iron. It’s the perfect size for a single-serving pie and fits nicely over the campfire.
Look for these features in your pie iron:
- Long handles to keep hands safe from the fire
- A locking mechanism to keep the iron closed
- A smooth cooking surface for easy cleaning
We’ve found that single cast iron versions work best for beginners. They’re easier to handle and still make delicious pies!

How to Season Your Pie Iron
Seasoning your pie iron is crucial for tasty treats and easy cleanup. Here’s our simple process:
- Clean the pie iron with soap and water
- Dry it thoroughly
- Coat the inside with vegetable oil
- Heat it over the campfire for 15 minutes
- Let it cool and wipe off excess oil
We repeat this process a few times before our first use. After each camping trip, we clean our pie iron and apply a thin layer of oil to prevent rust.
A well-seasoned pie iron makes the best campfire pies!
Crafting the Perfect Pie Iron Apple Pie
Making a yummy apple pie in a pie iron is super fun and easy! We’ll share our best tips for picking apples, mixing the filling, and getting the crust just right.
Choosing Apples for Your Filling
For our pie iron treats, we use 2 Granny Smith apples and 2 Cosmic Crisp apples. They’re nice and tart, which gives our pies a great flavor kick. But don’t worry if you can’t find them – any firm apple will do the trick! We also threw in 1 Bosc Pear!
Here’s a quick list of our fave apples for pie:
- Granny Smith
- Honeycrisp
- Braeburn
- Pink Lady
Remember, firmer apples hold up better when cooking. We don’t want mushy pies.
Pro tip: Mix and match different types of apples for a more complex flavor.
Mixing Your Apple Pie Filling
Now for the fun part – the filling! We like to keep things simple when we’re out camping. Here’s our go-to recipe:
- Chop up your apples into small, bite-sized pieces
- Toss them with some cinnamon and sugar
- Add a squeeze of lemon juice to keep things fresh
Want to jazz it up? Try adding:
- A pinch of nutmeg
- A dash of vanilla extract
- A sprinkle of brown sugar
Don’t go overboard with the liquid, though. Too much juice can make your crust soggy. Nobody likes a soggy bottom!
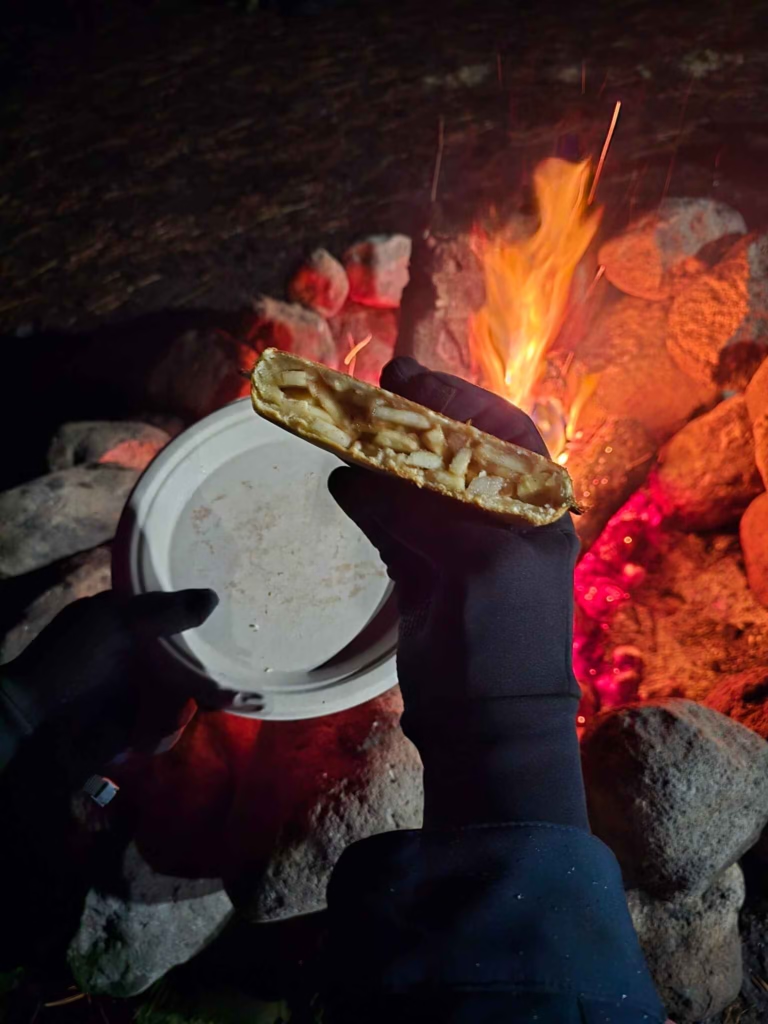
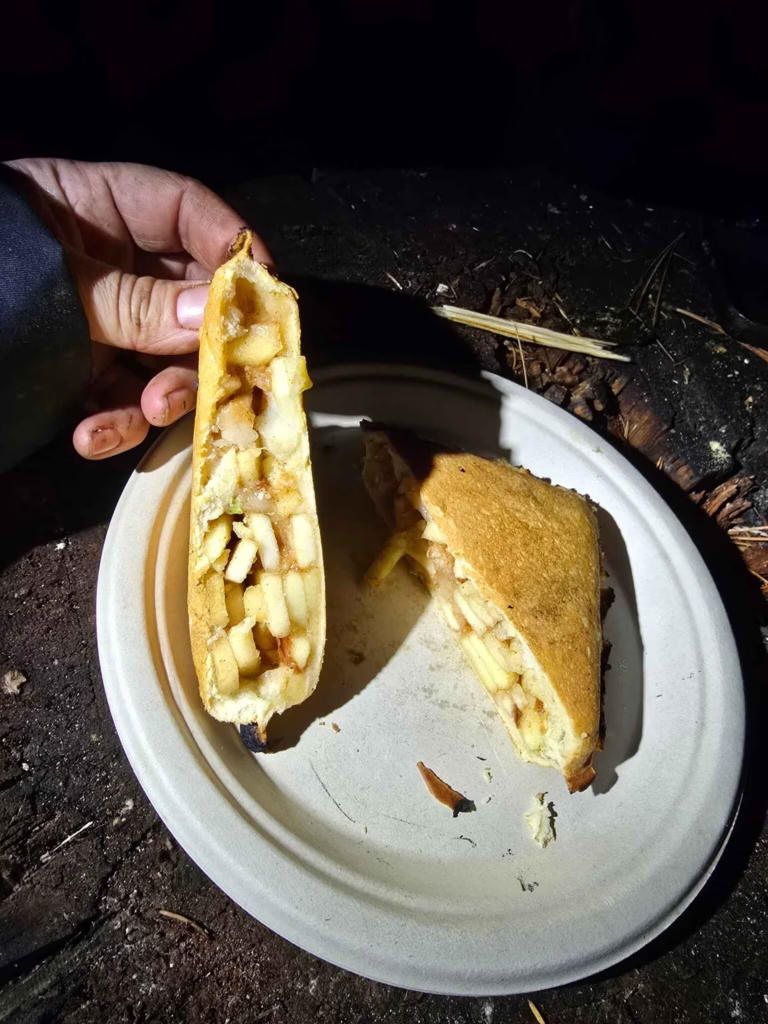
Want our exact recipe for the pies in the pics? Here ya go! We called it “Disaster Pie,” thinking it wouldn’t turn out, but it was actually amazing and tasted great!
- 1 Bosc Pear
- 2 Granny Smith Apples
- 2 Cosmic Crisp Apples
- 1/4 Cup Sugar
- 3 Tsp Cinnamon
- 1/2 Tsp Nutmeg
- 1 Tsp Cardamon
- Juice from one lemon
- Juice from 1/2 orange
We used croissants in a tube and Frankensteine’d it together for our pie crust. 🙂 Came out awesome!
Pie Crust 101
Ah, the crust – the unsung hero of our pie iron apple pies! We’ve got two options for you:
Homemade: If you’re feeling fancy, whip up a basic pie crust before your trip. It’s just flour, butter, salt, and water.
Store-bought: No shame in this game! Grab some refrigerated pie crusts from the store. They work great and save time.
Cut your crust to fit your pie iron. Don’t forget to butter the iron first – it helps the crust get nice and crispy.
Here’s a neat trick: Sprinkle a bit of sugar on the outside of your crust before cooking. It’ll give you a sweet, crunchy exterior. Yum!
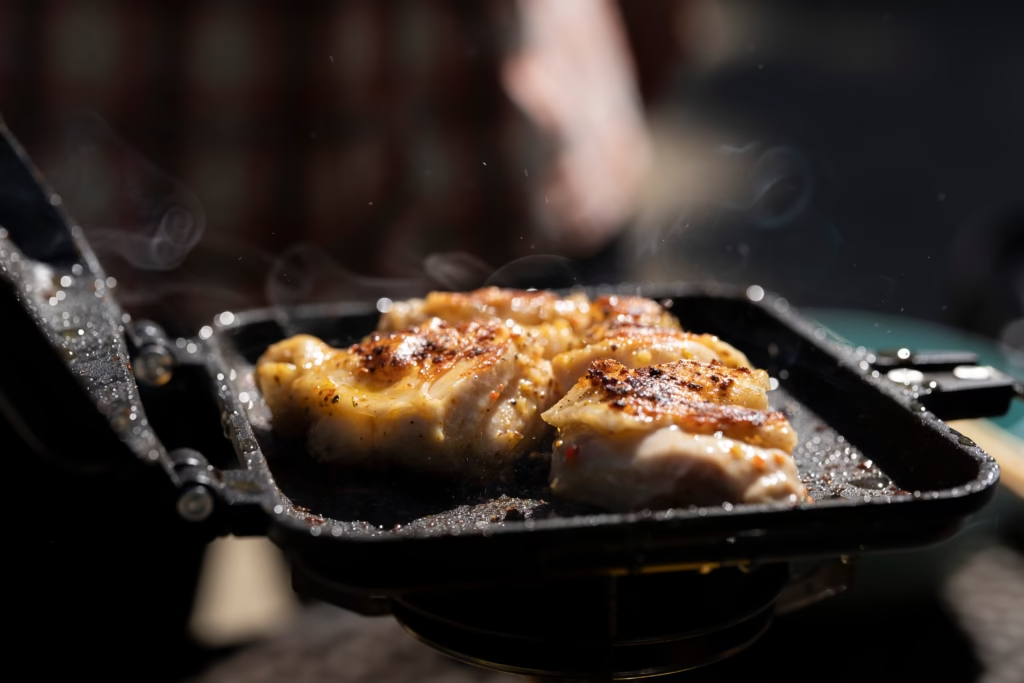
Step-by-Step Cooking Instructions

Let’s dive into making a mouthwatering pie iron apple pie over the campfire! We’ll cover everything from assembling your pie to perfecting that golden-brown crust. Get ready for a delicious adventure!
Assembling Your Pie Iron Apple Pie
First things first, let’s get our ingredients ready! We’ll need sliced apples, cinnamon, sugar, and some pie crust. Don’t forget to grease the inside of our pie iron with melted butter.
Next, we’ll line each side of the pie iron with a slice of bread or pie crust or whatever you’re using. Yum!
Now for the fun part – let’s mix our apple slices with cinnamon and sugar. Pile the mixture onto one side of the pie iron.
Time to close it up! We’ll press the edges together firmly to seal in all that gooey goodness. Our little pie is ready for the fire!
The Art of Baking over an Open Fire
Now comes the magical part – cooking over the campfire! We’ll place our pie iron right over the hot coals. But wait, there’s a trick to it!
We need to flip the pie iron every few minutes to make sure both sides cook evenly.
Keep an eye on the fire, too. If it’s too hot, our pie might burn. Too cool, and we’ll be waiting all night! Aim for medium heat – that’s our sweet spot.
Remember, patience is key. Good things come to those who wait… and flip their pie irons!
Testing for Doneness
How do we know when our pie is ready? It’s all about using our senses!
First, we’ll give it a careful peek. The crust should be a beautiful golden brown.
Next, let’s use our noses. When that amazing apple pie aroma starts wafting through the air, we’re getting close!
Finally, we can do a quick touch test. The pie iron should feel hot to the touch (careful, use oven mitts!). If it all checks out, it’s time to dig in!
Remember, it’s okay if it’s not perfect. Each pie is unique, just like our camping adventures! Our first pie came out MEH. The secone one came out amazing! So just keep trying until you get it down.
Delicious Variations
Who says pie iron desserts have to be just apple? Let’s explore some tasty twists on the classic campfire treat that’ll make your taste buds dance!
Cherry Pie Iron Pies
We love cherry pie, and it’s even better in a pie iron! Grab some cherry pie filling and get ready for a burst of fruity goodness. Here’s our go-to recipe:
- Butter two slices of bread
- Spoon cherry filling onto one slice
- Sprinkle with cinnamon and a dash of almond extract
- Close the pie iron and cook until golden brown
The result? A gooey, warm pocket of cherry bliss that’ll have you reaching for seconds. Pro tip: add a sprinkle of streusel topping for extra crunch!
Decadent Chocolate Pie Iron Desserts
Calling all chocoholics! We’ve got the perfect camping dessert for you.
Picture this: melty chocolate, gooey marshmallows, and crispy graham crackers all wrapped up in a toasty package. Yum!
Try this s’mores-inspired treat:
- Spread Nutella on both bread slices
- Add chocolate chips and mini marshmallows
- Sprinkle with crushed graham crackers
- Cook until the chocolate is melty and the marshmallows are puffy
Want to kick it up a notch? Add sliced bananas or a dollop of peanut butter for a flavor explosion!
Savory Pie Iron Creations
Who says pie irons are just for sweets? We’re all about thinking outside the box! Let’s turn our pie iron apple pies into savory delights.
Here are some mouthwatering ideas:
- Pizza pockets: Fill with sauce, cheese, and your favorite toppings
- Grilled cheese supreme: Add tomato, bacon, and avocado
- Breakfast sandwiches: Scrambled eggs, cheese, and ham
Our favorite? A gooey quesadilla packed with cheese, beans, and salsa. It’s like a fiesta in your mouth!
Remember, the sky’s the limit when it comes to pie iron creations. Get creative and let your taste buds be your guide!
Nutritional Information
Let’s dig into the tasty details of pie iron apple pie! We’ll explore the calorie breakdown and uncover some surprising health perks of this campfire treat.
Breaking Down the Calories
A slice of apple pie typically contains about 296 calories, but our pie iron version might be a bit different.
We’re looking at a mix of apples, pie crust, and maybe a touch of butter. The crust is the main calorie culprit here!
Most of the calories come from carbs – around 56% of the total. Fat makes up about 41%, while protein trails behind at just 3%. It’s not exactly a protein powerhouse, but that’s okay for a treat!
We should keep an eye on the sugar content too. Those sweet apples can pack quite a punch, with around 17g of sugar per serving. Yum!
Understanding the Health Benefits
Now, don’t write off our pie iron apple pie just yet! While it’s not exactly a superfood, it’s got some sneaky nutritional benefits.
Apples are the star of the show here. They’re packed with fiber, which is great for our digestion. Plus, they’re a good source of vitamin C – perfect for keeping our immune systems happy while we’re out camping.
We also get a small dose of important minerals. There’s a bit of iron (about 2% of our daily needs) and some potassium too. Every little bit helps, right?
The cinnamon we might sprinkle in isn’t just for flavor. It’s known to help regulate blood sugar levels. Who knew our campfire dessert could be so thoughtful?
After the Feast: Clean Up and Care
Cleaning and storing our pie irons properly is key to keeping the fun going. After having our pie iron rust to oblivion…. we learned the hard way. Let’s dive into the best ways to care for our trusty campfire companions after we’ve enjoyed our delicious apple pies!
Cleaning Your Pie Iron
First things first, let’s tackle the clean-up! We want to remove any stuck-on bits while the iron is still warm. A quick scrub with a brush or sponge usually does the trick.
If we’re dealing with stubborn residue, here’s a nifty trick:
- Heat the pie iron over the campfire for a few minutes
- Carefully open it and wipe with a damp cloth
- Rinse with clean water
For really tough messes, we can try the oven method when we get home:
- Preheat our oven to 350°F
- Place the pie iron inside for an hour
- Let it cool, then wipe clean
Remember, we never want to use soap on our cast iron pie irons. It can ruin the seasoning!
Storing Your Pie Iron for the Next Adventure
Now that our pie iron is squeaky clean, let’s make sure it’s ready for our next outdoor feast. Proper storage is crucial to prevent rust and keep it in tip-top shape.
Here’s our go-to storage routine:
- Dry the pie iron thoroughly
- Apply a thin layer of vegetable oil to prevent rust
- Store in a cool, dry place
We like to wrap our pie iron in a cloth or paper towel before putting it away. This helps absorb any moisture and keeps dust at bay. If we’re stacking multiple pie irons, we put a paper towel between each one to prevent scratches.
Tips and Tricks for Pie Iron Masters
We’ve got some awesome ideas to take your pie iron game to the next level! Get ready for tasty fillings, camping dessert hacks, and pro techniques that’ll make you the campfire cooking champ.
Creative Filling Ideas
Let’s spice up our pie iron treats!
Instead of plain white bread, why not try cinnamon swirl bread for a sweet twist? Or as we used for the pies in this post, crossoint rolls! They worked way better than we expected!
We love mixing brown sugar with butter and cinnamon for a gooey caramel-like filling.
For a fruity punch, toss diced apples with a bit of all-purpose flour, white sugar, and ground cinnamon. This mix helps thicken the filling as it cooks.
Don’t forget savory options too!
How about ham and cheese with a mustard spread? Or pizza pockets with tomato sauce, mozzarella, and pepperoni? The possibilities are endless!
Making the Most of Your Camping Desserts
Desserts around the campfire are the best!
We always pack some butter and brown sugar for quick caramel sauces. Just melt them together in your pie iron for a delicious topping.
Pre-mix dry ingredients at home in zip-lock bags. It’s a huge time-saver! For toppings, bring along some chopped nuts, mini marshmallows, or chocolate chips.
Don’t forget to grease your pie iron well. A little butter goes a long way in preventing sticking and adding flavor. And always let your desserts cool a bit before digging in – nobody likes a burnt tongue!
Advanced Pie Iron Techniques
Ready to level up? Try the flip and fill technique!
Cook one side of your bread, flip the iron, then add fillings to the toasted side. It gives a great crispy-to-gooey ratio.
For perfect crusts, brush the outside of your bread with melted butter before cooking. It’ll give you that golden-brown goodness every time.
Want layers?
Use thin slices of apple between two layers of cinnamon-sugar filling. It’s like a mini apple pie!
And for extra flaky crusts, try using refrigerated pie dough instead of bread.
Remember, low and slow is the way to go. Keep your fire or coals at a steady, moderate heat for even cooking without burning.
Frequently Asked Questions
Here are some common questions about making campfire apple pies in a pie iron. We’ve got all the tips and tricks you need to make these sweet delights a hit!
What’s the secret to getting that perfect golden crust on campfire apple pies?
The key to a golden crust is all about heat control and timing.
We love to rotate our pie iron frequently over medium-high heat. This ensures even cooking and that coveted crispy exterior.
Don’t forget to brush the outside with a bit of butter for extra flavor and shine!
Can I whip up a mouth-watering apple pie in a pie iron using crescent rolls, and if so, how?
Absolutely! Crescent rolls are a game-changer for quick and easy campfire pies.
We simply unroll the dough, place it in the pie iron, add our apple filling, and seal it up. The result? A flaky, buttery crust that’s to die for!
What’s the coolest variation of apple pie you can make with a pie iron while telling ghost stories around the fire?
How about a spooky “Graveyard Apple Pie”?
We use chocolate cookie crumbs for “dirt” and add gummy worms to the apple filling. Once cooked, we stick a few cookie “tombstones” in for the full effect. It’s deliciously eerie!
Missing a pie iron? No sweat! What’s the best way to make campfire apple pie without one?
No pie iron? No problem!
We love wrapping apple slices, cinnamon, and sugar in foil packets. Toss them on the hot coals for about 10 minutes, and voila!
Top with crushed graham crackers for a deconstructed apple pie that’s just as yummy.
For an epic dessert, what are some must-try pie iron recipes that’ll have everyone asking for seconds?
We’re obsessed with S’mores Pies! Graham cracker crust, chocolate, and marshmallows – it’s campfire heaven.
Another hit is our Peach Cobbler Pie. Fresh peaches, a sprinkle of cinnamon, and a dollop of whipped cream make it irresistible.
What are the top tips to ensure your pie iron apple pies are the stars of the campfire culinary show?
First, prep is key! We like to mix our apple filling beforehand for easy assembly.
Second, don’t overfill – it leads to messy spills.
Lastly, patience is a virtue. Let your pies cool for a few minutes before digging in. Trust us, it’s worth the wait!