
Truck Camper Boondocking on a Beginner Budget
You do not need a $60,000 rig to sleep in a quiet spot on public land with no hookups. Truck camper boondocking (or any vehicle, for that matter) is mostly a resource-management skill: if you can track your water, your battery, and your propane, a basic camper will keep you comfortable for a weekend. The gear can come later, one piece at a time.
I started out sleeping in the back of a Jeep Wrangler. Was it comfortable? Sort of. The first night wasn’t great, and I slowly made my setup more comfortable over time. I didn’t upgrade to the setup I have now until several years later, once I knew I’d be going out all the time and figured out my needs.
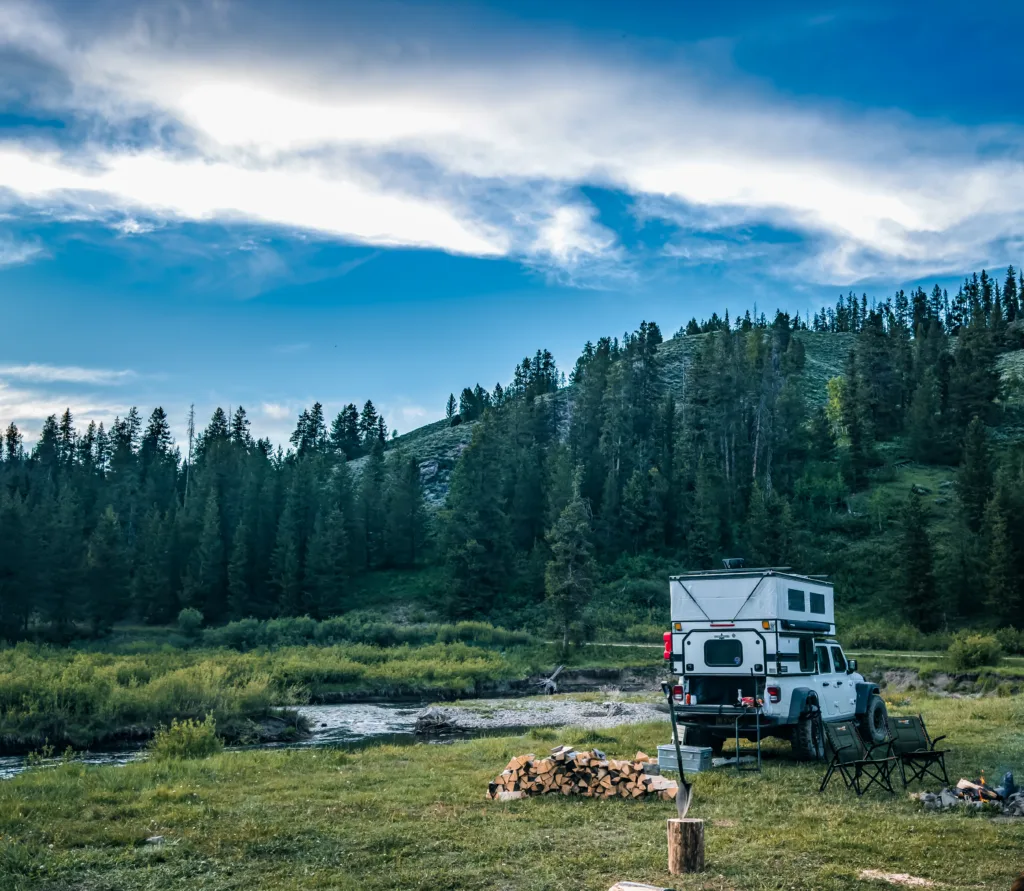
Most beginners get discouraged for the same few reasons. (Speaking from experience, this is what I had trouble with.) They run out of fresh water on day two; they drain the battery overnight and wake up to a dead water pump; or they drive up a rough road and find no place to turn around. All three are avoidable with a notepad, a little math, and a short first trip.
What follows is the order that actually matters for off-grid camping on a budget: pick a realistic trip, confirm the site is legal and reachable, stretch your water, then improve power only where your own numbers say you need it. Read it through, jot down your tank sizes and battery amp-hours, and plan one easy overnight this month. That first quiet night out is what teaches the rest.
Start With a Realistic First Off-Grid Trip
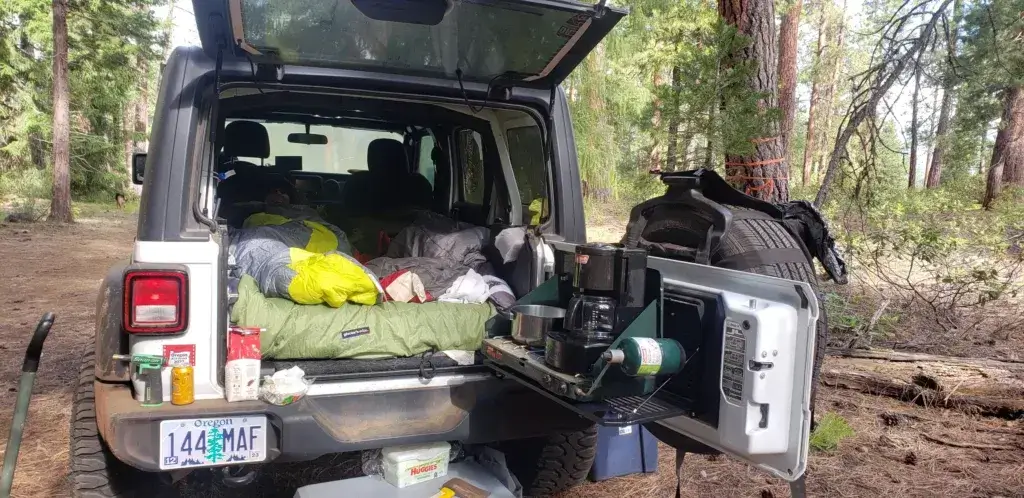
The words people use for camping without hookups get mixed up constantly, and the difference changes how you plan. Start with a one-night trip close to home, and set a small spending cap before you buy anything.
Boondocking, Dry Camping, and Free Camping Explained
RV boondocking means camping in a remote spot with no water, sewer, or electric hookups, usually on public land. You supply everything, and you pack out everything.
Dry camping is staying at a site without hookups inside a developed campground. You still have no shore power, which is the 120-volt electricity you plug into at a post, but you often have a vault toilet, a water spigot somewhere, and a neighbor 40 feet away.
Free camping is a money term, not a location term. A no-fee forest road pullout is free camping. So is a night at a Harvest Hosts location like a farm or winery, though that requires a membership and permission from the host. None of those are the same as true dispersed camping, and campground fees at RV parks and public campgrounds still run roughly $25 to $60 or more per night in many areas.
Choose an Easy One- or Two-Night Test Run
Pick a spot within two hours of home, on a road you would drive in a regular car. One night. Cell service is a bonus, not a requirement.
Camp with the systems you already have and take notes. How much water did you use? What did you forget? A short trip turns guessing into real numbers.
Set a Starter Budget Before Buying Gear
Spend your first $150 on containers and information, not electronics. Two or three 6-gallon water jugs, a decent battery monitor, a headlamp, leveling blocks, and a paper map of the area you plan to visit will do more than a solar panel.
After two or three trips, you will know exactly which limit you hit first. And then buy for that limit.
Find Legal Sites and Arrive Prepared
Legal boondocking sites almost always sit on federal public lands in the West, and rules change from one district to the next. Confirm the rules, then confirm you can actually get in and back out.
Research Public-Land Rules and Stay Limits
Most free dispersed camping happens on land managed by the Bureau of Land Management, usually called BLM, and the U.S. Forest Service in the national forests. Agencies call it “dispersed camping,” not boondocking, so search that term.
Typical patterns to verify locally:
- Stay limits of about 14 days in one spot, then a required move.
- Camp within 150 feet of an established road, in a spot already used before. There will usually be a firepit.
- Fire restrictions, which change weekly in dry months.
- Closures for wildlife, logging, or road washouts.
BLM land is plentiful in Nevada, and forest roads work well in Oregon, Colorado, eastern Washington, and parts of California. Alaska has huge public areas but long, rough approaches. State parks and most national parks do not allow dispersed camping at all, so plan on designated sites there.
Pack out all trash, use existing fire rings, and keep wastewater off the ground. Leaving no trace is what keeps these areas open.
Check Road Conditions, Weather, and Turnaround Space
Before you turn off pavement, look at satellite imagery and find a wide spot or loop where your truck can turn around. Truck campers are top-heavy, and backing a mile downhill in the dark is miserable and sometimes dangerous. I pull up Google Maps and just zoom into the area I’m looking at. I’ve found some of my favorite campsites this way.
Watch the forecast for rain. Clay and volcanic soil that hold your rig fine when dry can trap it after one storm. If a road looks worse than you expected, stop and turn around while you still can.
Know When a Developed Site Is the Better Option
Sometimes paying is the smart call. High winds, wildfire smoke, freezing nights, an empty water tank, or a full black tank all point toward a campground with a spigot and a dump station.
Keep one paid backup site saved on every trip plan. Having it removes the pressure to push on toward a spot you have never seen.
Make Water and Waste Capacity Last
Water, not power, ends most beginner trips early. Measure your real daily use, then add cheap storage and a simple waste plan.
Calculate Daily Fresh-Water Use
Many truck campers carry a 20 to 40 gallon fresh water tank. Assume 2 to 3 gallons of potable water per person per day when you are being careful, and more if you shower inside. If your camper doesn’t have a water tank, water jugs work great. Before I got a water tank put into my truck, I just used basic 5-gallon water jugs. For an overnighter, one or two of these work just fine.

For budget-minded boondockers, the YOSN 5-gallon water jug is a practical way to carry and dispense a substantial supply of water without adding much complexity to camp. The BPA-free polyethylene container weighs about 2.2 pounds empty and features dual handles, a wide-mouth opening for filling and cleaning, and a built-in spigot for convenient access to water for drinking, cooking, washing dishes, or setting up a simple hand-washing station. It also includes an extension tube, cleaning brush, storage bag, and a smaller collapsible water bag.
Do the math before you leave:
| Fresh tank | 2 people at 3 gal/day | With two 6-gal jugs added |
|---|---|---|
| 20 gallons | About 3 nights | About 5 nights |
| 30 gallons | About 5 nights | About 7 nights |
| 40 gallons | About 6 nights | About 8 nights |
Treat those as starting estimates, not promises. Your first trip will tell you your real number.
Stretch Supplies With Simple Camp Routines
The habits cost nothing and buy days:
- Wash dishes in a small tub, not under running water.
- Wipe plates with a paper towel before rinsing.
- Use a spray bottle for hand washing.
- Take short “navy” showers: wet, water off, soap, quick rinse.
- Cook one-pot meals so you have fewer pans to wash.
- Keep 5-gallon water jugs in the truck bed as a refill reserve.
Gray water fills faster than you expect. A collapsible jug under the outside drain lets you carry it to a proper dump instead of dumping it on the ground.
Plan Toilets, Tanks, and Disposal Before Departure
Your black water tank is usually the smallest number in the rig. Some truck campers have a 10-gallon black tank, which is a few days of normal use.
Cassette toilets, which use a removable holding tank you carry out by hand, are a real advantage off-grid because you can empty them at many restrooms and dump stations without moving camp.
A basic portable toilet with liner bags works too and costs far less than a plumbing change. This is what I use; it’s cheap, easy, and it gets the job done. No dump station required.

For boondockers trying to keep costs and gear to a minimum, the imodomio Retractable Portable Toilet offers a compact solution for when campground facilities aren't an option. It folds down to just 3 inches high for easier storage and adjusts from 3 to 13.58 inches in height when in use. The ABS plastic toilet weighs about 3 pounds and is rated to support up to 400 pounds. Its widened seat and foldable design make it useful for camping, road trips, beach outings, boats, and emergency situations.
If you do need a dump station, map them along your route before you go. Some are free, some charge a few dollars, and rural ones close seasonally.
Build a Low-Cost Power Setup That Works
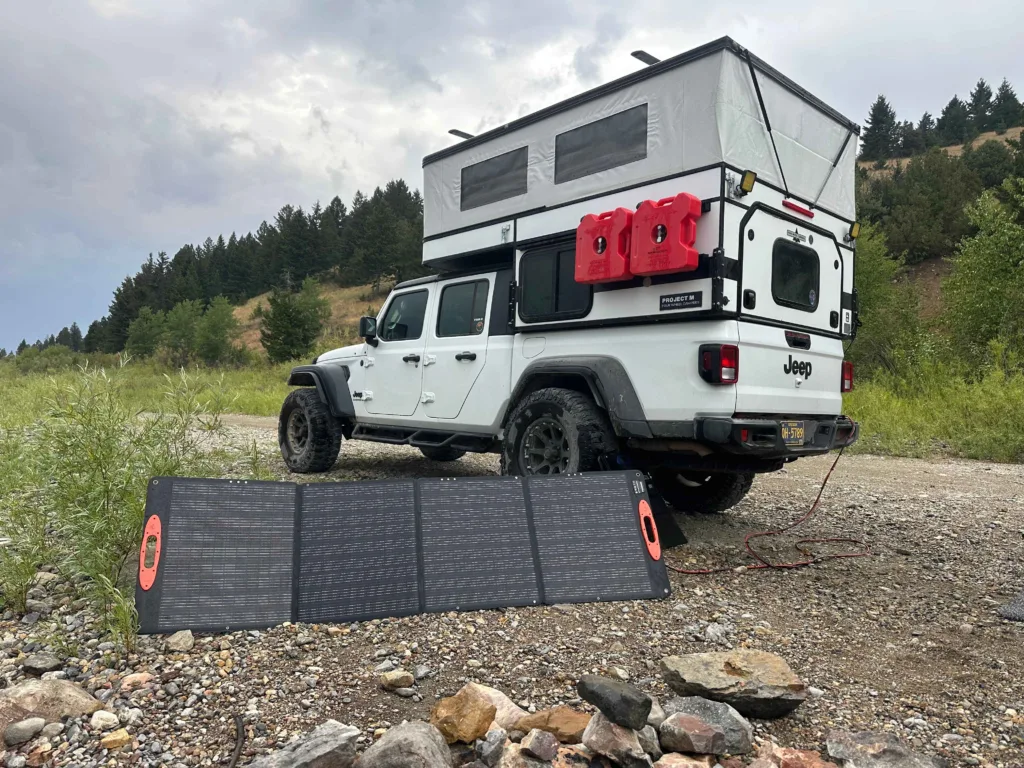
Good power management starts with knowing what you actually use each day, not with buying the biggest battery bank you can afford. A decent battery and a modest panel handle most weekend trips.
Estimate Battery Capacity From Actual Loads
Add up your amp-hours per day. Rough daily draws for a small camper:
- LED lights: 5 to 10 amp-hours
- Water pump: 2 to 5 amp-hours
- Furnace fan: 5 to 15 amp-hours on a cold night
- Roof fan: 10 to 20 amp-hours
- Phone and laptop charging: 5 to 15 amp-hours
- 12V compressor fridge: 30 to 50 amp-hours
Many beginners land between 25 and 60 amp-hours per day, or more in winter. A $30 battery monitor showing volts and amp-hours used is the single best power purchase you can make, because it turns guessing into a number.
Choose Between AGM and Lithium Upgrades
Two AGM batteries, roughly 200 amp-hours total, give you about 100 usable amp-hours since you should not drain them below half. For weekend trips with propane heat and a propane fridge, that is often enough.
A LiFePO4 lithium battery gives you nearly all of its rated capacity, weighs less, and charges faster. It also costs several times more. If your existing AGM batteries are healthy, use them for a season first and put the money toward water storage and solar.
Use Solar and Charging Sources Efficiently
A 100 to 200 watt solar panel with a good charge controller covers typical weekend use in sunny weather. A portable panel you can set in the sun while the camper sits in shade often outperforms a bigger roof array.
Also wire your truck to charge the camper batteries while you drive. Two hours of driving replaces a surprising amount, and it costs less than adding solar power.
I currently live, travel, and work remotely full-time from my camper. This is overkill for a weekend, but if you’re curious about my power setup, it’s detailed in this article here.
Stay Comfortable Without Expensive Upgrades
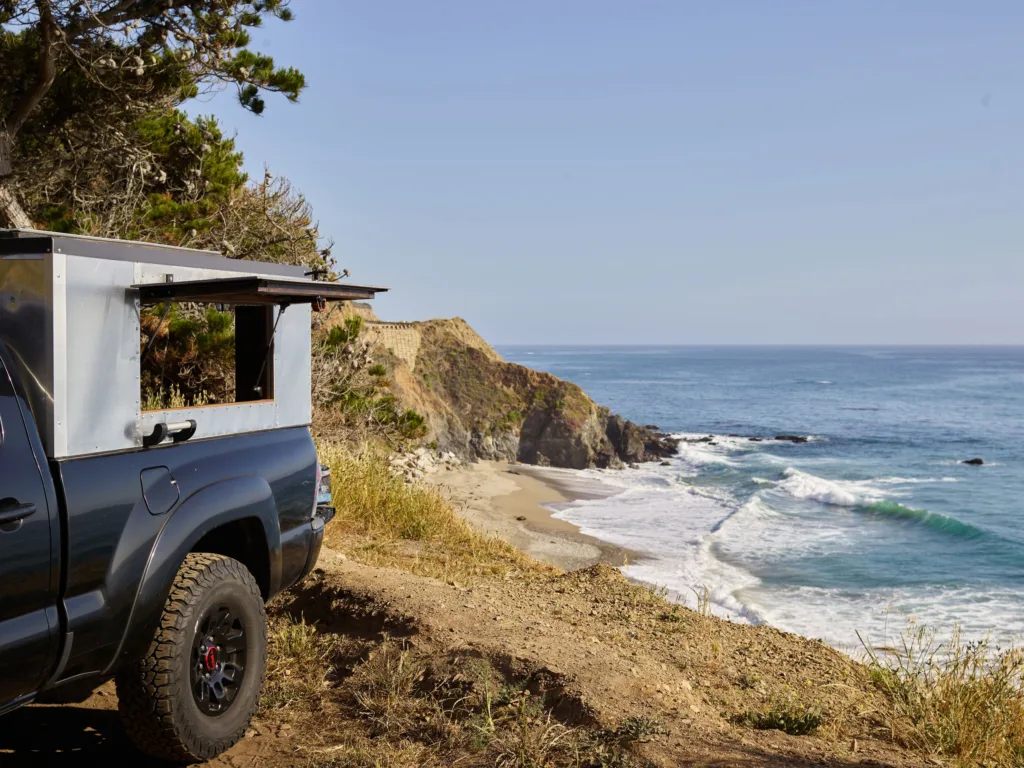
Comfort off-grid comes from propane, airflow, and food planning far more than from new appliances. A few dollars of foam and a slightly cracked window fix most complaints. (Cracked as in rolled down, not cracked as in broken. lol)
Manage Propane for Cooking and Heat
Propane runs your stove, your furnace, and sometimes your fridge if you have one in your truck camper. Two 20-pound tanks last many campers a week or more in mild weather, but a furnace running all night in the cold can burn through a tank in a couple of days.
Weigh your tanks or use a simple magnetic level gauge before each trip. A small buddy-style propane heater can take the edge off a chilly evening for less than the cost of a furnace repair, and it does not drain your battery. Never (ever, never, ever) sleep with an unvented heater running, and always run a carbon monoxide detector.
Simple food keeps costs and power use down. Rice, canned tuna, beans, pasta, eggs, and tortillas cook fast on one burner and need little refrigeration.

Improve Ventilation and Condensation Control
Four people breathing in a small camper make a lot of moisture. (Or two people and two dogs in our case.) Ventilation is the fix: crack two windows on opposite sides and run the roof vent, even when it is cold.
Wipe window condensation each morning. Lift your mattress or add a ventilation mat under it so moisture does not collect in the bed platform, which is where truck camper rot usually starts.
Adapt Your Setup for Cold-Weather Stays
Winter boondocking punishes weak spots. Insulated window covers cut from reflective foam board cost under $30 and make a real difference.
Other cheap steps that work:
- Drain outside showers and low water lines before hard freezes.
- Keep the fresh tank inside the heated space if your camper allows it.
- Use a warmer sleeping bag instead of running the furnace all night.
- Expect battery capacity to drop in the cold and shorten your trip accordingly.
Match the Camper and Truck to Your Travel Style
Buying more truck than you need is expensive; buying more camper than your truck can carry is unsafe. Check your payload sticker first, then decide between a pop-up and a hard-side, and upgrade slowly.
Understand Payload Before Choosing a Camper
Open your driver’s door and read the yellow sticker that says how many pounds of people and cargo your truck can carry. That is your payload, and it is the number that matters.
Then compare it to the camper’s wet weight, which means loaded with water, propane, batteries, and your stuff. Dry weight in a brochure always understates reality, often by 500 to 1,000 pounds.
A half-ton like a Ford F-150 or Toyota Tundra usually has 1,500 to 2,000 pounds of payload, which fits a light pop-up. A one-ton, like a Ford F-350, handles most hard-side campers with room to spare.
Compare Lightweight Pop-Ups and Hard-Side Models
Pop-up campers such as those from Four Wheel Camper (I have the Project M) are light, low, and easy on fuel. They fit a mid-size truck in some models, drive down tight forest roads without scraping branches, and cost less to tow around all year. Insulation is thinner, so winter is harder.
Hard-sided campers from builders like Lance, Arctic Fox, and Northern Lite give you standing room, better insulation, bigger tanks, and real cabinets. They also weigh 2,500 to 4,000 pounds wet and require a heavy-duty truck.
For a first rig, a used camper in the $5,000 to $15,000 range teaches you what you actually want before you spend more.
Use a Gradual Upgrade Path for Overlanding
If overlanding- meaning long, self-supported travel on rough roads- is your goal, add capability in this order: better tires, air bags or upgraded springs, recovery gear, and a shovel; then more water and power. Save suspension money until you know your loaded weight.
Frequently Asked Questions
What is the best truck camper setup for boondocking?
A camper light enough for your truck’s payload, with at least 25 gallons of fresh water, two deep-cycle batteries, 100 to 200 watts of solar, and propane heat, covers most needs. Lighter rigs reach more spots, which matters more than luxury features. Add capacity only after a few trips show you what runs out first.
How much does a truck camper suitable for off-grid camping cost?
Used hard-sided campers commonly sell for about $5,000 to $15,000 depending on age and condition, while new pop-ups and premium models run much higher. Plan another $300 to $800 for water jugs, a battery monitor, leveling blocks, and a portable toilet or basic solar. A truck you already own keeps the total far lower.
How long can you boondock in a truck camper without hookups?
Water usually decides it. With a 30-gallon tank, two careful people often get 4 to 6 nights, and extra jugs stretch that to a week. Your black tank and propane may run out sooner in cold weather, so track all three.
What size solar system and battery bank do you need for truck camper boondocking?
For weekend trips with propane heat and modest electronics, roughly 200 amp-hours of AGM batteries plus 100 to 200 watts of solar is a solid starting point. If you run a 12V fridge or work online, plan closer to 200 to 300 amp-hours of lithium and 300 or more watts of solar. Measure your daily amp-hours first.
Where can you legally boondock with a truck camper?
Most legal dispersed camping is on BLM land and in national forests, mainly in Western states like Nevada, Colorado, Washington, and California. Check the local district’s rules for stay limits, fire restrictions, and closures before you go. National parks and state parks generally require designated campgrounds.
What should you inspect before buying a used truck camper for boondocking?
Look for soft spots and water stains in the roof, corners, and around windows and vents, since leaks cause the costliest damage. Test the furnace, fridge, water pump, and every light, and check the battery date and tank condition. Then weigh the camper if you can, or verify its wet weight against your truck’s payload.